Electric Controlled Coupling
 |
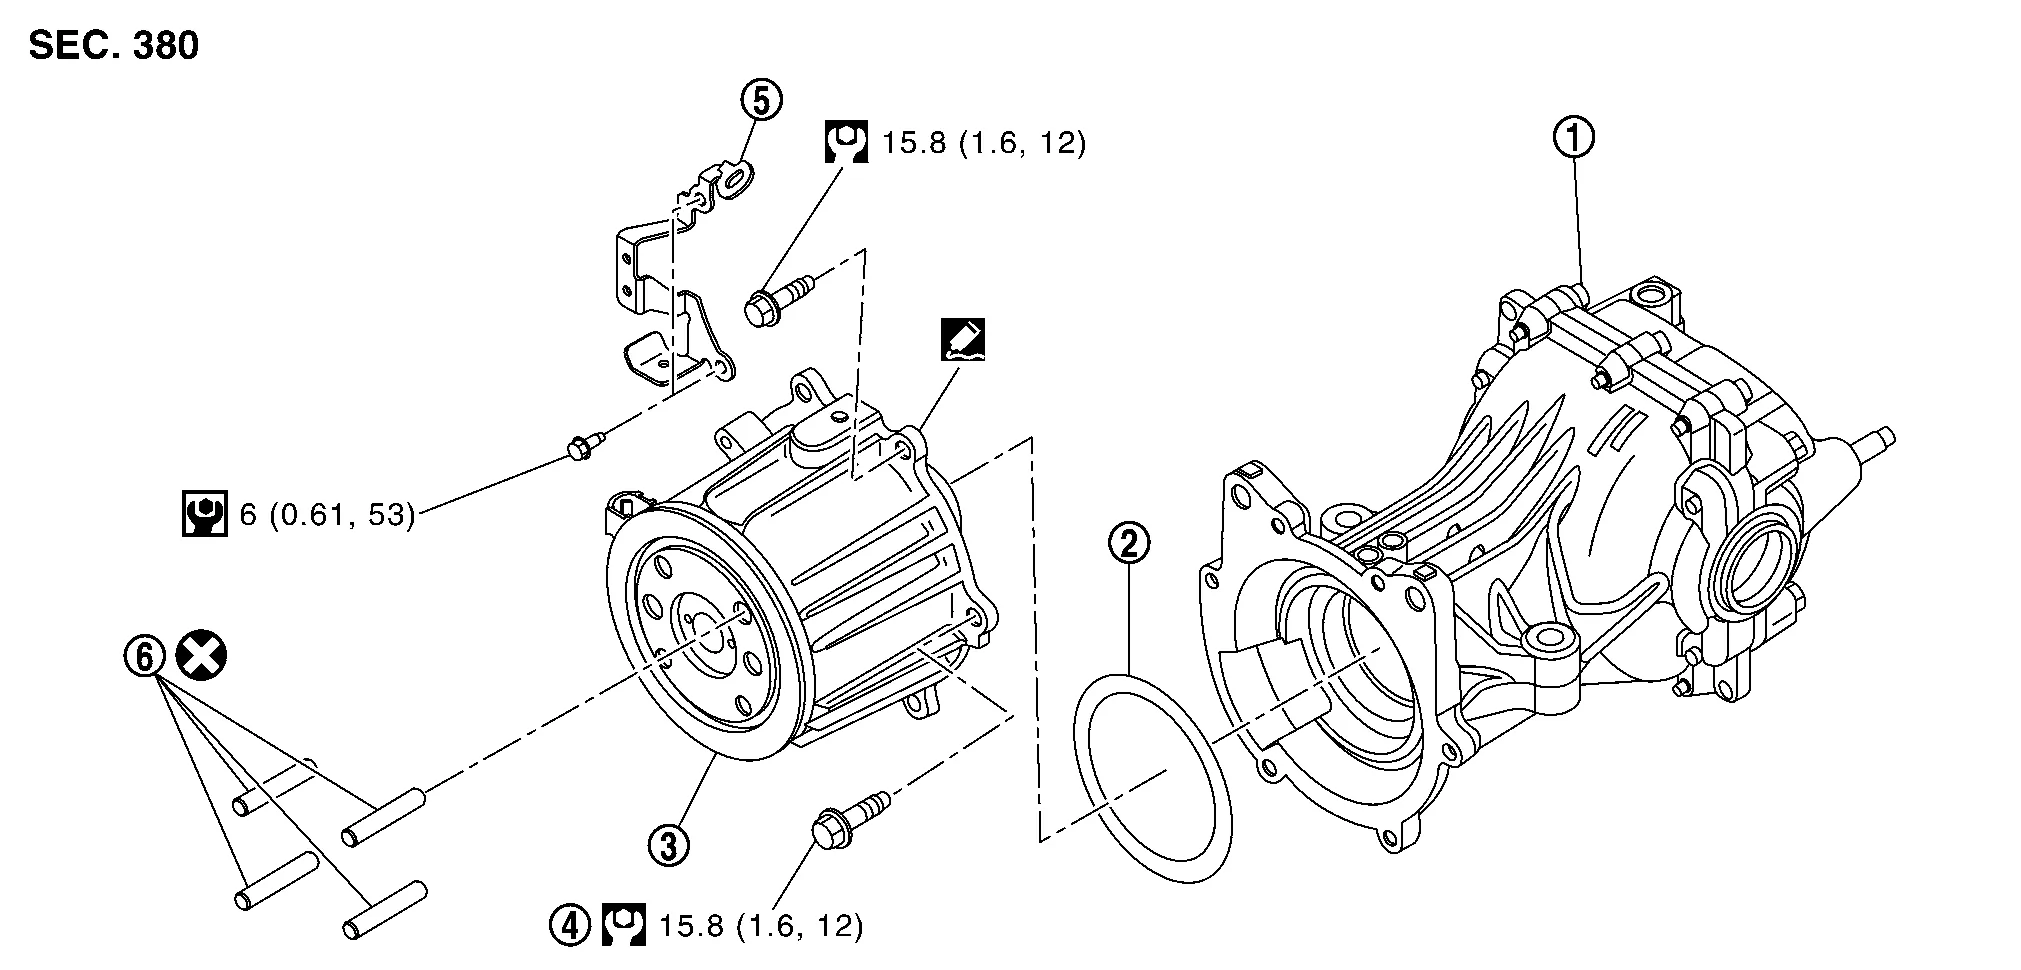
Rear final drive assembly |  |
Wave spring |  |
Electric controlled coupling assembly |
 |
Reamer bolt |  |
Connector bracket |  |
Stud bolt |
 : N·m (kg-m, in-lb) |
|||||
 : N·m (kg-m, ft-lb) |
|||||
 : Always replace after every disassembly. |
|||||
 : Apply Genuine Silicone RTV or equivalent. Refer to Recommended Chemical Products and Sealants. |
|||||
REMOVAL
Drain gear oil. Refer to Draining.
Remove propeller shaft from rear final drive assembly. Refer to Removal and Installation.
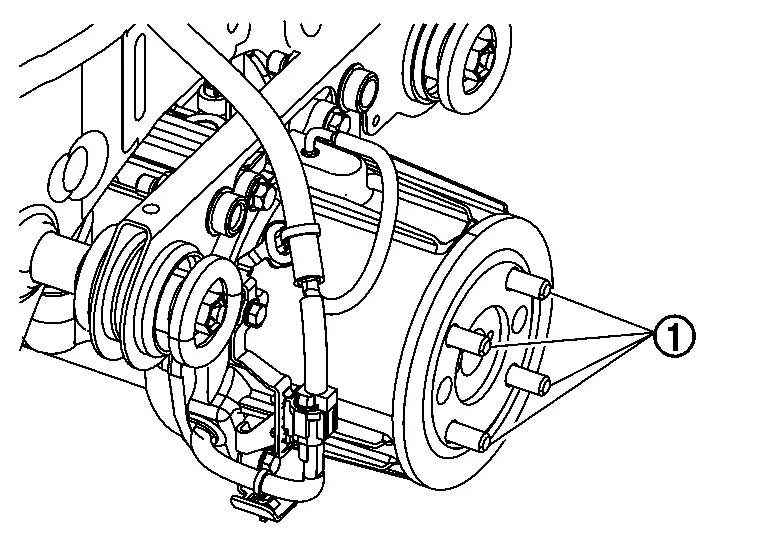
Remove stud bolts (1).
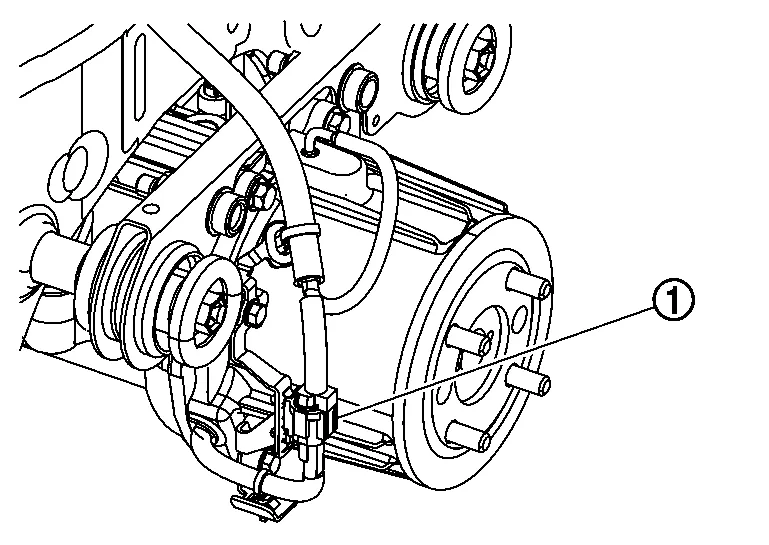
Disconnect AWD solenoid harness connector (1).
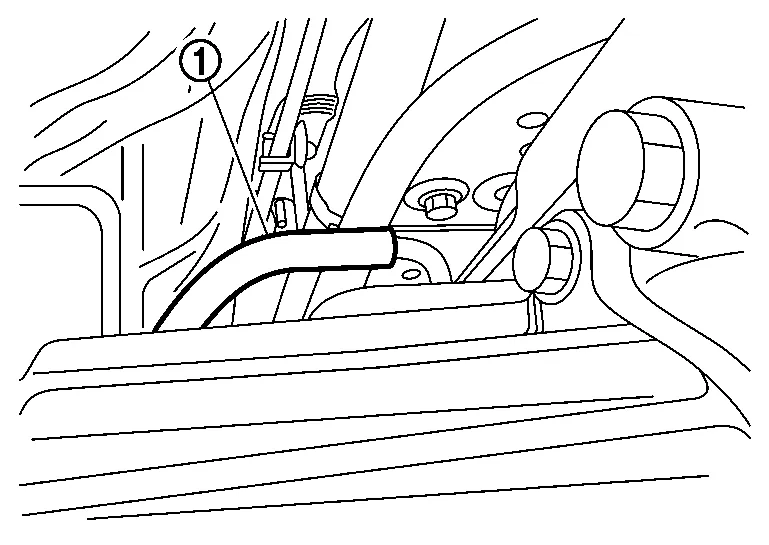
Remove air breather hose (1) from electric controlled coupling assembly. Refer to Removal and Installation.
Remove electric controlled coupling assembly from final drive assembly.
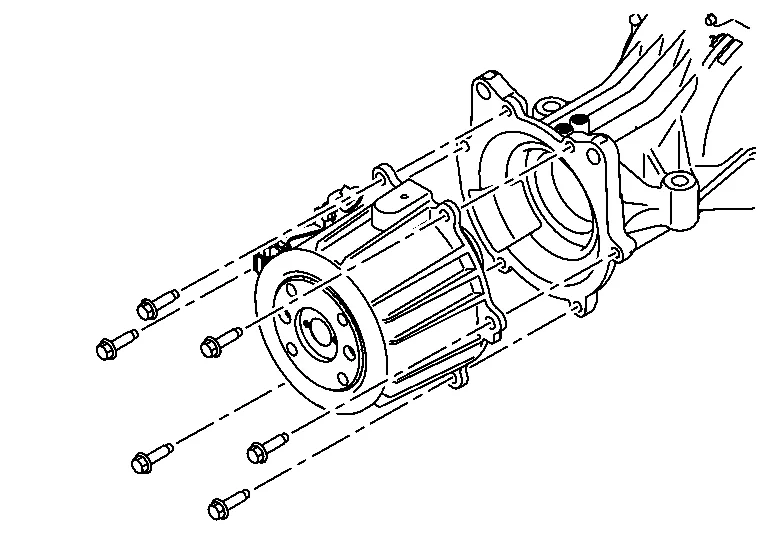
Remove wave spring.
Remove drive pinion oil seal from the inside of gear carrier. Refer to Removal and Installation.
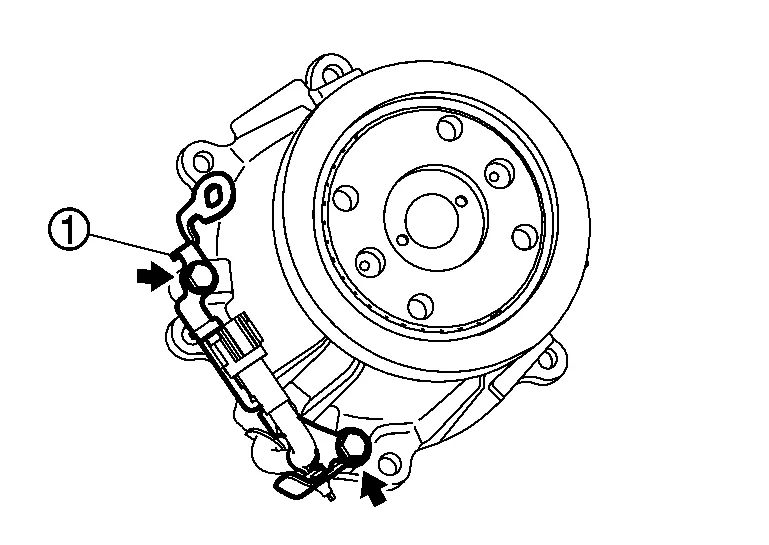
Remove connector bracket (1) from electric controlled coupling.
 |
bolt |
Remove connector clip to disconnect connector bracket from AWD solenoid harness connector.

|
Clip |
INSTALLATION
Install connector bracket to electric controlled coupling.
For tightening torque, refer to Exploded View.
Lock AWD solenoid harness with connector clip.
Install drive pinion oil seal to the inside of gear carrier. Refer to Removal and Installation.
Install wave spring (1) to the inside of gear carrier.

Apply liquid gasket to mating surface of electric controlled coupling assembly.
For applying liquid gasket, refer to Exploded View.

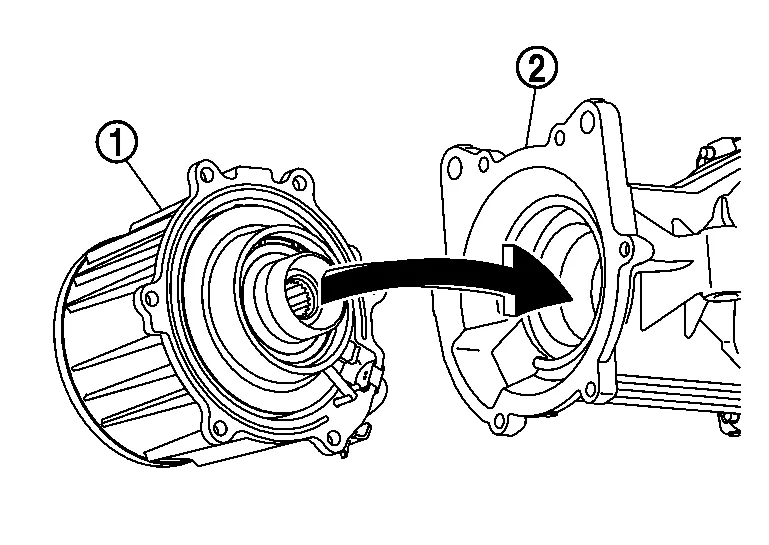
Join electric controlled coupling assembly (1) to spline of drive pinion, then install it to final drive assembly (2).
Temporarily tighten reamer bolts (1) to the positions shown in the figure.
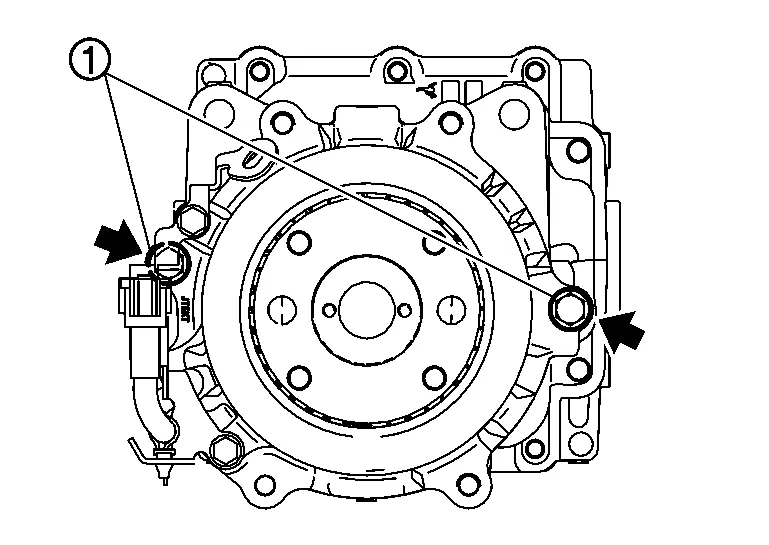
Tighten reamer bolts and electric controlled coupling assembly mounting bolts to the specified torque.
For tightening torque, refer to Exploded View.
Install air breather hose (1) to electric controlled coupling assembly. Refer to Removal and Installation.
Connect AWD solenoid harness connector (1).
Install stud bolts (1).

 |
: Electric controlled coupling side |
| Thread length | |
| A | : Long |
| B | : Short |
Install propeller shaft. Refer to Removal and Installation.
Refill gear oil to the final drive. Refer to Refilling.
Perform inspection and adjustment after installation. Refer to Inspection and Adjustment.
INSPECTION AFTER INSTALLATION
Check final drive for leaks.
Check oil level. Refer to Inspection.
ADJUSTMENT AFTER INSTALLATION
When replaced electric controlled coupling, perform writing unit characteristics. Refer to Description.