Fuel tank
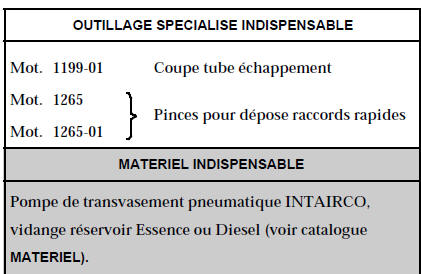
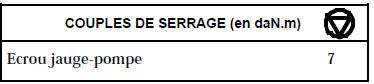
IMPORTANT: during the entire fuel tank removal and refitting procedure, do not smoke and do not bring incandescent objects near the work area.
DRAINING THE FUEL TANK (petrol version)
Remove the steel access cover for the fuel pump and gauge unit.
Remove the fitting clip (if fitted).
Disconnect the quick-release connector (1), Mot. 1265.
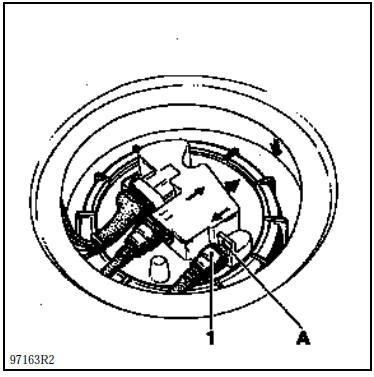
Connect a hose of sufficient length to outlet (A) so that it can be placed in a container outside the vehicle.
NOTE: an INTAIRCO pneumatic transfer pump can also be used (see MATERIEL catalogue).
In the engine compartment, disconnect the fuel pump relay (K) located in the engine interconnection box.
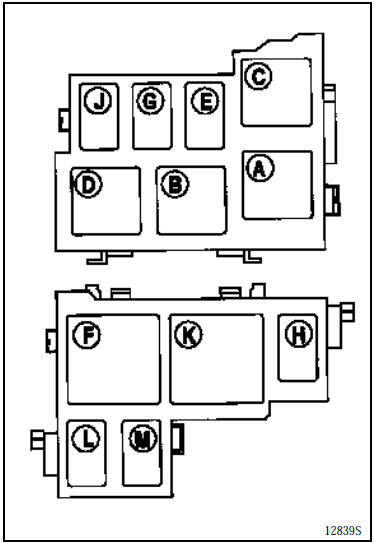
Bridge terminals 3 and 5 and let the fuel drain until it starts to arrive intermittently.
Remove the jumper.
Reconnect the relay.
Disconnect the battery.
DRAINING THE TANK (Diesel version)
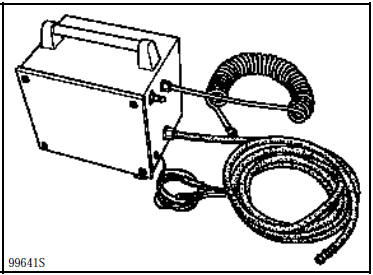
Diesel versions have no electric fuel pump, so a pump must be used to drain the tank.
For example, using the INTAIRCO pneumatic pump (see MATERIEL catalogue),
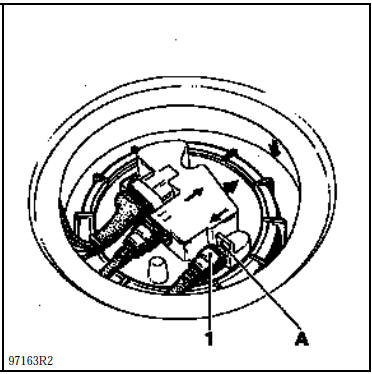
Remove the steel access cover for the fuel pump and gauge unit.
Remove the fitting clip (if fitted).
Disconnect the quick-release fitting (1), Mot. 1265.
REMOVING THE TANK (Petrol or Diesel version)
Disconnect the battery.
Vehicle on a two-post lift.
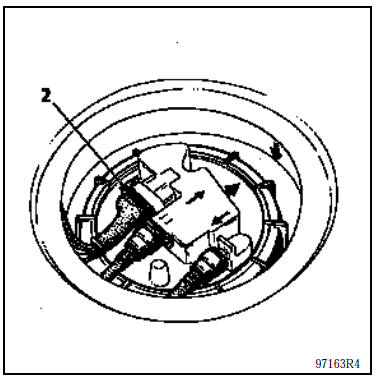
Disconnect the electrical connector (2) and the quick-release fittings, Mot. 1265 or Mot. 1265-01.
Raise the vehicle.
Detach the exhaust tube from the exhaust downpipe.
Remove the exhaust mounting bracket at the centre of the vehicle.
Disconnect the fuel filter.
Remove the heat shields (3) and (4) located under the tank and under the parking brake cables.
Remove the exhaust retaining bracket (5).
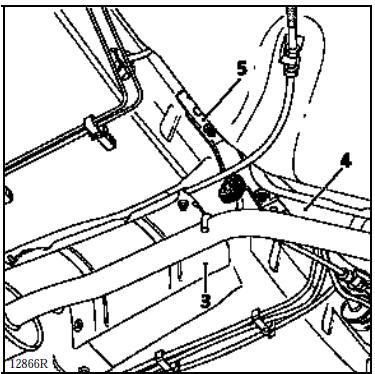
Swing the exhaust to the right-hand side of the vehicle.
Measure dimension X before adjusting the parking brake adjuster.
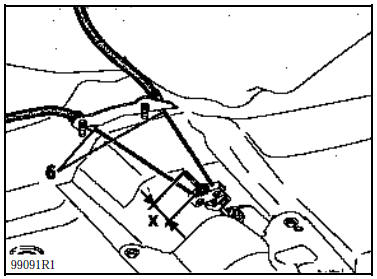
Adjust the device so as to release the left and right cables (carefully release the plastic retainer of cable (6)).
Disconnect both fittings (7) and (8) (use tool Mot. 1265).
Disconnect hose (9).
Detach the tank from the filler neck (10).
Unclip the parking brake cables (11) from under the tank.
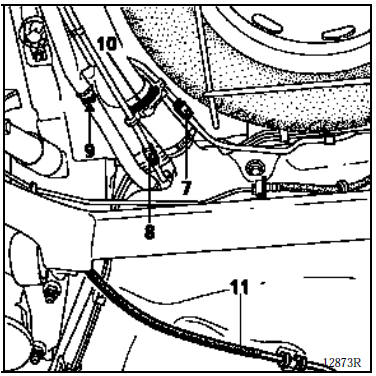
Unclip the brake hydraulic lines from the side of the tank.
Unclip the fuel lines from the tank.
Position a support jack under the tank.
Remove the four screws securing the tank.
Tilt the tank slightly forward, then remove it.
INSTALLATION
Refit in reverse order of removal.
Take care not to pinch the hoses (risk of leaks).
Fit the quick-release fittings by hand and make sure they click into place.
Take care
Petrol version, 1st generation
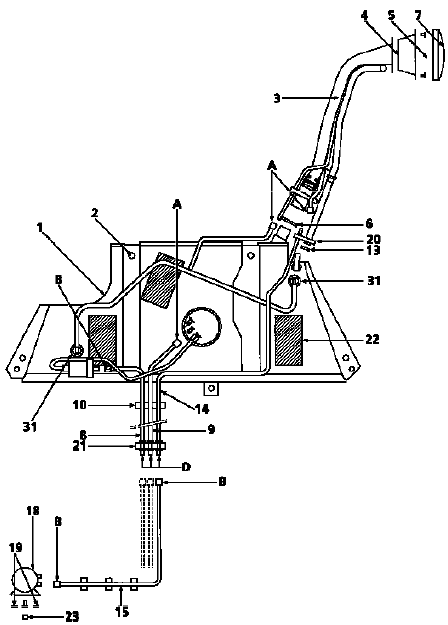
Petrol tank, 1st generation
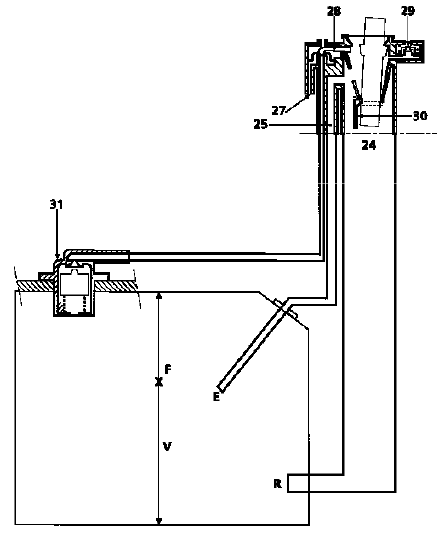
Petrol version, 2nd generation
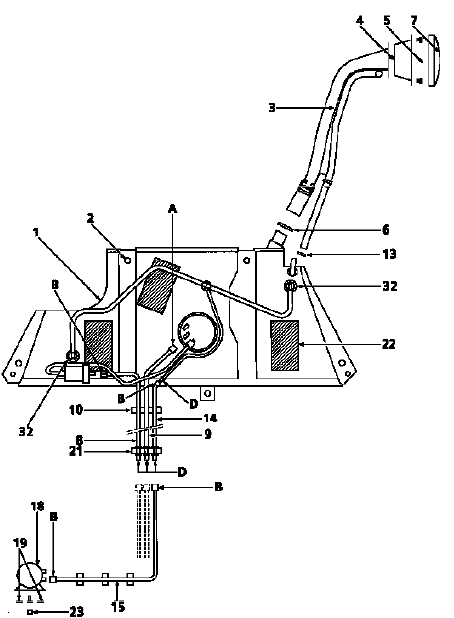
Petrol tank, 2nd generation
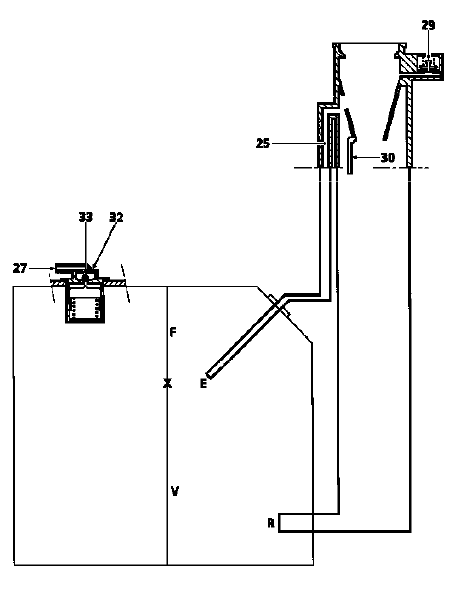
Diesel version
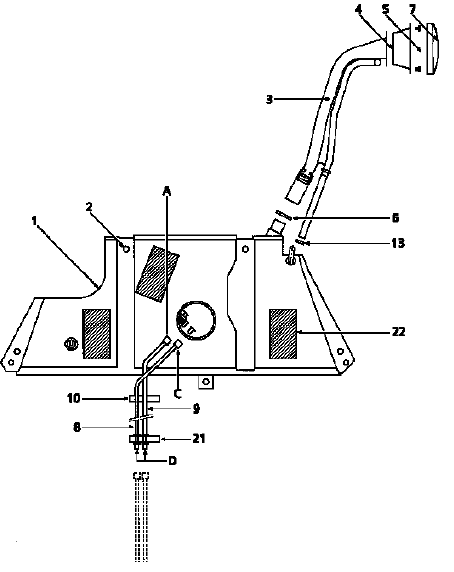
Diesel tank
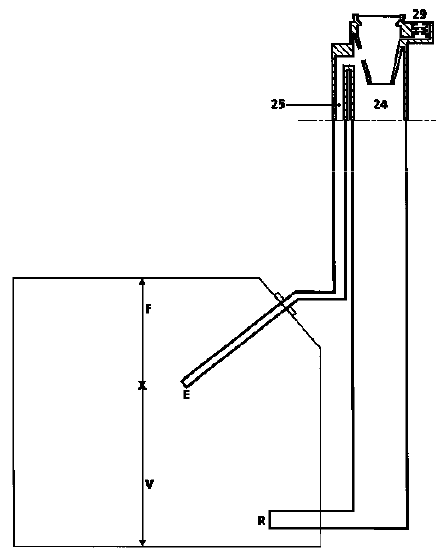
The tank is vented through the head of the fuel suction / fuel gauge assembly.
Parts list
- Reservoir
- Screw
- Filler neck
- Filler neck bowl
- Rivet
- Sleeve retaining clip
- Cap
- Supply hose
- Return hose
- Clip
- Clip
- Canister hose
- Canister hose
- Canister
- Screw
- Clip
- Clip
- Damping plate
- Cage nut
- Filler neck outlet - fuel passage
- Venting during filling
- Canister connection (fuel vapour)
- Overfill prevention valve
- Overpressure / vacuum safety valve
- Restriction valve
- Rollover leak-proof valve
- Overfill prevention valve and rollover leak-proof valve.
A Quick-release fitting
B Snap-fit connector
C Quick-release fitting
D Non-snap-fit end
E Air outlet during filling
F Air volume allowing the fuel to expand
R Fuel filler opening
V Maximum permissible fuel volume
ROLE OF THE VALVES
28 Overfill prevention valve
When the tank cap is removed, the valve closes, trapping a volume of air in the venting volume. This prevents fuel from rising into this volume.
When the cap is refitted, the valve opens, allowing the tank to vent to the canister.
29 Overpressure / vacuum safety valve
If the fuel vapour recirculation circuit is blocked, this valve prevents the tank from becoming overpressurised (the tank swells) or under vacuum (as fuel is consumed, the tank collapses).
30 Restriction valve
This valve prevents leaded fuel from being put into the tank.
31 Rollover leak-proof valve
If the vehicle rolls over, this valve prevents the tank from emptying either through the canister line or through the venting line (Diesel).
32 Overfill prevention valve and
rollover leak-proof valve. The overfill prevention valve operates using ball (33).
With the vehicle at rest during refuelling, the ball rests on its seat, trapping a volume of air in the tank.
With the vehicle in motion, ball (33) leaves its seat, connecting the tank to the canister.
When the tank is full, a volume of air must remain in the tank to allow the fuel to expand without bursting the tank.
The rollover leak-proof valve works in the same way as valve (31).
The tank has a sealed-type cap.
The unleaded fuel filler neck has:
- a smaller filler opening that is incompatible with a standard fuel nozzle (lead would contaminate the emissions system: oxygen sensor and catalytic converter),
- a valve closing the filler neck opening (30) (to prevent fuel vapour escaping or fuel flowing back).
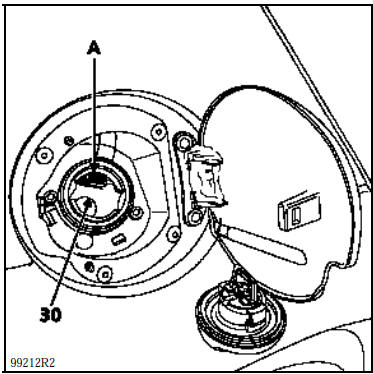
Fitting the cap releases the overfill prevention valve (A), which allows the tank to vent (only on first-generation petrol versions).
Test yourself
A quick Renault Kangoo quiz: every answer comes with an explanation and a link to the manual page.