Diesel filter
K9K
IMPORTANTBefore any work:
- connect the diagnostic tool (aftersales),
- communicate with the injection ECU,
- check that the injection rail is no longer pressurised,
- beware of the fuel temperature,
- order the special high-pressure injection circuit plug kit.
- Strictly observe cleanliness rules.
- - Always replace the entire cartridge (the diesel filter is contained in a non-removable cartridge).
REMOVAL
- Turn the steering wheel fully to the left.
- Clean the wheel arch.
- Disconnect the battery.
- Remove the washer fluid filler neck.
- Disconnect all pipe connections from the filter.
- Fit the cleanliness plugs.
Avoid contact of the pipe connections with a contaminated environment.
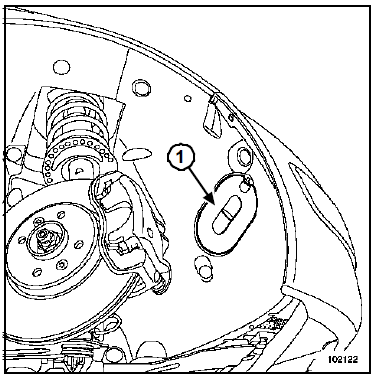
- Remove the access cover (1) from the right mudguard.
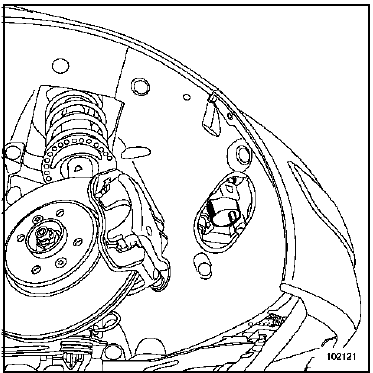
- Release the diesel filter from its bracket by pushing the filter upward.
- Extract the diesel filter through the access cover.
INSTALLATION
- Fit the new diesel filter (remove the plugs only at the last moment).
- Reconnect the pipe connections.
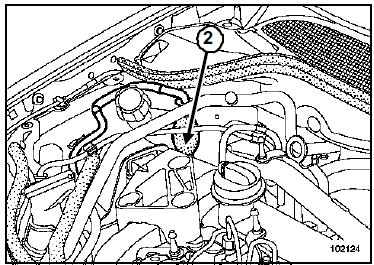
- Prime the fuel supply circuit using the priming pump (2) (automatic bleeding).
- Refit in the reverse order of removal.
Connect the battery; carry out the necessary re-learns (see Electrical Equipment chapter).
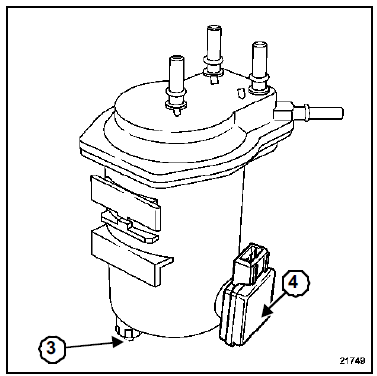
- Periodically drain the water from the diesel filter through the drain plug (3).
- Some vehicles have a water-in-diesel sensor (4) located on the filter. If water is detected, the injection fault warning light comes on.
F9Q
IMPORTANTBefore any work:
- connect the diagnostic tool (aftersales),
- communicate with the injection ECU,
- check that the injection rail is no longer pressurised,
- beware of the fuel temperature,
- order the special high-pressure injection circuit plug kit.
WARNING Strictly observe cleanliness rules.
The diesel filter is located behind the right headlamp unit.
It is contained in a removable cartridge. This cartridge incorporates a diesel heater consisting of a resistor and a thermal switch.
Note: To remove the cartridge, remove the complete diesel filter assembly.
REMOVAL
- Turn the steering wheel fully to the left.
- Clean the wheel arch.
- Disconnect the battery.
- Remove the washer fluid filler neck.
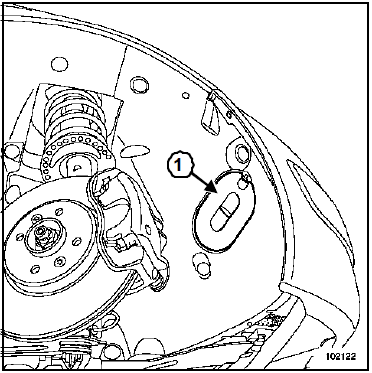
- Remove the access cover from the right mudguard (1).
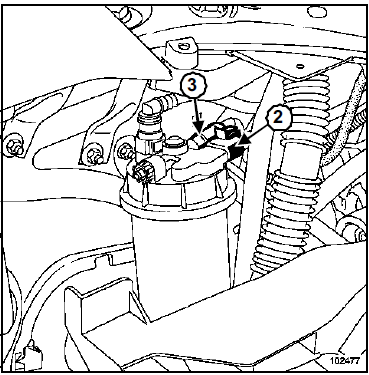
- Disconnect from the filter:
- the diesel heater connector (2),
- the engine fuel supply pipe (3).
- Fit the cleanliness plugs.
Avoid contact of the pipe connections with a contaminated environment.
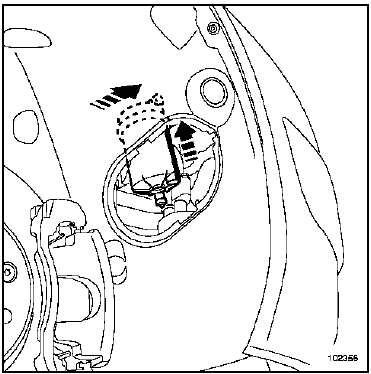
- Unclip the diesel filter from its bracket through the access cover, following the movements shown in the illustration.
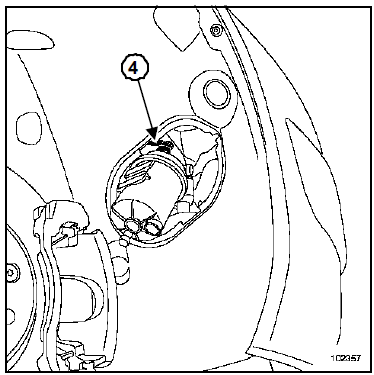
- Disconnect the pipe (4) from the filter coming from the tank.
- Fit cleanliness plugs to the pipe and the filter.
- Extract the filter through the access cover.
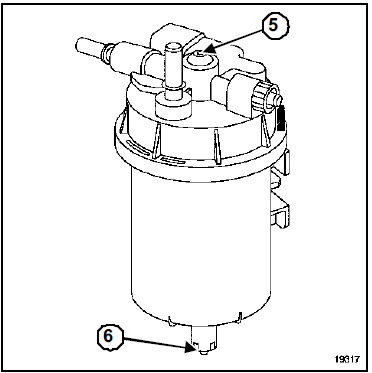
- Note the position of the cover relative to the bowl.
- Remove:
- the filter cover screw (5),
- the filter cartridge.
INSTALLATION
WARNING- Align the mark on the cover fitted with cleanliness plugs with the mark on the bowl.
- Always respect the position of the connections on the filter.
Fit the new diesel filter (remove the plugs only at the last moment).
- Reconnect the pipe connections.
- Take care not to pinch or damage the pipes.
- Prime the fuel supply circuit using the priming pump.
- Refit in the reverse order of removal.
Connect the battery; carry out the necessary re-learns (see Electrical Equipment chapter).
Note:- Periodically drain the water from the diesel filter through the drain plug (6).
- Some vehicles have a water-in-diesel sensor located on the filter.
If water is detected, the injection fault warning light comes on.
Test yourself
A quick Renault Megane quiz: every answer comes with an explanation and a link to the manual page.