Headliner (3-door version)
TIGHTENING TORQUE (in N.m) |
|
| Seat belt rail and fixing screws | 21 |

REMOVAL
IMPORTANT: Before starting to remove the headliner trim, the airbag ECU must be disabled using the diagnostic tool (see chapter 88C).Remove:
- the windscreen pillar trim (see chapter 71A-A),
- the sun visors (see chapter 57A-E).
Partially remove:
- the door surround seals,
- the tailgate seal.
CAUTION: Handle the surround seals carefully to avoid any risk of damage or soiling.
Removing the interior mirror:
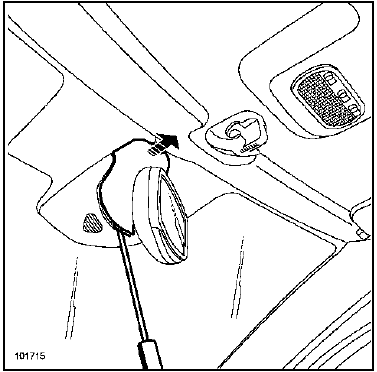
Unclip the upper cover.
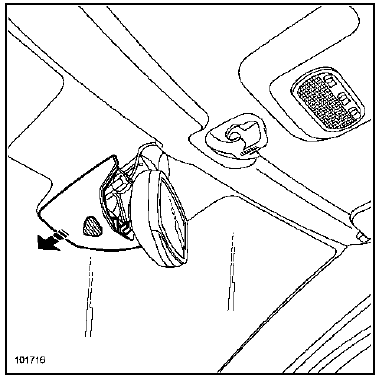
Unclip the lower cover.
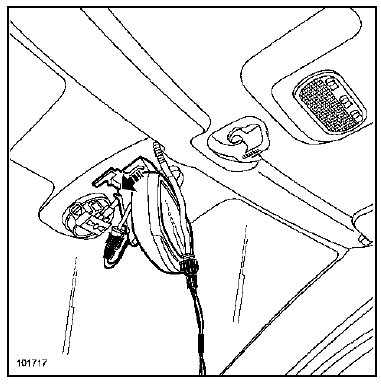
Disconnect the connectors.
Remove the mirror.
NOTE: When removing the mirror, take care near the rain sensor to avoid damaging it.
Removing the quarter trim:
Remove the rear parcel shelf.
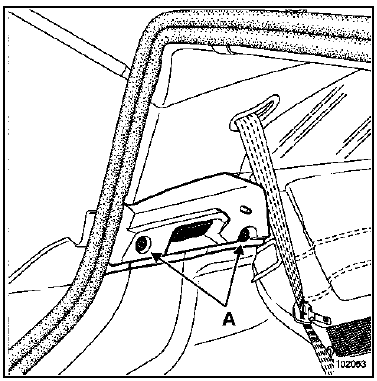
Remove the screws (A).
Partially release the parcel shelf.
Disconnect the luggage compartment light connector.
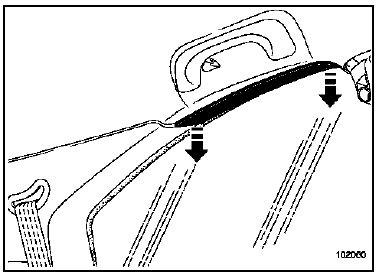
Unclip the upper trim.
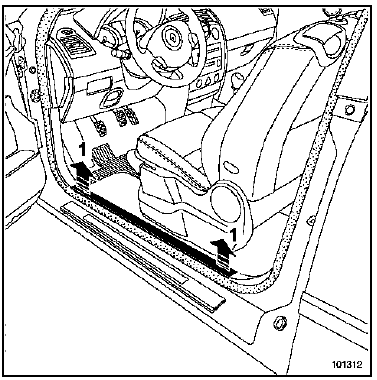
Slide the front seat forward.
Unclip the front sill trim (1).
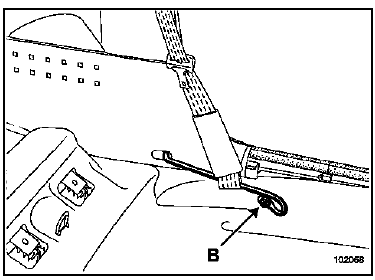
Remove the seat belt rail bolt (B).
Release the seat belt.
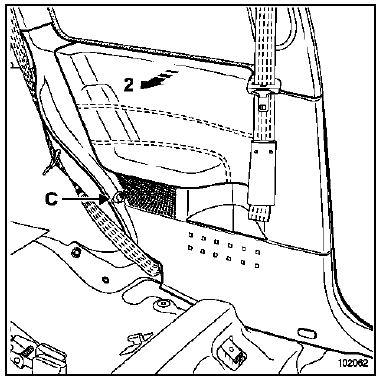
Remove the screw (C).
Unclip the rear wing trim (2).
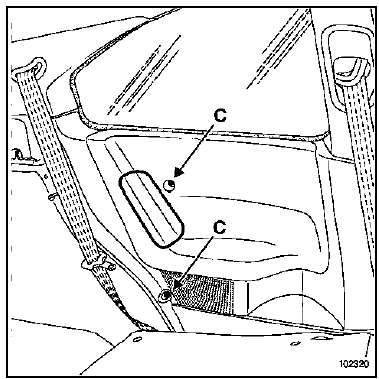
For a vehicle fitted with rear side airbags: remove the two screws (C).
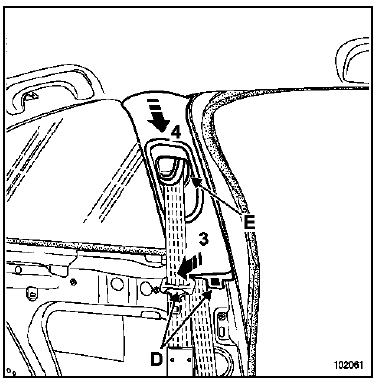
Partially release the door seal.
Unclip the lower retaining clips (D).
Release:
- the trim (3) and (4),
- the seat belt webbing through the opening (E).
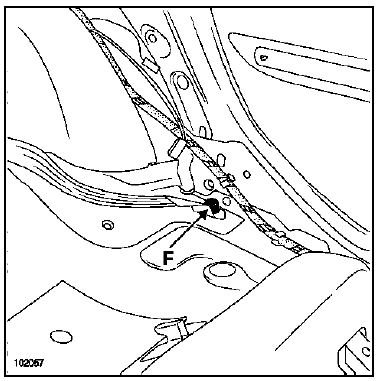
Remove the lower seat belt anchorage (F).
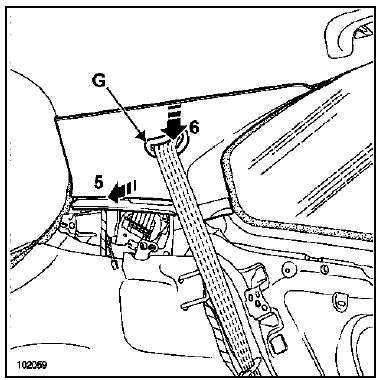
Partially release the luggage compartment seal.
Unclip the quarter trim (5).
Release:
- the trim (6),
- the seat belt webbing through the opening (G).
Removing the grab handles:
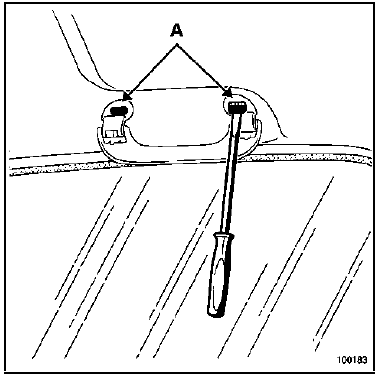
Using tool Car. 1597, unclip the two locating pins (A), then remove the part by pulling it off by hand.
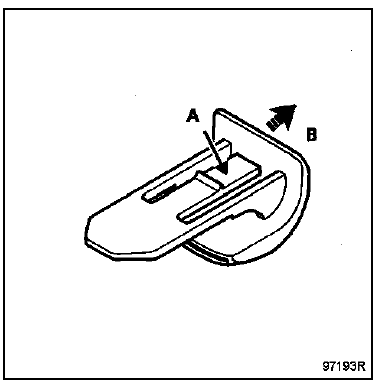
Unclip the two rear upper clips of the trim.
The following operations require two technicians.
Carefully unfasten the trim (Velcro strip).
Place the trim over the headrests and disconnect the various connectors.
Carefully remove the trim through the tailgate opening to avoid creasing it.
Specifics for removing the headliner on vehicles fitted with a sunroof:
NOTE: The method below only covers the additional components fitted when the vehicle has a sunroof.
The rest of the procedure is the same as for the model without a sunroof.
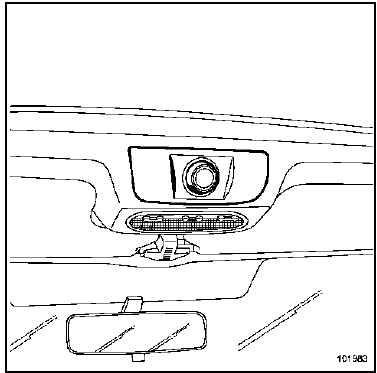
Remove the sunroof control.
Disconnect the connectors.
CAUTION: Handle the headliner with care, as cutting the sunroof opening makes the side edges fragile (risk of creasing).
INSTALLATION
Feed the headliner in through the tailgate opening.
Connect the connectors.
Center the headliner while fitting the grab handles.
Refit in the reverse order of removal.
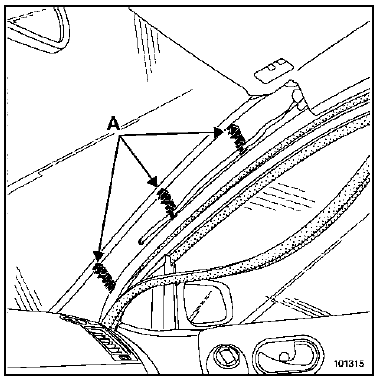
Before refitting the headliner, check the condition of the clips (A), part number: 82 00 100 314.
CAUTION: The Carminat antenna wire is attached to the fixing clips of the left windscreen pillar.
Tighten the seat belt rail and fixing screws to torque (21 N.m).
Test yourself
A quick Renault Megane quiz: every answer comes with an explanation and a link to the manual page.