Transmission
Differential output seal
In this manual: Transmission
~4min read
JH3 or JR5
Essential special tools |
|
| Bvi. 1666 | Differential seal installation tool |
Tightening torques |
|
| wheel mounting bolts | 11 daN.m |
| lower ball joint nut | 6.2 daN.m |
| steering ball joint nut | 3.7 daN.m |
| stabilizer bar ball joint nut | 4.4 daN.m |
| hub nut | 28 daN.m |
| relay bearing bracket nut | 2.1 daN.m |
| engine torque rod bolt | 10.5 daN.m |
| subframe torque rod bolt | 10.5 daN.m |
| battery cover | 0.4 daN.m |

REMOVAL
- Position the vehicle on a two-post lift.
- Disconnect the battery, starting with the negative terminal.
- Remove the undershield.
- Drain the gearbox oil.
- Remove:
- the wheel,
- the mudguard,
- the hub nut,
- the steering ball joint,
- the stabilizer bar ball joint,
- the lower ball joint.
- Disconnect:
- the wheel speed sensor connector,
- the xenon headlamp levelling sensor wiring (if fitted).
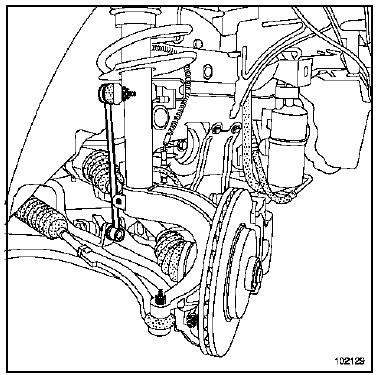
- Remove the relay bearing bracket.
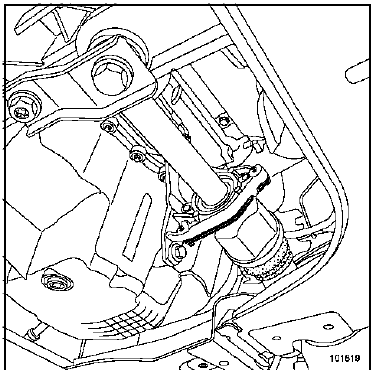
- Remove the driveshaft.
SEAL REPLACEMENT
- Tap the oil seal on the base using a pin punch and a small hammer to rotate it in its housing.
- Remove the dislodged seal with pliers, taking care not to damage the splines of the differential side gear.
INSTALLATION
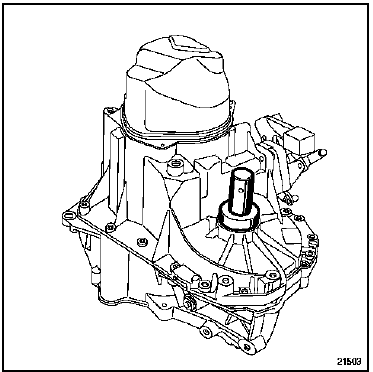
- Lubricate the seal.
- Refit the seal using tool (Bvi. 1666) (index A: right side, index B: left side).
- Position the driveshaft in relation to the differential side gear.
- Refit in the reverse order of removal.
- Tighten to the following torques:
- wheel mounting bolts (11 daN.m),
- the lower ball joint nut (6.2 daN.m),
- the steering ball joint nut (3.7 daN.m),
- stabilizer bar ball joint nut (4.4 daN.m),
- the hub nut (28 daN.m),
- relay bearing bracket nut (2.1 daN.m),
- engine torque rod bolts (10.5 daN.m),
- subframe torque rod bolts (10.5 daN.m).
- Check the gearbox oil level.
Connect the battery; carry out the necessary relearn procedures (see Battery chapter).
- Torque the battery cover (0.4 daN.m).
ND0
Essential special tools |
|
| Bvi. 1689 | Differential output seal installation tool |
Tightening torques |
|
| wheel mounting bolts | 11 daN.m |
| lower ball joint nut | 6.2 daN.m |
| steering ball joint nut | 3.7 daN.m |
| stabilizer bar ball joint nut | 4.4 daN.m |
| hub nut | 28 daN.m |
| relay bearing bracket nut | 2.1 daN.m |
| engine torque rod bolt | 18 daN.m |
| subframe torque rod bolt | 10.5 daN.m |
| battery cover | 0.4 daN.m |

REMOVAL
- Position the vehicle on a two-post lift.
- Remove the battery cover.
- Disconnect the battery, starting with the negative terminal.
- Remove the undershield.
- Drain the gearbox oil.
- Remove:
- the right-hand wheel,
- the right-hand mudguard,
- the hub nut,
- the steering ball joint,
- the stabilizer bar ball joint,
- the lower ball joint.
- Disconnect:
- the wheel speed sensor connector,
- the xenon headlamp levelling sensor wiring (if fitted).
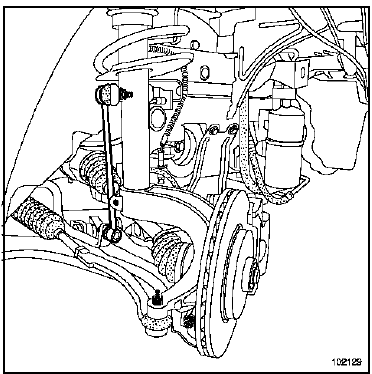
- Remove the relay bearing bracket.
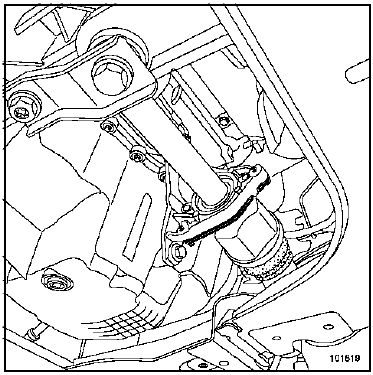
- Remove the driveshaft.
SEAL REPLACEMENT
- Tap the oil seal on the base using a pin punch and a small hammer to rotate it in its housing.
- Remove the dislodged seal with pliers, taking care not to damage the splines of the differential side gear.
INSTALLATION
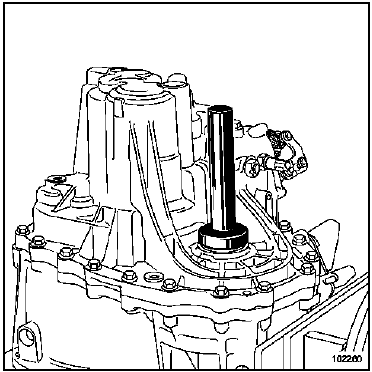
- Lubricate the seal before fitting it onto the splined part of the differential side gear.
- Refit the seal using tool (Bvi. 1689) (index A: right side, index B: left side).
- Position the driveshaft in relation to the differential side gear.
- Refit in the reverse order of removal.
- Tighten to the following torques:
- wheel mounting bolts (11 daN.m),
- the lower ball joint nut (6.2 daN.m),
- the steering ball joint nut (3.7 daN.m),
- stabilizer bar ball joint nut (4.4 daN.m),
- the hub nut (28 daN.m),
- relay bearing bracket nut (2.1 daN.m),
- engine torque rod bolts (18 daN.m),
- subframe torque rod bolts (10.5 daN.m).
- Check the gearbox oil level.
Connect the battery; carry out the necessary relearn procedures (see Battery chapter).
- Torque the battery cover (0.4 daN.m).
Test yourself
A quick Renault Megane quiz: every answer comes with an explanation and a link to the manual page.
Was this page helpful?