Engine Electrical System
Advanced Smart Cruise Control (ASCC) Unit-Radar Repair Procedures
In this manual: Engine Electrical System
21steps
~141min
5/5difficulty
3special tools
Done 0 of 21
Removal
- Remove the bumper. (Refer to Body – "Front Bumper")
- Disconnect the connector from the Smart Cruise Control Unit.
- Remove the Smart Cruise Control Unit (A) from the vehicle after loosening the mounting bolts.
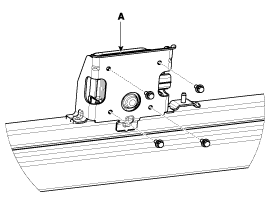
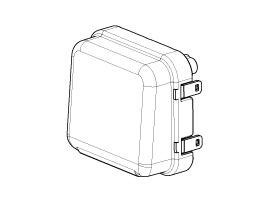
Installation
- Install in the reverse order of removal.
- Align the Smart Cruise Control sensor. (Refer to Advanced Smart Cruise Control (ASCC) Alignment)
- Install the bumper cover. (Refer to Body - "Front Bumper Cover")
|
|

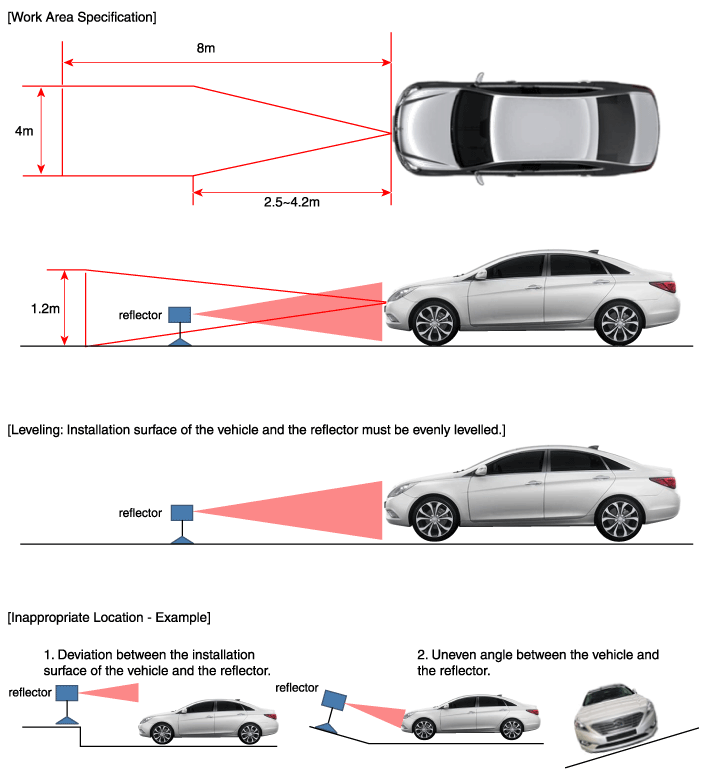
- Park the vehicle horizontally on level ground.

- The alignment may be inaccurate if the installation surface height and the vehicle and reflector tilt angles differ.
- Perform the alignment in an area with a minimum clearance of 8 m (26 ft) in front, 4 m (13 ft) to the sides, and 1.2 m (4 ft) above the vehicle.
- Remove heavy items from the vehicle interior (seating area and trunk).
- Make sure all tires are inflated to the specified pressure.
- Remove objects (metal plates, resin, etc.) that may cause electrical signal interference from the area where the sensor alignment is performed.
- Make sure the vehicle does not move or vibrate when performing sensor alignment (door open/close or entering/exiting the vehicle).
- Make sure the radiator grille and sensor cover are not contaminated.
- Make sure the wheel alignment angles are within specification.
- Do not turn off the power while performing sensor alignment.
- The voltage supplied to the radar sensor must be 9 to 16 V.
- The temperature in the area where sensor alignment is performed must be within -30 to 60 °C.
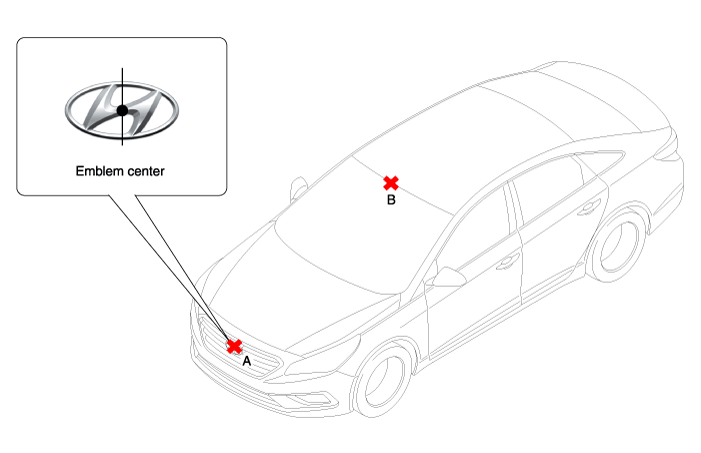
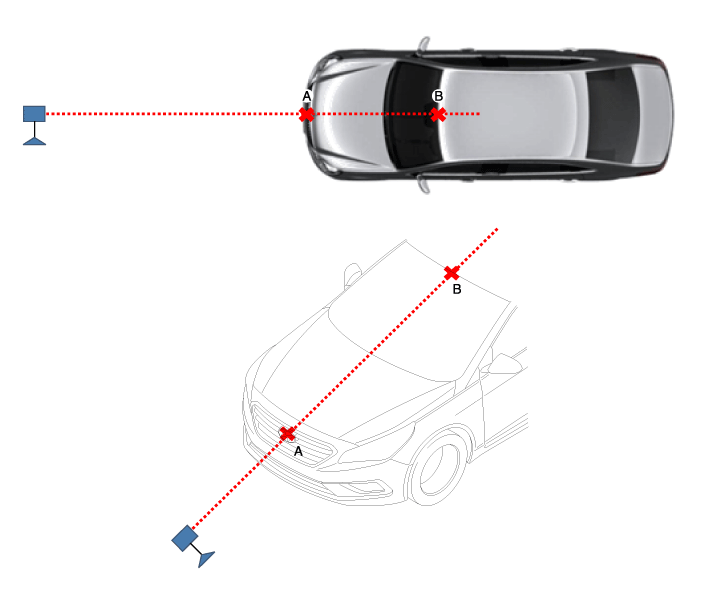
- Mark the center point of the emblem (A) and the center point at the top of the windshield (B).
- Connect the ASCC calibration beam (SST No.: 09964-C1200) to the Tri-Pod (SST No.: 09964-C1300).

- Align the vertical laser line with (A) and (B) using the ASCC calibration beam pointer.
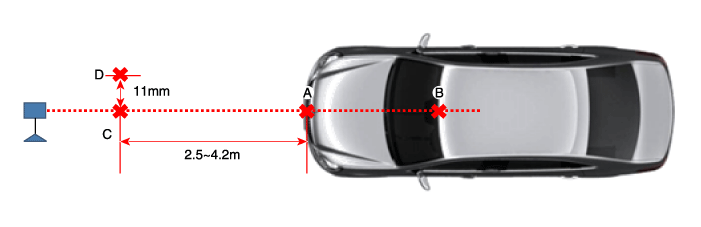
- Mark (C) located 2.5 ~ 4.2 m from (A) in front of the vehicle.
- Mark (D) at a point 11 mm to the left of (C) vertically.
- Disconnect the ASCC calibration beam (Part No.: 09964-C1200) from the Tri-Pod (Part No.: 09964-C1300).
- Connect the reflector (SST No.: 09964-C1100) to the Tri-Pod (SST No.: 09964-C1300) and set the reflector center height to 577 mm.
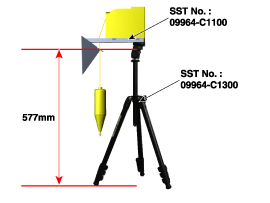
- Level the reflector horizontally using the leveler built into the tripod (SST No.: 09964-C1300).

Adjust the level so the level bubble is between the specification lines. - Install the SST (reflector or Tri-Pod) so that the position of the SST (reflector) matches position (D).

Visually check that the reflective surface of the reflector is level with the front of the vehicle. - Visually check the radar sensor and the front bumper surface again for the following items.
- Make sure there is no debris or reflective objects on the radar surface.
- Make sure there is no debris or reflective objects on the radiator grille.
- Connect GDS to the vehicle DLC and start the sensor alignment.
Vibration with the engine running may cause inaccurate sensor alignment. Perform sensor alignment with the ignition in the IG ON position. - After selecting the correct vehicle model, select "SCC Alignment" from the special functions in the GDS menu.
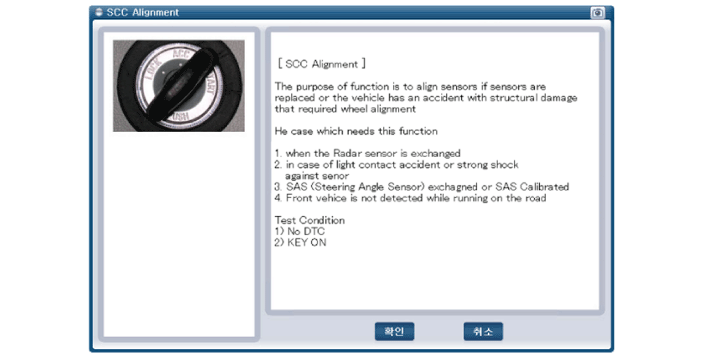
- Perform the sensor alignment by following the instructions shown on the GDS screen.
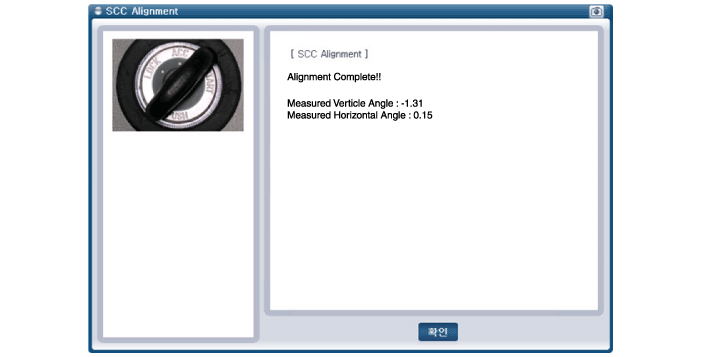
- If sensor alignment fails, check the alignment conditions. Turn the ignition off, then repeat the sensor alignment procedure.
Test yourself
A quick Hyundai Sonata LF quiz: every answer comes with an explanation and a link to the manual page.
Was this page helpful?