Removal
REMOVAL
PRECAUTION / NOTICE / HINT
HINT:
- Repeat the same procedure for the right side and the left side.
- The following procedure applies to the left side.
PROCEDURE
1. REMOVE WINDSHIELD OUTER MOULDING
(a) Apply protective tape around the windshield outer moulding.
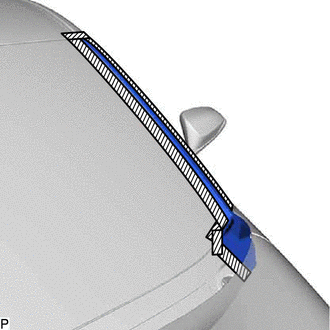
 |
Protective tape |
(b) Release the claws and clip to disconnect the windshield outer moulding, as shown in the illustration.
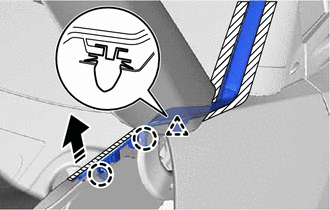
 |
Remove in this direction |
(c) Using a D-type moulding remover, release the claws to remove the windshield outer moulding. |
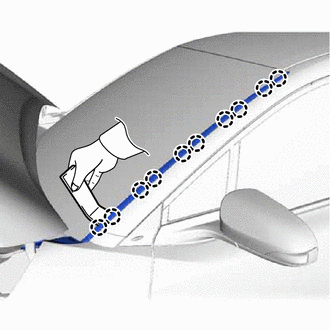 |
2. REMOVE WINDSHIELD OUTER MOULDING CLIP NO. 1
HINT:
Perform the following procedure only when it is necessary to replace a windshield outer moulding clip No. 1.
(a) Release the claws to remove the 5 windshield outer moulding clips No. 1, as shown in the illustration.
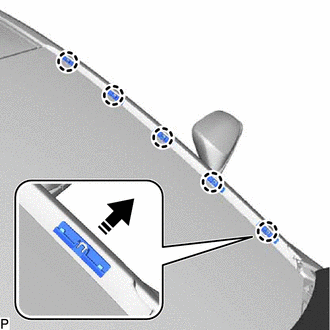
|
Remove in this direction |
3. REMOVE WINDSHIELD OUTER MOULDING CLIP NO. 3
HINT:
Perform the following procedure only when it is necessary to replace a windshield outer moulding clip No. 3.
(a) Remove the windshield glass sub-assembly.
Click here
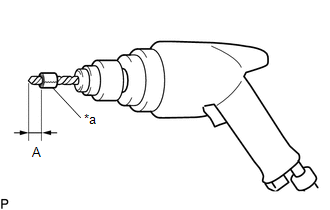
(b) Install a 4.0 mm (0.157 in.) drill bit into a drill.
(c) Wrap tape around the 4.0 mm (0.157 in.) to 5.0 mm (0.197 in.) drill bit, 4.0 to 5.0 mm (0.157 to 0.197 in.) from the tip, as shown in the illustration. Standard measurement:
NOTICE: This tape on the 4.0 mm (0.157 in.) drill bit prevents it from drilling too deep. |
|
(d) Lightly press the drill bit against the windshield outer moulding clips No. 3 to drill through the windshield outer moulding clip No. 3 flanges and remove the 5 windshield outer moulding clips No. 3. CAUTION: Be careful when handling windshield outer moulding clips No. 3, as they may be hot. NOTICE:
|
|
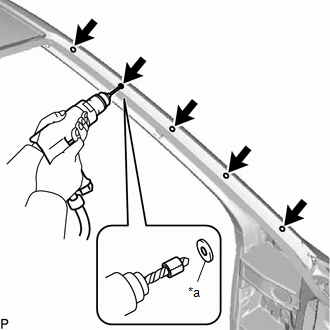
(e) Using a vacuum cleaner, remove the windshield outer moulding clip No. 3 fragments and the chips from the drilled areas.