Installation
INSTALLATION
PRECAUTION / NOTICE / HINT
HINT:
- Repeat the same procedure for the right side and the left side.
- The following procedure applies to the left side.
PROCEDURE
1. INSTALL WINDSHIELD OUTER MOULDING CLIP NO. 3
HINT:
Perform the following procedure only when it is necessary to replace a windshield outer moulding clip No. 3.
(a) Using a riveter with a nose piece, install 5 new windshield outer moulding clips No. 3.
HINT:
If the windshield outer moulding clip No. 3 mandrel does not pop out the first time the riveter is used, slide the riveter forward on the mandrel, then operate it again.
NOTICE:
- Do not pry on the windshield outer moulding clip No. 3 with the riveter, as this may damage the riveter and mandrel.
- Make sure the windshield outer moulding clips No. 3 are firmly seated against the vehicle body.
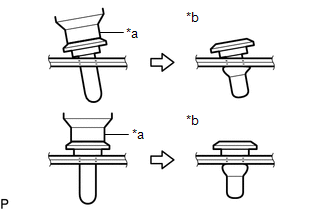
*a
Rivet Gun
*b
Incorrect
- Do not tilt the riveter when installing the windshield outer moulding clip No. 3 onto the vehicle body.
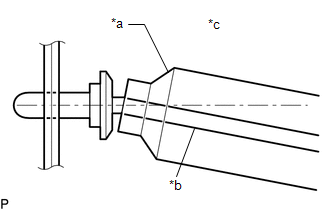
*a |
Rivet Gun |
*b |
Mandrel |
*c |
Incorrect |
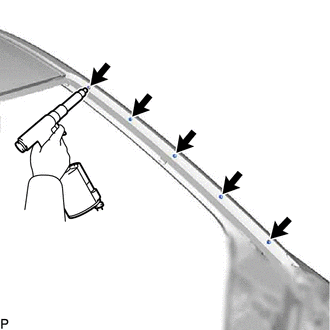
(b) Install the windshield glass sub-assembly.
Click here
2. INSTALL WINDSHIELD OUTER MOULDING CLIP NO. 1
HINT:
Perform the following procedure only when it is necessary to replace a windshield outer moulding clip No. 1.
(a) Engage the claws to install 5 new windshield outer moulding clips No. 1, as shown in the illustration.
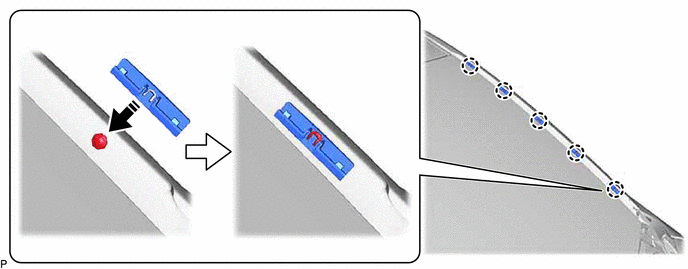
 |
Install in this direction |
- |
- |
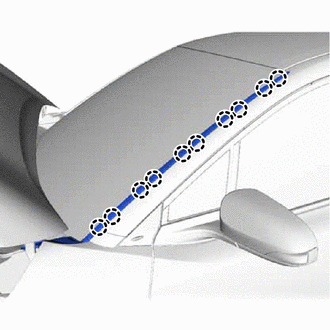
3. INSTALL WINDSHIELD OUTER MOULDING
(a) Engage the claws to install the windshield outer moulding. |
 |
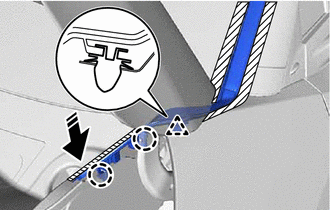
(b) Engage the claws and clip to connect the windshield outer moulding, as shown in the illustration.
|
Install in this direction |
(c) Remove the masking tape.