Removal
REMOVAL
PRECAUTION / NOTICE / HINT
The procedures required (adjustment, calibration, initialization or registration) that must be performed after parts have been removed and installed or replaced during rear seat belt outer belt assembly removal/installation are shown below.
Procedure Required After Replacing / Removing / Installing PartsReplaced Part or Performed Procedure | Required Procedure | Effect/Inoperative Function When Required Procedure Is Not Performed | Link |
|---|---|---|---|
Disconnect the cable from the negative (-) battery terminal. |
Initialize Back Door Lock |
Door Lock Control System |
 |
Memorize Steering Angle Neutral Point |
Lane Departure Alert System (with Steering Control) |
|
|
Pre-Collision System |
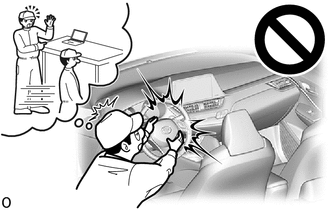
CAUTION:
Some service operations affect the SRS airbag system. Before starting any service operation, carefully read the precautions for the SRS airbag system.
Click here
HINT:
- Repeat the same procedure for the right side and the left side.
- The procedure described below applies to the LH side.
PROCEDURE
1. REMOVE REAR SEAT ASSEMBLY
Click here
2. REMOVE REAR PACKAGE TRAY TRIM PANEL ASSEMBLY (WITH PACKAGE TRAY TRIM)
Click here
3. REMOVE LUGGAGE COMPARTMENT COVER ASSEMBLY (WITH LUGGAGE COMPARTMENT COVER)
Click here
4. REMOVE LUGGAGE COMPARTMENT BOARD ASSEMBLY
Click here
5. REMOVE SPARE WHEEL BED
Click here
6. REMOVE LEFT LUGGAGE COMPARTMENT FLOOR BOX
Click here
7. REMOVE RIGHT LUGGAGE COMPARTMENT FLOOR BOX
Click here
8. REMOVE REAR DOOR SCUFF PLATE (without rear seat side airbag)
Click here
9. REMOVE REAR DOOR SCUFF PLATE (with rear seat side airbag)
Click here
10. REMOVE REAR DOOR OPENING TRIM WEATHERSTRIP
Click here
11. REMOVE REAR SEATBACK HINGE SUBASSEMBLY
Click here
12. REMOVE REAR PILLAR GARNISH (with rear seat side airbag)
Click here
13. REMOVE REAR SEAT SIDE GARNISH (without rear seat side airbag)
Click here
14. REMOVE REAR SEAT SIDE GARNISH (with rear seat side airbag)
Click here
15. REMOVE REAR LUGGAGE COMPARTMENT TRIM COVER
Click here
16. REMOVE NO. 1 LUGGAGE COMPARTMENT LIGHT ASSEMBLY
Click here
17. REMOVE LUGGAGE COMPARTMENT SIDE TRIM PANEL ASSEMBLY
Click here
18. REMOVE ROOF SIDE INNER GARNISH ASSEMBLY
Click here
19. REMOVE REAR LEFT 3-POINT OUTER SEAT BELT ASSEMBLY (for left side)
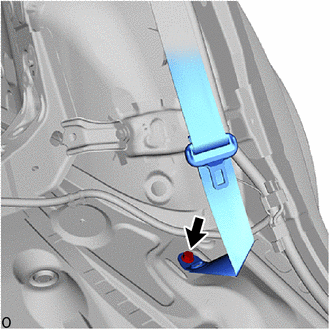
(a) Remove the bolt to disconnect the floor anchor of the rear left 3-point outer seat belt assembly. |
 |
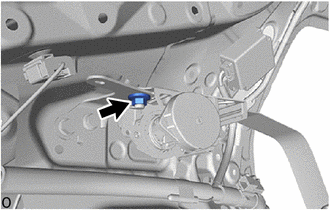
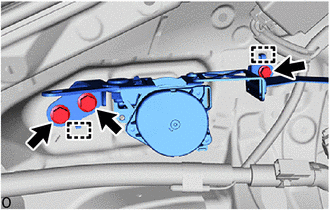
(b) Without pretensioner and force limiter:
(1) Loosen the nut. |
 |
(2) Remove the 3 bolts. |
 |
(3) Release the guides to remove the rear left 3-point outer seat belt assembly with bracket.
(4) Remove the nut. |
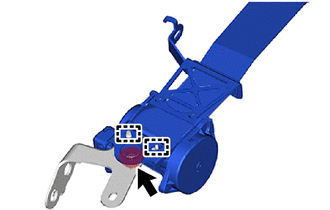 |
(5) Release the guides to remove the rear left 3-point outer seat belt assembly from the left outer belt anchor bracket subassembly.
(c) With pretensioner and force limiter:
(1) Loosen the nut. |
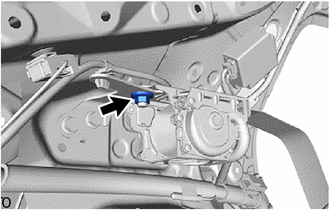 |
(2) Remove the 3 bolts. |
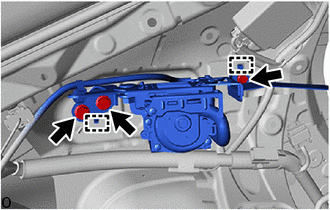 |
(3) Release the guides to detach the rear left 3-point outer seat belt assembly with bracket.
(4) Release the clip. |
|
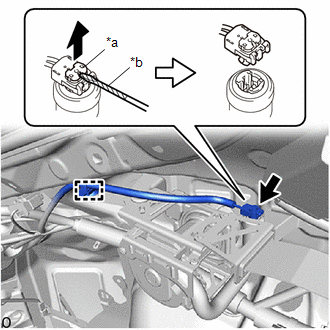
(5) Using a screwdriver with its tip wrapped in protective tape, pull out the lock button to release the lock and disconnect the pretensioner connector as shown in the illustration.
(6) Remove the nut. |
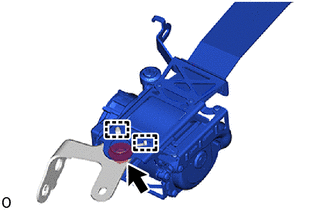 |
(7) Release the guides to remove the rear left 3-point outer seat belt assembly from the left outer belt anchor support subassembly.
20. REMOVE REAR RIGHT 3-POINT OUTER SEAT BELT ASSEMBLY (for RH side)
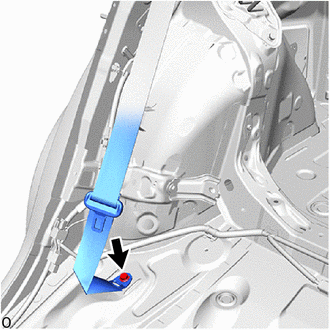
(a) Remove the bolt to disconnect the floor anchor of the rear right 3-point outer seat belt assembly. |
 |
(b) Without pretensioner and force limiter:
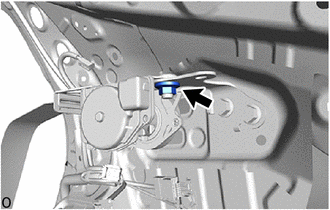
(1) Loosen the nut. |
 |
(2) Remove the 3 bolts. |
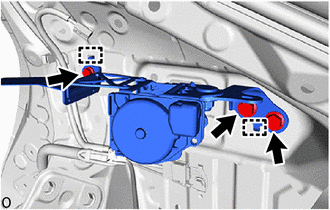 |
(3) Release the guides to remove the rear right 3-point outer seat belt assembly with bracket.
(4) Remove the nut. |
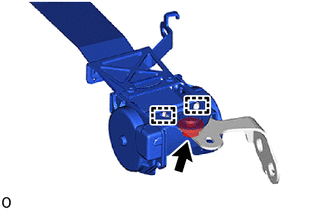 |
(5) Release the guides to remove the rear right 3-point outer seat belt assembly from the right outer belt anchor support subassembly.
(c) With pretensioner and force limiter:
(1) Release the clip. |
|
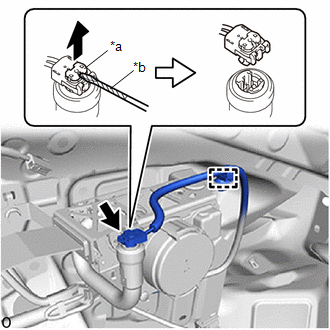
(2) Using a screwdriver with the tip wrapped in protective tape beforehand, pull out the lock button to release the lock and disconnect the pretensioner connector as shown in the illustration.
(3) Loosen the nut. |
|
(4) Remove the 3 bolts. |
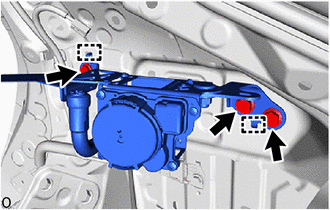 |
(5) Release the guides to remove the rear right 3-point outer seat belt assembly with bracket.
(6) Remove the nut. |
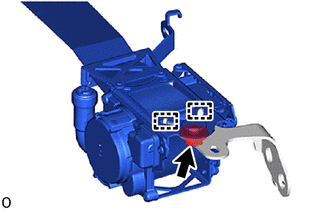 |
(7) Release the guides to remove the rear right 3-point outer seat belt assembly from the right outer belt anchor support subassembly.