Installation
INSTALLATION
PRECAUTION / NOTICE / HINT
HINT:
- Repeat the same procedure for the right side and the left side.
- The following procedure applies to the left side.
PROCEDURE
1. INSTALL FRONT DOOR GLASS FRONT MOULDING
(a) Using a pneumatic rivet tool or a hand riveter with a nose piece, install the front door glass front moulding with 2 new rivets.
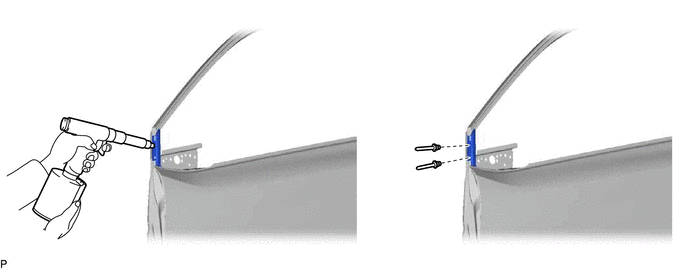
NOTICE:
To prevent damage, when installing the front door glass front moulding, make sure there are enough people to hold it properly.
HINT:
If the rivet mandrel does not come out on the first use of the rivet gun, slide the rivet gun forward over the mandrel, then operate it again.
NOTICE:
- Do not pry on the rivet with the riveter as this may damage the riveter and the mandrel.
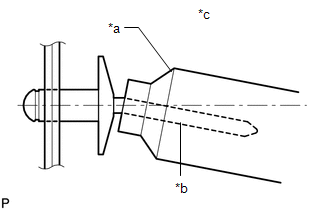
*a
Rivet Gun
*b
Mandrel
*c
Incorrect
- Make sure the rivets are seated firmly against the moulding.
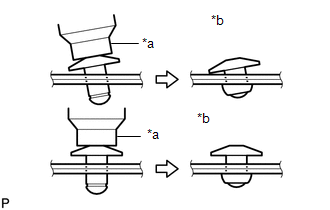
*a
Rivet Gun
*b
Incorrect
- Do not tilt the riveter when installing the rivet on the moulding.
- Do not leave a gap between the rivet head and the moulding.
- Do not leave a gap between the moulding and the door frame. Hold both parts firmly together while installing the rivet.
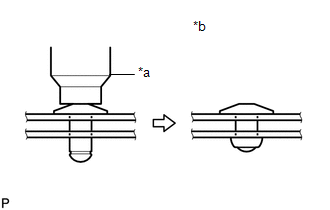
*a
Rivet Gun
*b
Incorrect
(b) Install the front door panel sub-assembly with the 4 bolts (A). Torque: Manufactured by TMMT: 26 N·m {265 kgf·cm, 19 ft·lbf} Manufactured by TMC: 21 N·m {214 kgf·cm, 15 ft·lbf} NOTICE: To prevent damage, when installing the front door panel sub-assembly, make sure there are enough people to hold it properly. |
|
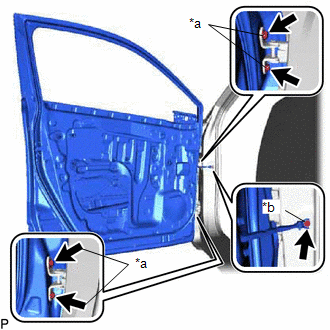
(c) Install the bolt <B>.
Torque:
30 N·m {306 kgf·cm, 22 ft·lbf}
(d) Using a brush, apply anti-rust coating to the front door hinge assembly as shown in the illustration. |
|
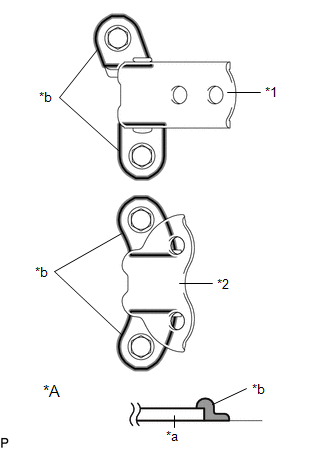
(e) Connect each connector.
(f) Engage each clip.
2. INSTALL COWL SIDE TRIM PANEL
Click here
3. INSTALL FRONT DOOR SCUFF PLATE
Click here
4. INSTALL FRONT DOOR UPPER GLASS MOULDING
(a) Insert the guide to temporarily install the front door upper glass moulding onto the door frame.
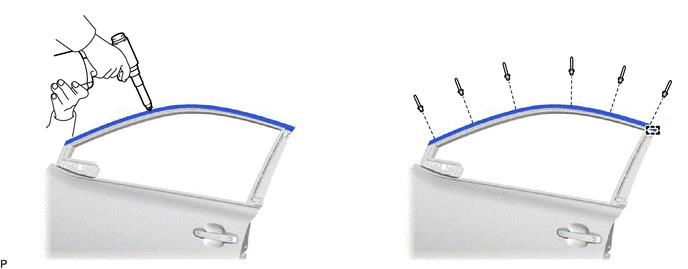
(b) Using a pneumatic rivet tool or a hand riveter with a nose piece, install the front door upper glass moulding with 6 new rivets.
HINT:
If the rivet mandrel does not come out on the first use of the rivet gun, slide the rivet gun forward over the mandrel, then operate it again.
NOTICE:
- Do not pry on the rivet with the riveter as this may damage the riveter and the mandrel.
*a
Rivet Gun
*b
Mandrel
*c
Incorrect
- Make sure the rivets are seated firmly against the moulding.
*a
Rivet Gun
*b
Incorrect
- Do not tilt the riveter when installing the rivet on the moulding.
- Do not leave a gap between the rivet head and the moulding.
- Do not leave a gap between the moulding and the door frame. Hold both parts firmly together while installing the rivet.
*a
Rivet Gun
*b
Incorrect
5. INSTALL FRONT DOOR FIXED GLASS
Click here
6. INSTALL FRONT DOOR LOWER FRAME SUB-ASSEMBLY
Click here
7. INSTALL FRONT DOOR GLASS RUN
Click here
8. INSTALL UPPER DOOR FRAME GARNISH
Click here
9. CONNECT FRONT DOOR WEATHERSTRIP
(a) Engage the clips to connect the front door weatherstrip.
10. INSTALL FRONT DOOR OUTER MOULDING SUB-ASSEMBLY
HINT:
When installing a new front door outer moulding sub-assembly, heat the vehicle body and the front door outer moulding sub-assembly using a heat light.
Heating TemperatureItem | Temperature |
|---|---|
Vehicle Body |
40 à 60 °C |
Front door outer moulding sub-assembly |
20 à 30 °C |
CAUTION:
- Do not touch heated parts or the heat lamp. Touching them may cause burns.
- Prolonged contact with heated parts may cause burns.
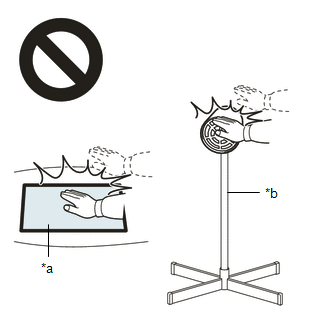
*a |
Hot Surface |
*b |
Heat Lamp |
NOTICE:
Do not overheat the vehicle body or the front door outer moulding sub-assembly.
(a) Clean the surface of the vehicle body.
(1) Using a heat light, heat the surface of the vehicle body.
(2) Remove the double-sided tape from the vehicle body.
(3) Remove any adhesive residue using a cleaning agent.
(b) Install a new front door outer moulding sub-assembly.
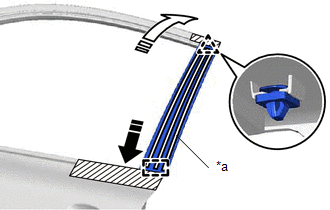
*a |
Double-sided adhesive tape |
 |
Install in this direction (1) |
 |
Install in this direction (2) |
(1) Using a heat light, heat the vehicle body and the front door outer moulding sub-assembly.
(2) Remove the protective sheet from the front door outer moulding sub-assembly.
HINT:
After removing the release liner, prevent the adhesive surface from contacting foreign matter.
(3) Engage the guide and clip, and apply the double-sided tape and sponge seal to install the front door outer moulding sub-assembly.
HINT:
Press the front door outer moulding sub-assembly firmly to install it.
(c) Remove the masking tape.
11. INSTALL THE FRONT DOOR BELT MOULDING ASSEMBLY
Click here