Brake actuator assy (W/O VSC)
Connect the hand−held tester to the DLC3.
Start the engine and run it at idle.
Select the ACTIVE TEST mode on the hand−held tester.
HINT: Please refer to the hand−held tester operator’s manual for further details.
With the motor relay ON, check the actuator motor operation noise.
Turn the motor relay OFF.
Depress the brake pedal and hold it for about 15 seconds. Check that the brake pedal cannot be depressed.
With the motor relay ON, check that the pedal does not pulsate.
Turn the motor relay OFF and release the brake pedal.
With the brake pedal depressed, perform the following operations.
Turn the SFRH and SFRR solenoid ON simultaneously, and check that the pedal cannot be depressed.
Turn the SFRH and SFRR solenoid OFF simultaneously, and check that the pedal can be depressed.
Turn the motor relay ON, and check that the pedal returns.
Turn the motor relay OFF and release the brake pedal.
As in the same procedure, check the solenoids of other wheels.
HINT:
Left front wheel: SFLH, SFLR Right rear wheel: SRRH, SRRR Left rear wheel: SRLH, SRLR
Using SST, disconnect the 6 brake lines from the actuator.
SST 09023−00101
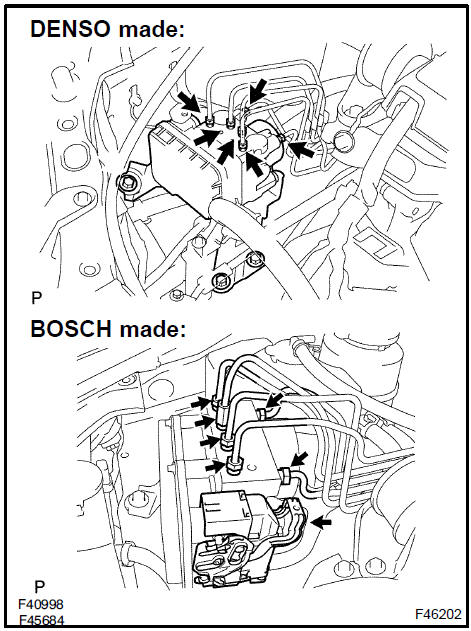
Use tags or make a memo to identify the place to reconnect.
Disconnect the brake actuator connector.
Remove the 3 nuts and brake actuator with bracket.
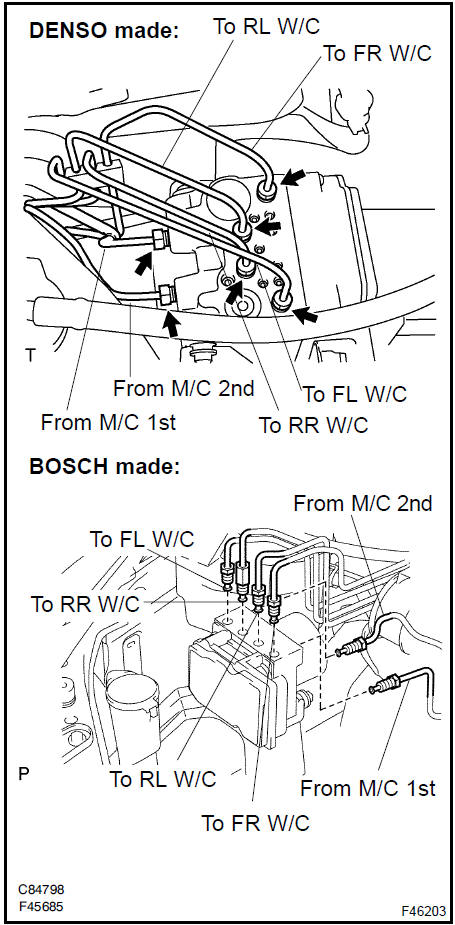
Remove the 2 nuts and brake actuator from the bracket.
Install the brake actuator to the bracket with the 2 nuts.
Torque:
DENSO made: 5,4 N·m BOSCH made: 8 N·m
Install the brake actuator with the 3 nuts.
Torque: 19 N·mConnect the brake actuator connector
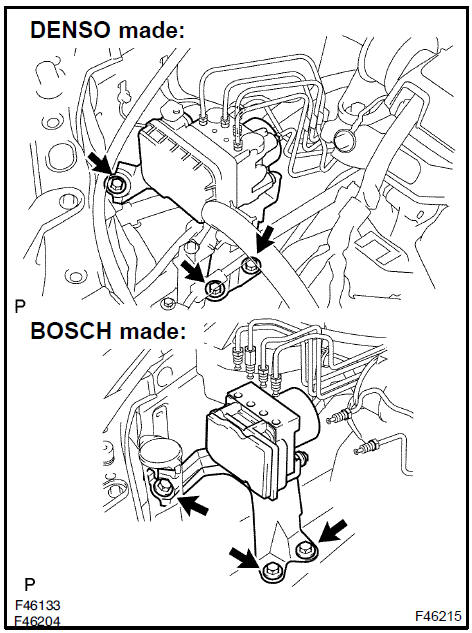
Using SST, connect the each brake line to the correct position of brake actuator, as shown in the illustration.
SST 09023−00101
Torque: 15 N·m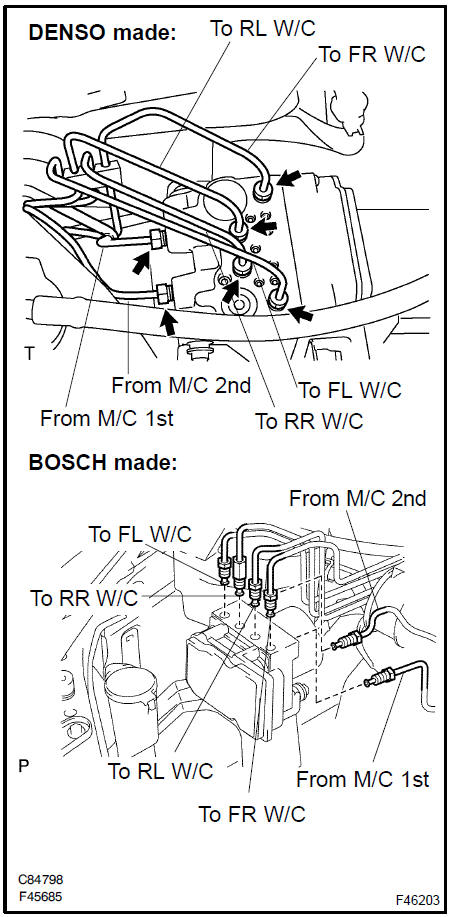
- FILL RESERVOIR WITH BRAKE FLUID
- BLEED MASTER CYLINDER
SST 09023−00101
- BLEED BRAKE LINE
- CHECK FLUID LEVEL IN RESERVOIR
- CHECK BRAKE FLUID LEAKAGE
- CHECK OPERATION OF BRAKE ACTUATOR
Test yourself
A quick Toyota Camry quiz: every answer comes with an explanation and a link to the manual page.