Heater & air conditioner
Cooler condenser assy
In this manual: Heater & air conditioner
23steps
~138min
4/5difficulty
Done 0 of 23
ON−VEHICLE INSPECTION 1. INSPECT COOLER CONDENSER ASSY
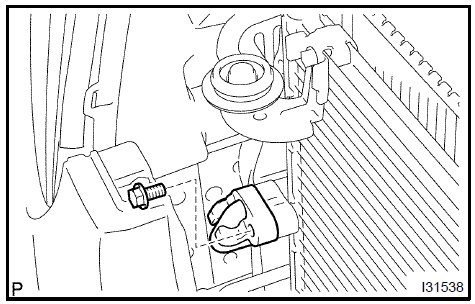 Remove cooler refrigerant discharge hose No.1 3. DISCONNECT COOLER REFRIGERANT LIQUID PIPE A
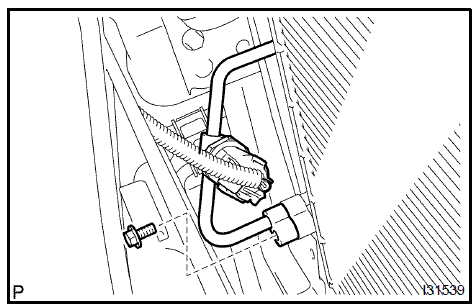 Disconnect cooler refrigerant liquid pipe A
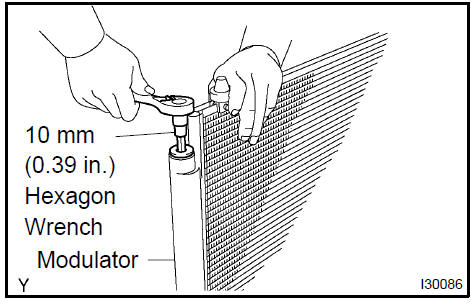
 Remove cooler condenser assy 7. REMOVE COOLER DRYER
 Install cooler condenser assy 10. INSTALL RADIATOR SUPPORT UPPER 3MZ−FE:
1MZ−FE:
2AZ−FE: 11. INSTALL COOLER REFRIGERANT LIQUID PIPE A
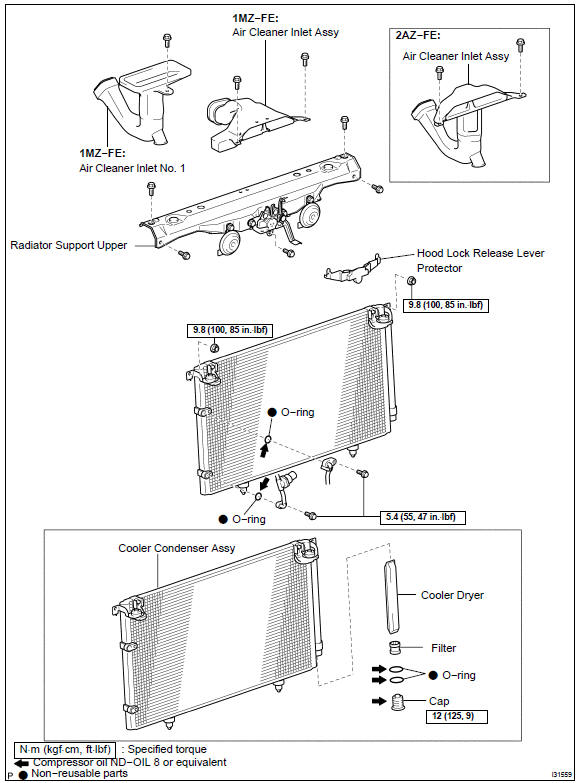
a. If a fin of the cooler condenser assy is dirty, clean it with water and dry it with compressor air.
NOTICE: Do not damage the fin of the condenser assy.b. If a fin of the condenser assy is bent, make it straight using a screwdriver or pliers.
2. INSPECT CONDENSER FOR LEAKAGE OF REFRIGERANT- Using a halogen leak detector, check pipe joints for gas leakage.
- If gas leakage is detected in a joint, check the torque of the joint.
HINT: COMPONENTS
- DISCHARGE REFRIGERANT FROM REFRIGERATION SYSTEM SST 07110−58060 (07117−58080, 07117−58090, 07117−78050, 07117−88060, 07117−88070, 07117−88080)
- REMOVE COOLER REFRIGERANT DISCHARGE HOSE No.1
- Remove the bolt and disconnect the cooler refrigerant discharge hose No. 1 from the cooler condenser assy.
- Remove the O−ring from the cooler refrigerant discharge hose No. 1.
Remove cooler refrigerant discharge hose No.1 3. DISCONNECT COOLER REFRIGERANT LIQUID PIPE A
- Remove the bolt and disconnect the cooler refrigerant liquid pipe A from the cooler condenser assy.
- Remove the O−ring from the cooler refrigerant liquid pipe A.
Disconnect cooler refrigerant liquid pipe A
- REMOVE AIR CLEANER INLET ASSY 3MZ−FE:
1MZ−FE:
2AZ−FE: - REMOVE RADIATOR SUPPORT UPPER 3MZ−FE:
1MZ−FE:
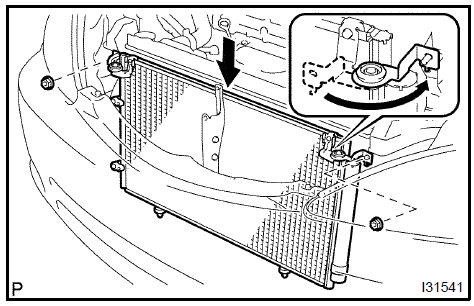
2AZ−FE: - REMOVE COOLER CONDENSER ASSY
a. Remove the 2 nuts and cooler condenser assy.
Remove cooler condenser assy 7. REMOVE COOLER DRYER
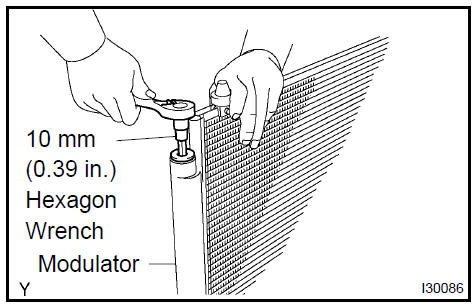
a. Using hexagon wrench 10 mm (0.39 in.), remove the cap and filter from the modulator.
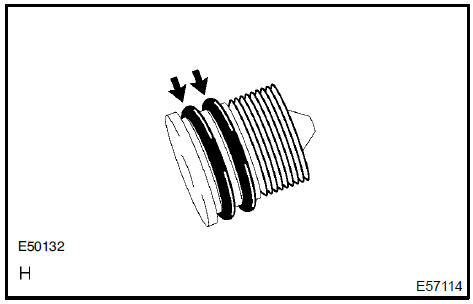
b. Remove the 2 O−rings from the cap.
SST 99999−60018
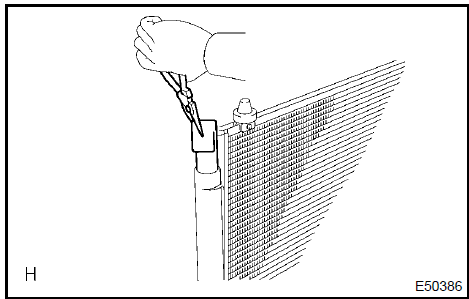
8. INSTALL COOLER DRYERa. Using a needle nose pliers, install the cooler dryer.
- Install 2 new O−rings to the cap.
- Sufficiently apply compressor oil to the fit surfaces of the O−ring and the cap. Compressor oil: ND−OIL 8 or equivalent

SST 99999−60018
Install cooler condenser assy 10. INSTALL RADIATOR SUPPORT UPPER 3MZ−FE:1MZ−FE:
2AZ−FE: 11. INSTALL COOLER REFRIGERANT LIQUID PIPE A
- Remove the attached vinyl tape from the tube and connecting part of the cooler condenser assy.
- Sufficiently apply compressor oil to the new O−ring and pipe joint. Compressor oil: ND−OIL 8 or equivalent
- Install a O−ring to the cooler refrigerant liquid pipe A.
- Connect the cooler refrigerant liquid pipe A to the cooler condenser assy with the bolt. Torque: 5,4 N·m
- Remove the attached vinyl tape from the tube and connecting part of the cooler condenser assy.
- Sufficiently apply compressor oil to the new O−ring and hose joint. Compressor oil: ND−OIL 8 or equivalent
- Install a O−ring to the cooler refrigerant discharge hose No. 1.

- CHARGE REFRIGERANT SST 07110−58060 (07117−58060, 07117−58070, 07117−58080, 07117−58090, 07117−78050, 07117−88060, 07117−88070, 07117−88080) Specified amount: 550 50 g (19.37 1.76 oz.)
- WARM UP ENGINE
- INSPECT LEAKAGE OF REFRIGERANT
Test yourself
A quick Toyota Camry quiz: every answer comes with an explanation and a link to the manual page.
Was this page helpful?