Cooler compressor assy (1MZ−FE)
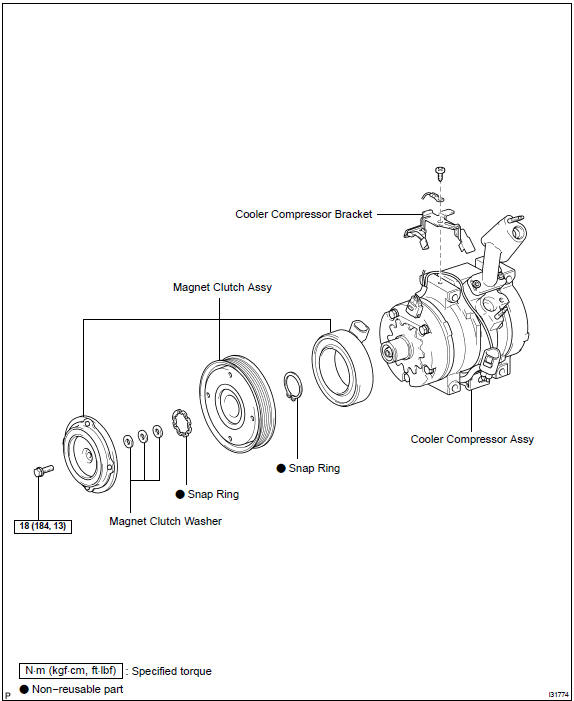
HINT: COMPONENTS:
- DISCHARGE REFRIGERANT FROM REFRIGERATION SYSTEM SST 07110−58060 (07117−58080, 07117−58090, 07117−78050, 07117−88060, 07117−88070, 07117−88080)
- REMOVE V (COOLER COMPRESSOR TO CRANKSHAFT PULLEY) BELT No.1
- REMOVE GENERATOR ASSY
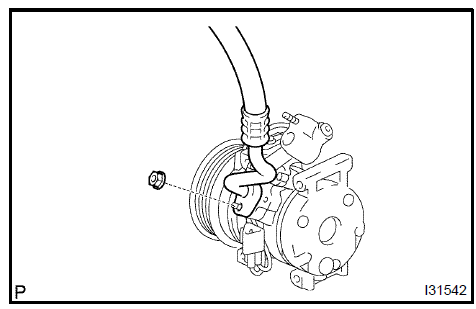
- DISCONNECT COOLER REFRIGERANT DISCHARGE HOSE No.1
- Remove the nut and disconnect the cooler refrigerant discharge hose No. 1.
- Remove the O−ring from the cooler refrigerant discharge hose No. 1.
 Disconnect cooler refrigerant discharge hose No.1 5. DISCONNECT COOLER REFRIGERANT SUCTION HOSE No.1
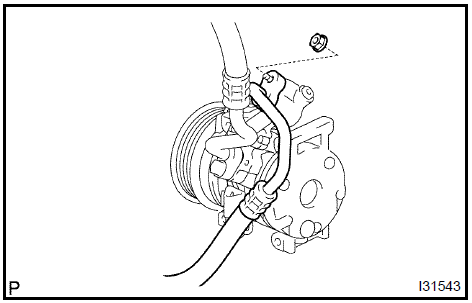
- Remove the nut and disconnect the cooler refrigerant suction hose No. 1.
- Remove the O−ring from the cooler refrigerant suction hose No. 1.
 Disconnect cooler refrigerant suction hose No.1 6. REMOVE COMPRESSOR AND MAGNETIC CLUTCH
- Disconnect the connector and clamp.
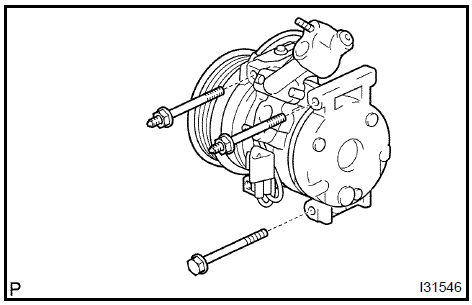
- Remove the 2 bolts, nut and cooler compressor bracket.

c. Remove the 3 bolts and compressor and magnetic clutch
a. Remove the screw, earth wire and cooler compressor bracket.
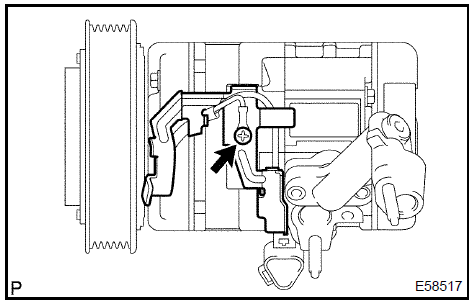 Remove cooler compressor bracket 8. REMOVE MAGNET CLUTCH ASSY
- Remove the bolt and bracket.
- Place the compressor and magnetic clutch in vise
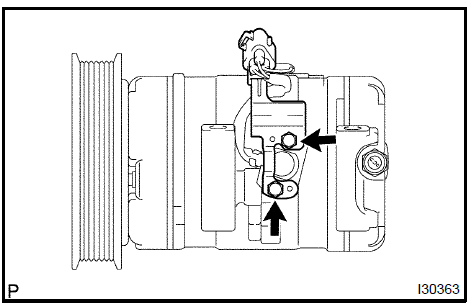
- Using a vise pliers, hold the magnet clutch hub.
- Remove the bolt, magnet clutch hub and magnet clutch washer.

- Using a snap ring expander, remove the snap ring and magnet clutch rotor.
- Disconnect the connector.

g. Using a snap ring expander, remove the snap ring and magnet clutch starter.

- REMOVE COOLER COMPRESSOR ASSY
- INSTALL MAGNET CLUTCH ASSY
a. Matching the parts shown in the illustration, install the magnet clutch starter.
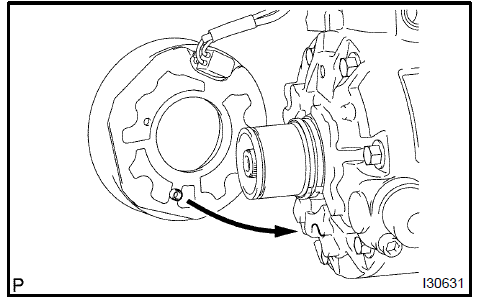
- Using a snap ring expander, install a new snap ring with the chamfered side facing up.
- Connect the connector.
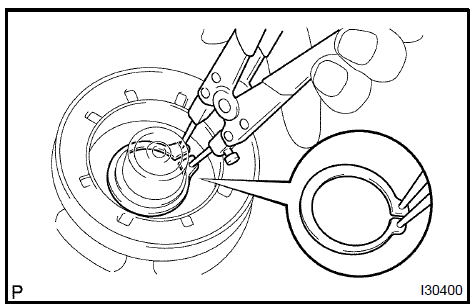
- Using a snap ring expander, install the magnet clutch rotor and a new snap ring with the chamfered side facing up.
- Install the magnet clutch washer and magnet clutch hub.

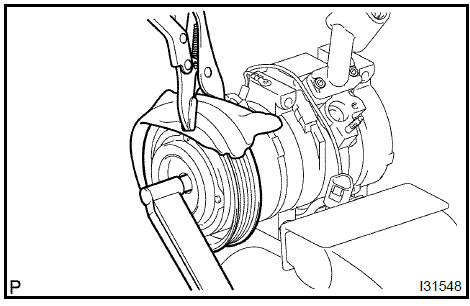
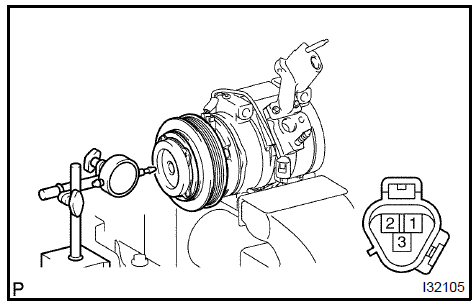
- Set the dial indicator to the magnet clutch hub.
- Connect the battery positive lead to the terminal 3 of magnet clutch connector and the negative lead to the earth wire. Turn on and off the magnet clutch and measure the clearance. Standard clearance: 0.35 − 0.60 mm (0.014 − 0.024 in.)
If the measured value is out of the standard range, remove the magnet clutch hub and adjust it with magnet clutch washers.
NOTICE: Adjustment shall be performed with 3 or less magnet clutch washers.c. Remove the compressor and magnetic clutch from the vise.
d. Install the bolt and bracket.
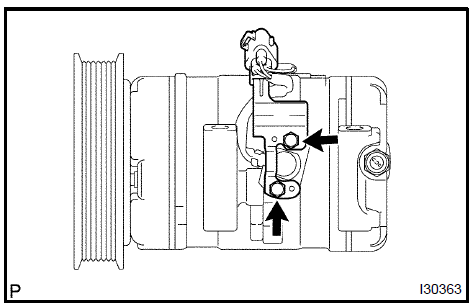
a. Install the earth wire and cooler compressor bracket with the screw.
 Install cooler compressor bracket 13. INSPECT COMPRESSOR OIL a. When replacing the compressor and magnetic clutch with new one, after gradually removing the refrigerant gas from the service valve, drain the following amount of oil from the new compressor and magnetic clutch before installation.Standard: (Oil capacity inside new compressor and magnetic clutch: 120 + 15 cc (4.1 +0.51 fl.oz.) ) − (Remaining oil amount in the removed compressor and magnetic clutch) = (Oil amount to be removed when replacing) NOTICE:
- When checking the compressor oil level, observe the precautions on the cooler removal/installation.
- Because compressor oil remains in the pipes of the vehicle, if a new compressor and magnetic clutch is installed without removing some oil inside, the oil amount becomes too much, preventing heat exchange in the refrigerant cycle and causing refrigerant failure.
- If the remaining oil in the removed compressor and magnetic clutch is too small in volume, check for oil leakage.
- Be sure to use ND−OIL8 for compressor oil.
a. Temporarily the compressor and magnetic clutch with the 3 bolts.
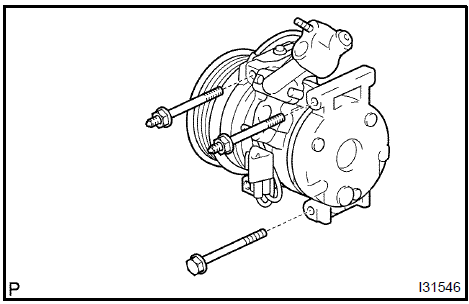 Temporarily tighten compressor and magnetic clutch 15. FULLY TIGHTEN COMPRESSOR AND MAGNETIC CLUTCH a. Tighten the compressor and magnetic clutch with the bolt a. and bolt b..Torque: 25 N·m
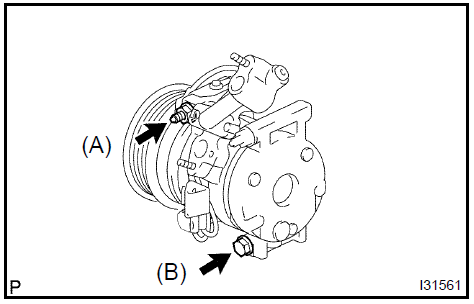
25 N·m (Bolt c.) 25 N·m (Nut d.) 18 N·m (Bolt e.

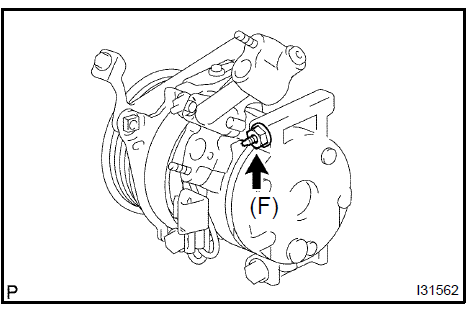
- Tighten the compressor and magnetic clutch with the bolt f.. Torque: 25 N·m
- connect the connector.
- Remove the attached vinyl tape from the hose.
- Sufficiently apply compressor oil to the new O−ring and fit surface of the compressor and magnetic clutch. Compressor oil: ND−OIL 8 or equivalent
- Install a O−ring to the cooler refrigerant suction hose No. 1.
- Remove the attached vinyl tape from the hose.
- Sufficiently apply compressor oil to the new O−ring and fit surface of the compressor and magnetic clutch. Compressor oil: ND−OIL 8 or equivalent
- Install a O−ring to the cooler refrigerant discharge hose No.1.
- INSTALL GENERATOR ASSY
- INSTALL V (COOLER COMPRESSOR TO CRANKSHAFT PULLEY) BELT No.1
- CHARGE REFRIGERANT
SST 07110−58060 (07117−58060, 07117−58070, 07117−58080, 07117−58090, 07117−78050, 07117−88060, 07117−88070, 07117−88080)
- WARM UP ENGINE
- INSPECT LEAKAGE OF REFRIGER
Test yourself
A quick Toyota Camry quiz: every answer comes with an explanation and a link to the manual page.