Introduction
Basic repair hint
In this manual: Introduction
22steps
~132min
4/5difficulty
Done 0 of 22
- Hints on operations
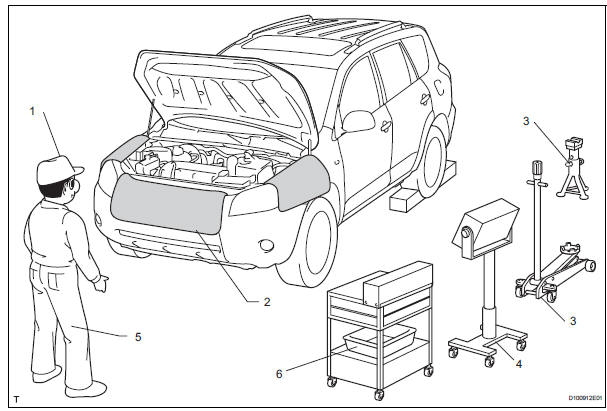
| 1 | Attire |
|
| 2 | Vehicle protection | Prepare a grille cover, fender cover, seat cover and floor mat before starting the operation. |
| 3 | Safe operation |
|
| 4 | Preparation of tools and measuring gauge | Before starting the operation, prepare a tool stand, sst, gauge, oil and parts for replacement. |
| 5 | Removal and installation, disassembly and assembly operations |
|
| 6 | Removed parts |
|
- Jacking up and supporting vehicle
- Care must be taken when jacking up and supporting the vehicle. Be sure to lift and support the vehicle at the proper locations.
- Precoated parts
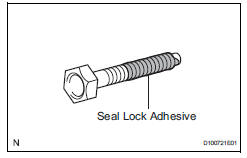
- Precoated parts are bolts and nuts that are coated with a seal lock adhesive at the factory.
- If a precoated part is retightened, loosened or moved in any way, it must be recoated with the specified adhesive.
- When reusing a precoated part, clean off the old adhesive and dry the part with compressed air.
Then apply new seal lock adhesive appropriate to that part.
- Some seal lock agents harden slowly. You may have to wait for the seal lock adhesive to harden.
- Gaskets
- When necessary, use a sealer on gaskets to prevent leaks.
- Bolts, nuts and screws
- Carefully follow all the specifications for tightening torques. Always use a torque wrench.
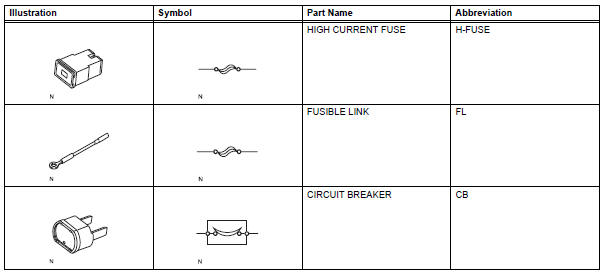
- Fuses
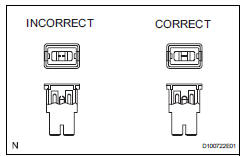
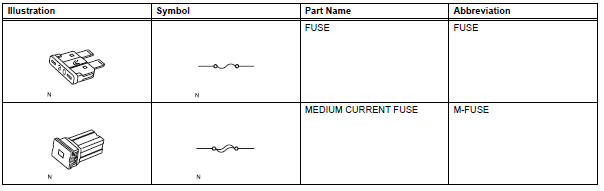
- When inspecting a fuse, check that the wire of the fuse is not broken.
- When replacing fuses, be sure that the new fuse has the correct amperage rating. Do not exceed the rating or use one with a lower rating.
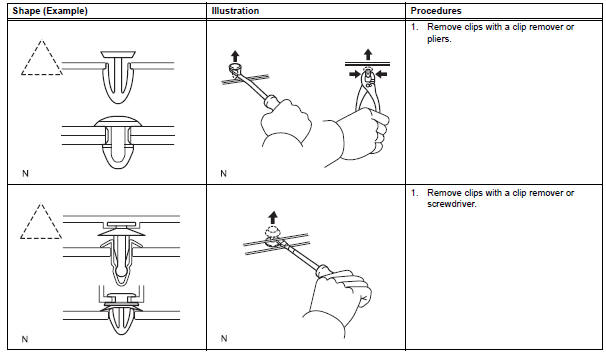
- Clips
If clips are damaged during a procedure, always replace the clips with new clips.
- The removal and installation methods of typical clips used for vehicle body parts are shown in the table below.

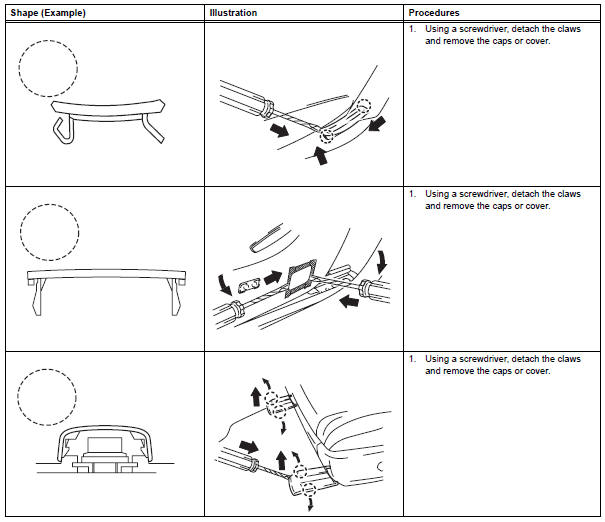
- Claws
- The removal and installation methods of typical claws used for vehicle body parts are shown in the table below.
If claws of caps or covers are damaged during a procedure, always replace the caps or covers with new ones.
- Removal and installation of vacuum hoses.
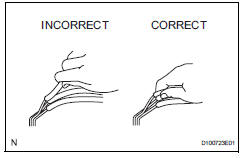
- To disconnect a vacuum hose, pull and twist from the end of the hose. Do not pull from the middle of the hose as this may cause damage.
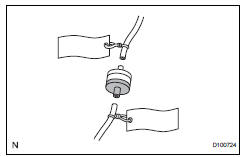
- When disconnecting vacuum hoses, use tags to identify where they should be reconnected.
- After completing any hose related repairs, double-check that the vacuum hoses are properly connected. The label under the hood shows the proper layout.
- When using a vacuum gauge, never force the hose onto a connector that is too large. If a hose has been stretched, it may leak air. Use a stepdown adapter if necessary.
- Torque when using torque wrench with extension tool
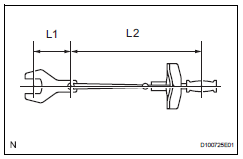
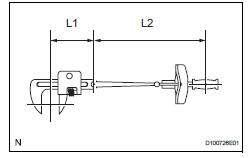
- Use the formula below to calculate special torque values for situations where sst or an extension tool is combined with a torque wrench.
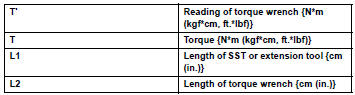
Notice:
If an extension tool or sst is combined with a torque wrench and the wrench is used to tighten to a torque specification in this manual, the actual torque will be excessive and parts will be damaged.
Test yourself
A quick Toyota RAV4 quiz: every answer comes with an explanation and a link to the manual page.
Was this page helpful?