Brake control
Removal (2006/01- )
In this manual: Brake control
14steps
~89min
4/5difficulty
1special tools
Done 0 of 14
- Disconnect cable from negative battery terminal
- Remove air cleaner case sub-assembly (for 2az-fe)
- Remove the air cleaner case (see page em-98).
Refer to the procedures from the removal of the purge vsv up until the removal of the air cleaner case.
- Remove air cleaner case (for 2gr-fe)
- Remove the air cleaner case (see page em-21).
Refer to the procedures from the removal of the air cleaner cap sub-assembly up until the removal of the air cleaner case.
- Drain brake fluid
Wash off brake fluid immediately if it comes in contact with any painted surface.
- Disconnect brake lines
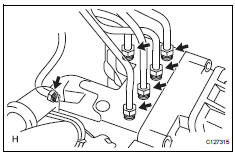
- Using sst, disconnect the 6 brake lines from the actuator.
- Place tags or marks to identify the installation locations of each brake line.
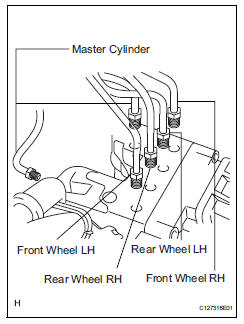
- Remove abs and traction actuator assembly with bracket
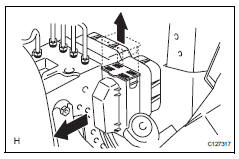
- Pull the lock lever upward and disconnect the connector.
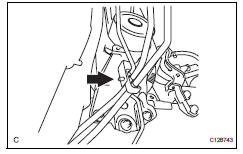
- Disconnect the brake tube clamp from the bracket.
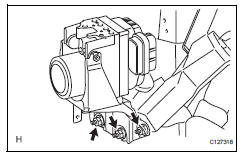
- Remove the 3 nuts and actuator with bracket.
Be careful not to damage the brake tubes.
Disassembly- Remove abs and traction actuator assembly

- Remove the 2 nuts and actuator from the bracket.
- Remove brake actuator bolt holder
- Remove the 2 bolt holders from the actuator.
- Remove brake actuator bolt cushion
- Remove the 3 cushions from the actuator.
- Install brake actuator bolt cushion
- Install the 3 cushions to the actuator.
- Install brake actuator bolt holder
- Install the 2 bolt holders to the actuator.
- Install abs and traction actuator assembly
- Do not remove the hole plug before connecting the brake tube. New actuators are filled with brake fluid.
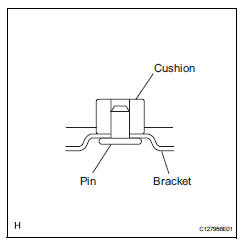
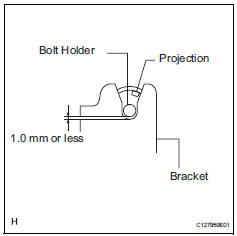
- The clearance between the bolt holder and bracket is less than 1.0 Mm (0.039 In.).
- The projection should be set as shown in the illustration.
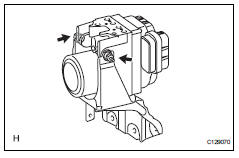
- Install the 2 nuts to assemble the actuator and bracket.
Test yourself
A quick Toyota RAV4 quiz: every answer comes with an explanation and a link to the manual page.
Was this page helpful?