Rear Room Temperature Sensor Circuit
DESCRIPTION
This sensor detects the rear cabin temperature that is used as the basis for temperature control and sends a signal to the A/C amplifier.
WIRING DIAGRAM

INSPECTION PROCEDURE
1 READ VALUE OF INTELLIGENT TESTER
(a) Connect the intelligent tester to the DLC3.
(b) Turn the ignition switch to the ON position and turn the intelligent tester main switch on.
(c) Select the item below in the DATA LIST, and read the display on the intelligent tester.
DATA LIST / AIR CONDITIONER: 
OK: The display is as specified in the normal condition column.
Result 

2 INSPECT REAR A/C ROOM TEMPERATURE SENSOR
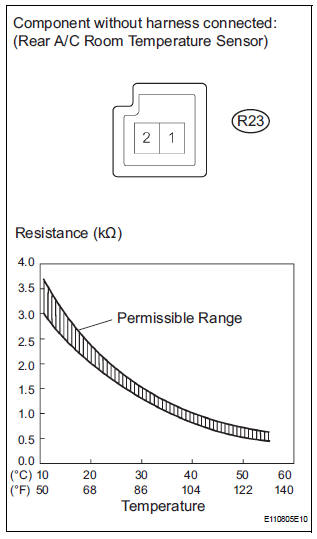
(a) Remove the rear A/C room temperature sensor.
(b) Measure the resistance according to the value(s) in the table below.
Standard resistance 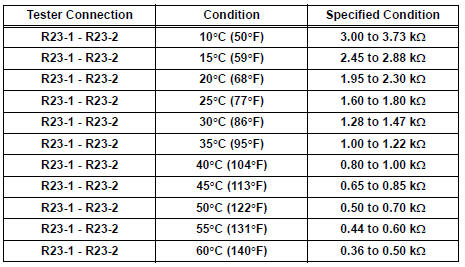
NOTICE:
- Hold the sensor only by its connector. Touching the sensor may change the resistance value.
- When measuring, the sensor temperature must be the same as the rear cabin temperature.
HINT: As the temperature increases, the resistance decreases (see the graph).


3 CHECK HARNESS AND CONNECTOR (REAR A/C ROOM TEMPERATURE SENSOR - A/C AMPLIFIER)
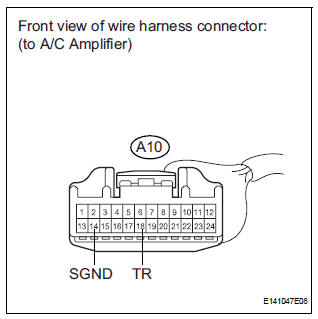
(a) Disconnect the connector from the A/C amplifier.
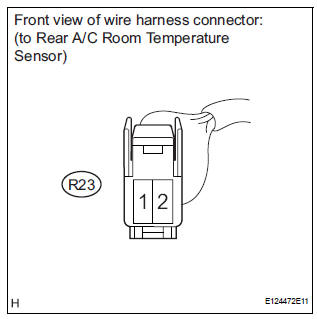
(b) Disconnect the connector from the rear A/C room temperature sensor.
(c) Measure the resistance according to the value(s) in the table below.
Standard resistance 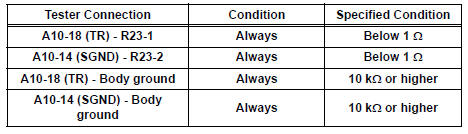


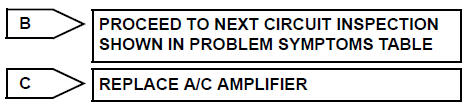
REPLACE A/C AMPLIFIER
Test yourself
A quick Toyota Sienna quiz: every answer comes with an explanation and a link to the manual page.