Removal
1. Remove windshield wiper motor assembly hint: (see page ww-4) 2. Remove front outer cowl top panel subassembly (see page em-27) 3. Drain engine coolant (see page co-6) 4. Remove v-bank cover sub-assembly (see page em-28) 5. Remove no. 2 Air cleaner inlet (see page em- 28) 6. Remove no. 1 Air cleaner inlet (see page em- 28) 7. Remove air cleaner cap sub-assembly
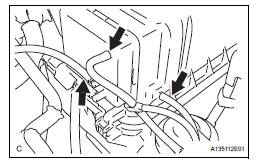
(A) disconnect the 3 vacuum hoses.

(b) Remove the No. 2 ventilation hose and air cleaner hose band.
(c) Disconnect the vacuum hose (EVAP) from the air cleaner hose.
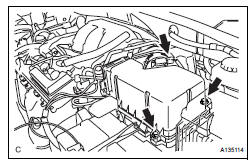
(d) Disconnect the mass air flow meter connector.
(e) Remove the 2 bolts and air cleaner cap subassembly.
8. REMOVE AIR CLEANER CASE SUB-ASSEMBLY (See page EM-28)
9. REMOVE THROTTLE BODY

(a) Disconnect the throttle body connector and clamp.
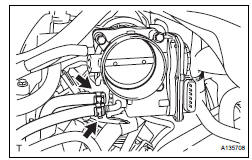
(b) Disconnect the 2 water by-pass hoses from the throttle body.
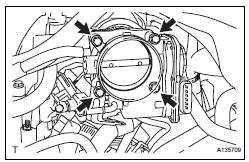
(c) Remove the 4 bolts and throttle body.
(d) Remove the throttle body gasket from the intake air surge tank.
INSPECTION
1. INSPECT THROTTLE BODY
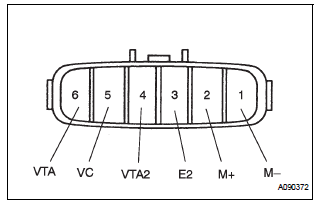
(a) Using an ohmmeter, measure the resistance between the terminals.
Standard resistance 
If the result is not as specified, replace the throttle body assembly.
Test yourself
A quick Toyota Sienna quiz: every answer comes with an explanation and a link to the manual page.