Crankshaft Position Sensor
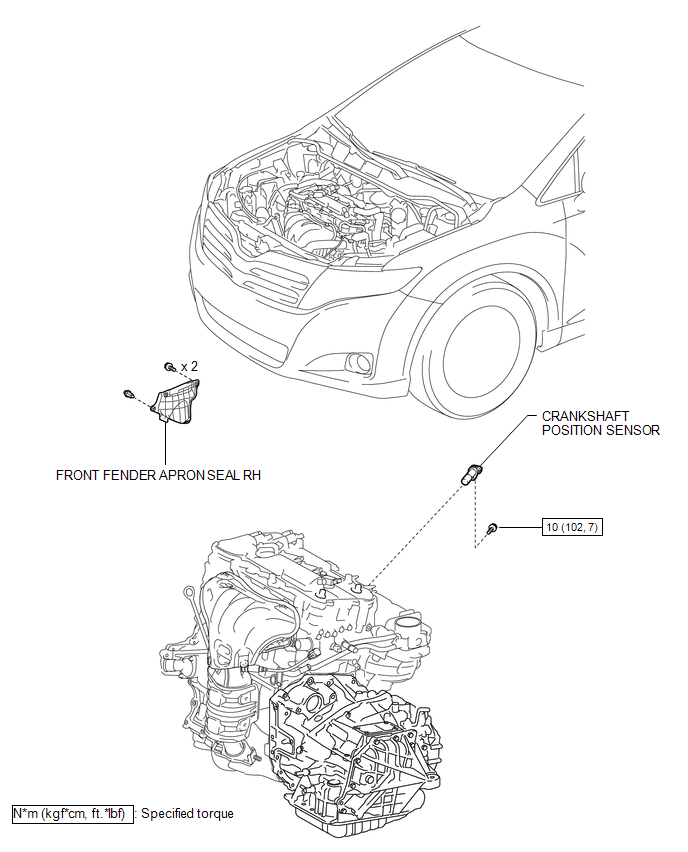
Removal REMOVAL PROCEDURE
1. REMOVE FRONT FENDER APRON SEAL RH

2. REMOVE CRANKSHAFT POSITION SENSOR
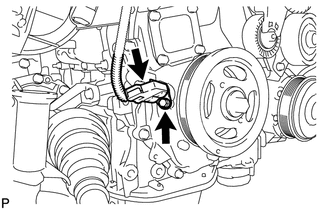
(a) Disconnect the sensor connector.
(b) Remove the bolt and sensor.
Inspection INSPECTION PROCEDURE1. INSPECT CRANKSHAFT POSITION SENSOR
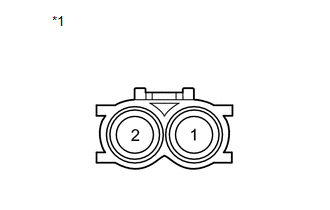 Text in Illustration
*1 |
Component without harness connected (Crank Position Sensor) |
(a) Measure the resistance according to the value(s) in the table below.
Standard Resistance:
Tester Connection | Condition | Specified Condition |
|---|---|---|
1 - 2 |
Cold |
1630 to 2740 Ω |
Hot |
2065 to 3225 Ω |
HINT:
In the table above, the terms "Cold" and "Hot" refer to the temperature of the coils. "Cold" means approximately -10 to 50 °C. "Hot" means approximately 50 to 100 °C.
If the result is not as specified, replace the crankshaft position sensor.
Installation INSTALLATION PROCEDURE1. INSTALL CRANKSHAFT POSITION SENSOR
(a) Apply a light coat of engine oil to the O-ring of the crankshaft position sensor.
NOTICE:
If reusing the crankshaft position sensor, be sure to inspect the O-ring.
(b) Install the crankshaft position sensor to the timing chain cover sub-assembly with the bolt.
Torque:
10 N·m {102 kgf·cm, 7 ft·lbf}
NOTICE:
- If the crankshaft position sensor has been struck or dropped, replace it.
- Make sure that the O-ring is not cracked or moved out of place when installing the crankshaft position sensor.
(c) Connect the crankshaft position sensor connector.
2. INSPECT FOR OIL LEAK
3. INSTALL FRONT FENDER APRON SEAL RH

Test yourself
A quick Toyota Venza quiz: every answer comes with an explanation and a link to the manual page.