7- speed dual clutch gearbox 0CW

Removing and installing clutch engagement

~3min read

Removing

Dual clutch removed → Chapter.

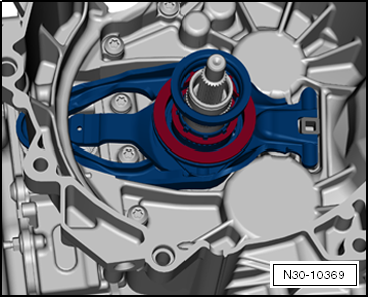
  • Remove large engaging lever with small engagement bearing.
Note The upper section of bushing cannot be removed or installed alone. It is always removed or installed together with lower section of guide sleeve and »small« engaging lever.
Removing and installing clutch engagement
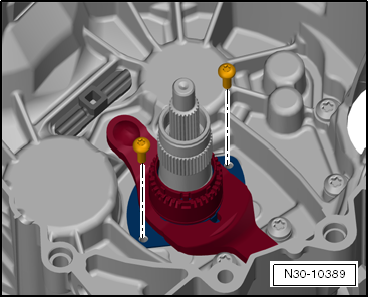
  • Undo and remove bolts and remove »small« engagement lever together with upper and lower section of guide sleeve.
Removing and installing clutch engagement

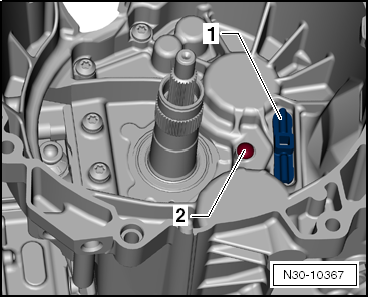
Only replace the ball pin -2- when it is worn → Anchor.

WARNING

The hinge mounting -1- cannot be removed.

Installing

Install in reverse order of removal, observing the following:

WARNING The position of the engagement bearings “K 1” and “K 2” must only be adjusted after the following work:

Dual clutch was renewed.

Engaging levers were renewed.

Small ball pin for engaging lever “K 2” has been renewed.

Engagement bearings were renewed.

The hinge mounting cannot be removed.

If you have performed any of the above work, you must now adjust the position of engagement bearings “K 1 and K 2” → Chapter.
Note There is no need to adjust anything if all the named parts have only been removed and reinstalled.
Removing and installing clutch engagement

Hinge mounting -1- and ball pin -2- have been installed.

Only replace the ball pin -2- when it is worn → Anchor.

Observe the following when installing a new engaging lever »K 2«:

Removing and installing clutch engagement
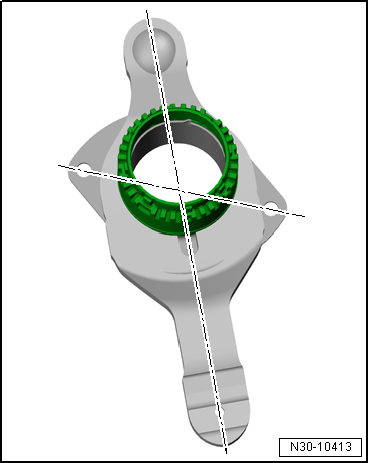
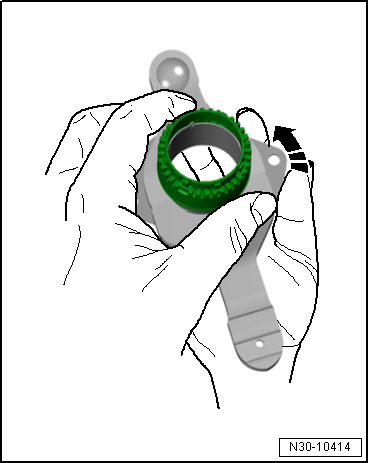
The new engaging lever »K2« with upper and lower section of guide sleeve will be delivered in transport position -illustration- and must be set to installation position prior to installation.

Setting engaging lever »K2« to installation position:

Removing and installing clutch engagement
  • Hold upper section of guide sleeve with one hand. With the other hand turn the lower section of guide sleeve in direction of arrow until the sleeve moves freely.
Note Apply high force to hold both sections, as this is necessary for turning the lower section of the guide sleeve.
Removing and installing clutch engagement
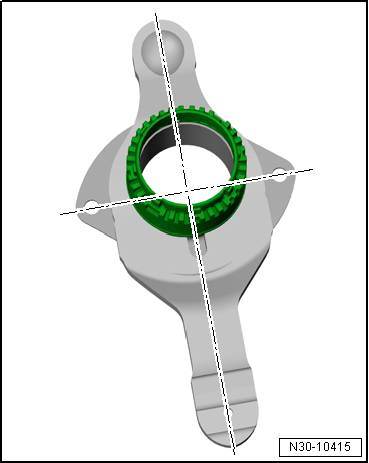
If the engaging lever is in installation position, the holes of the lower section of guide sleeve are at right angles to the engaging lever. The sleeve moves freely.
  • When installing a new engaging lever, the position of the engaging bearings “K 1” and “K 2” must be adjusted → Chapter.

Continuation for all:

Removing and installing clutch engagement
  • Install »small« engagement lever together with upper and lower section of bushing. Insert and tighten new bolts.

Specified torques: → Item

Removing and installing clutch engagement
  • Insert »large« engaging lever with measured shims for “K 1” and “K 2” and with small engagement bearing.
The large shim is inserted into the large engagement bearing, with the hemispherical side of the shim facing downwards. The small shim goes under the small engagement bearing. Therefore, insert shim first.
Removing and installing clutch engagement
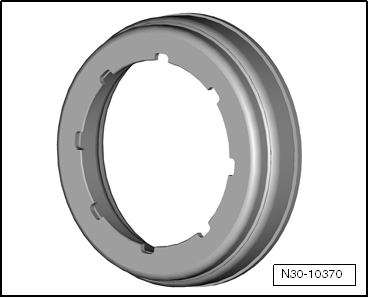
The shim and the small engagement bearing only fit in one position due to the 8 grooves.
  • By turning, check that parts have been installed correctly and that grooves are seated correctly.
  • Check both engaging levers are seated correctly.
  • Install dual clutch → Chapter.
Removing and installing clutch engagement

Test yourself

A quick Volkswagen Golf quiz: every answer comes with an explanation and a link to the manual page.