Suspension, Wheels, Steering
Control Arm with Mounting Bracket, Removing and Installing
In this manual: Suspension, Wheels, Steering
~1min read
Special tools and workshop equipment required
- Torque Wrench 1332 40-200Nm -VAG1332-
- Locating Pins -T10096-
Removing
- Remove the wheel.
- Remove the lower noise insulation.
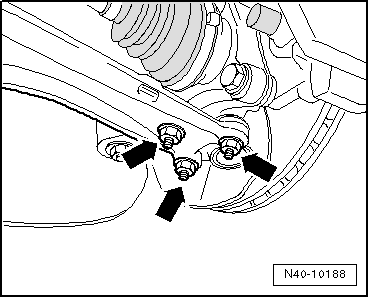
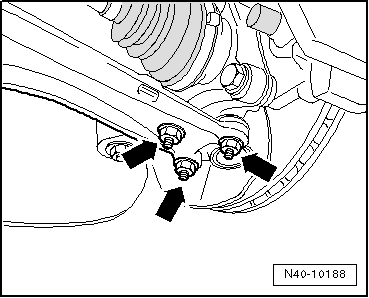
- Remove the nuts -arrows-.
- Remove the wheel bearing housing with the ball joint from the control arm.
- Secure position for mounting bracket.
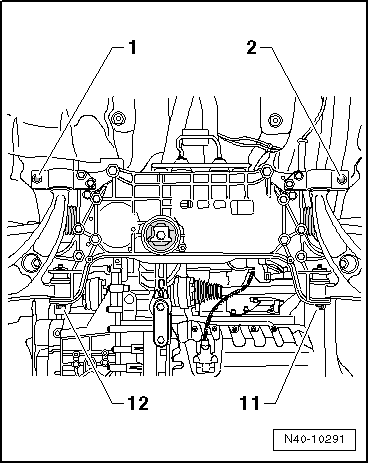
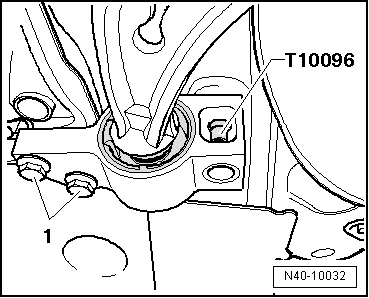
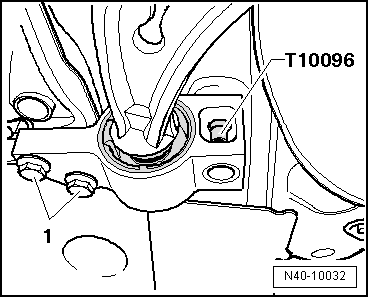
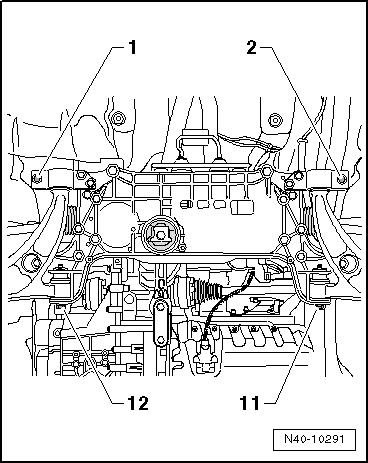
- Replace bolt -1- for left side, -2- for right side using Locating Pins -T10096- and tighten locating pins to 20 N·m.
Note
Locating Pins -T10096- may only be tightened to a maximum of 20 N·m, since otherwise the threads of the locating bolts will be damaged.
- Now unscrew -11- for left side of vehicle, -12- for right side of vehicle.
- Remove the bolts -1-.
- Remove control arm with mounting bracket.
Installing
- Insert control arm with mounting bracket into subframe.
- Insert bolts -11 and 12- but do not tighten.
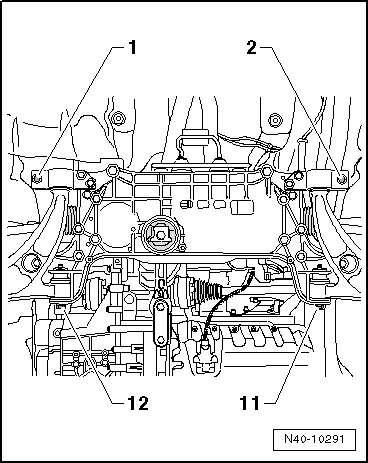
- Insert bolts -1- and tighten.
- Now replace Locating Pin -T10096- with a new bolt and tighten it.
- Bolt control arm tightly to ball joint -arrows-.
- Bolt the control arm onto the subframe in curb weight position -11 and 12-.
Install in reverse order of removal.
- Install lower noise insulation.
Note
Make sure the ball joint boot is not damaged or twisted.
Tightening Specifications
| Component | Tightening Specification |
Mounting bracket to body
|
70 N·m + 180º |
Ball joint to aluminum control arm:
|
60 N·m |
Ball joint to sheet steel control arm
|
100 N·m |
Control arm to subframe
|
70 N·m + 180º |
Test yourself
A quick Volkswagen Tiguan quiz: every answer comes with an explanation and a link to the manual page.
Was this page helpful?