Suspension, Wheels, Steering
Stabilizer Bar, Removing and Installing
In this manual: Suspension, Wheels, Steering
~3min read
Special tools and workshop equipment required
- Locating Pins -T10096-
- Torque Wrench 1332 40-200Nm -VAG1332-
- Engine and Gearbox Jack -VAS6931-
- Puller - Ball Joint -3287A-
Removing
- Remove front wheels.
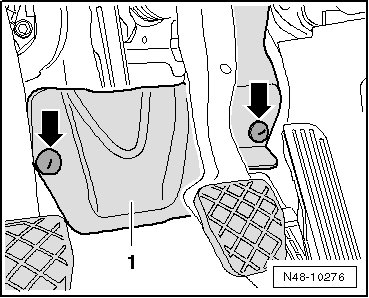
- Remove the nuts -arrows- and remove foot well trim -1-.
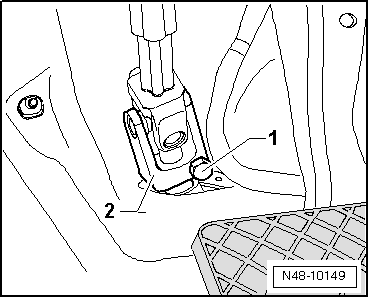
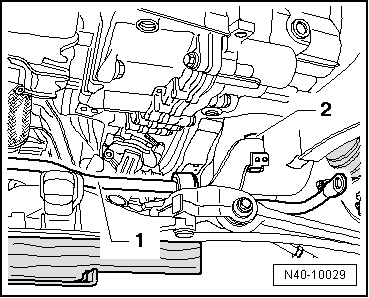
- Remove the bolt -1- and pull off universal joint -2- from steering gear.
Caution
If the universal joint is separated from the steering gear, the following work cannot be performed:
- Connect the battery.
- Switching on the ignition
- Turning the steering gear
- Turning the steering column.
These points must be observed since performing these actions could cause irreparable damage.
- Remove the lower noise insulation.
- Remove coupling rods from stabilizer.
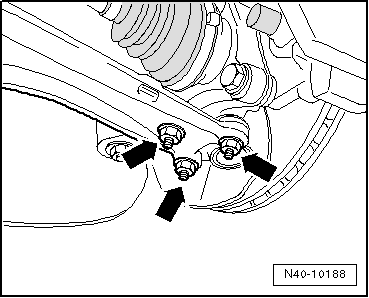
- Remove the nuts -arrows- on left and right side of vehicle.
- Loosen nut of tie rod ball joint on both sides, but do not unscrew yet.
To Protect the Thread, Screw the Nut on the Pin A Few Turns.
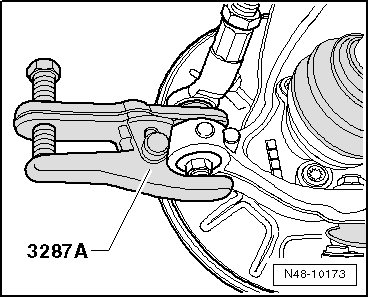
- Press off tie rod end from wheel bearing housing using Puller - Ball Joint -3287A-.
- Secure the subframe.
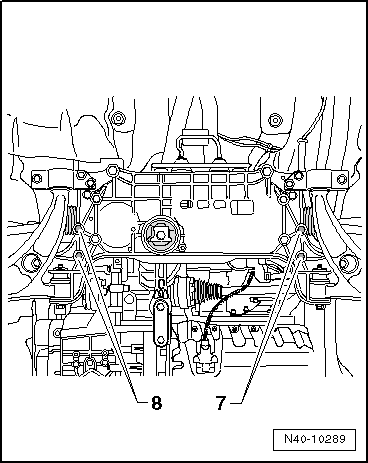
- Remove the stabilizer from subframe -7 and 8-.
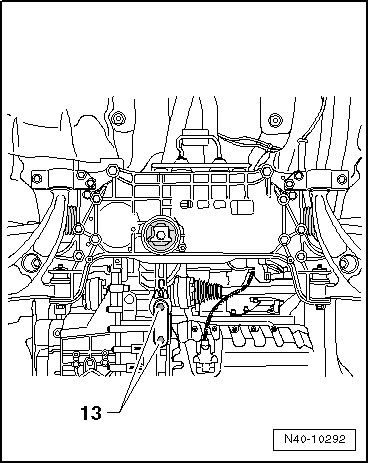
- Remove the bolts -13- and then remove the pendulum support from the transmission.
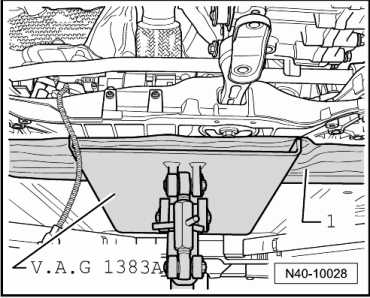
- Place the Engine and Gearbox Jack -VAS6931- under the subframe.
- Place for example a block of wood -1- between Engine/Gearbox Jack -VAG1383A- and subframe.
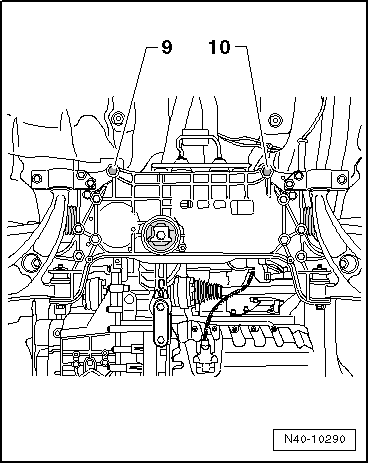
- Remove the bolts -9 and 10-, and slightly lower the subframe. Observe electrical wires when doing this.
- Slide stabilizer bar toward right, as seen in direction of travel.
- Now, lift the stabilizer bar -1- toward the front, over the subframe -2- and down, while turning the stabilizer bar slightly.
Installing
Install in reverse order of removal.
- Install the lower noise insulation.
Note
- Coat the seal on the steering gear with lubricant such as soft soap before installing the steering gear.
- After attaching steering gear to drive axle, make sure that seal on steering gear is positioned to mounting plate without kinks and opening to foot well is sealed correctly. Ingress of water and/or noises may be the result.
- Make sure sealing surfaces are clean.
Tightening Specifications
| Component | Tightening Specification |
Mounting bracket to body
|
70 N·m + 180º |
Stabilizer bar to coupling rod
|
65 N·m |
Stabilizer bar to subframe
|
20 N·m + 90º |
Ball joint to aluminum control arm:
|
60 N·m |
Ball joint to sheet steel control arm
|
100 N·m |
Control arm to subframe
|
70 N·m + 180º |
Tie rod end to wheel bearing housing
|
50 N·m |
Universal joint to steering gear
|
30 N·m |
| Exhaust system bracket to subframe . | |
Tightening Specifications, Subframe to Body
| Bolt | Tightening Specification |
M12 x 1.5 x 90
|
70 N·m + 180º |
M12 x 1.5 x 100
|
70 N·m + 180º |
M12 x 1.5 x 110
|
70 N·m + 90º |
Tightening Specifications, Pendulum Support to the Transmission
| Bolt | Tightening Specification |
M10 x 35
|
50 N·m + 90º |
M10 x 75
|
50 N·m + 90º |
M12 x 1.5 x 85
|
60 N·m + 90º |
- After installing, perform the basic setting on the Steering Angle Sensor -G85- using the Vehicle Diagnostic Tester.
Test yourself
A quick Volkswagen Tiguan quiz: every answer comes with an explanation and a link to the manual page.
Was this page helpful?