Brake lines
Repairing brake lines
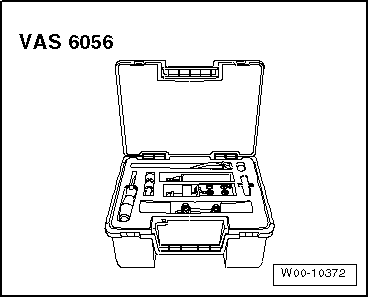
The flaring tool for brake lines -VAS 6056- can be used to flare brake lines with a 5 mm outer tube diameter without damaging the coating. This allows sections of brake lines to be replaced more cost-effectively in certain cases.
Work with flaring tool set V.A.G. 1356 is not permitted due to the coating and the diameter of the black brake lines.

Note
- Brake lines may only be bent up to a maximum of 90º; otherwise they kink or show deformations that impermissibly narrow the line cross-section.
- Preferably separate brake lines at the underbody.
- Select the position of the intermediate pieces so that they cannot rub against moving parts.
- Do not grease the spindle, clean only with denatured alcohol.
Required Special Tools, Test and Measuring Equipment and Auxiliary Items
- Flaring tool for brake lines -VAS 6056-
- Brake filling and bleeding unit -VAS 5234-
List of individual tools:
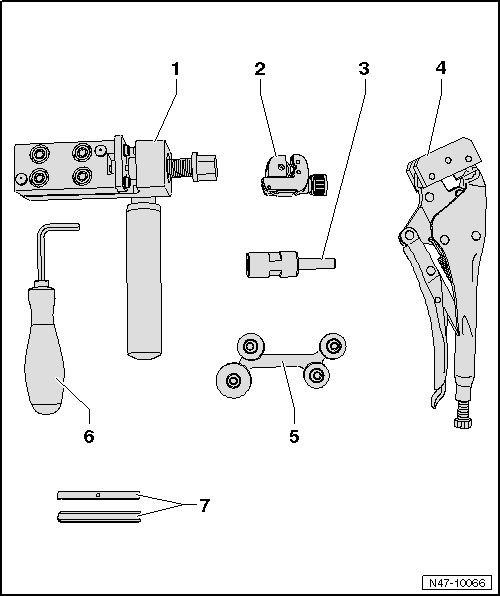

1) The grub screws (in the shaft and on the side) are adjusted and must not be changed!
Work instructions
- Unscrew the affected brake line from the brake caliper or wheel brake cylinder. Catch any escaping brake fluid and dispose of it properly.
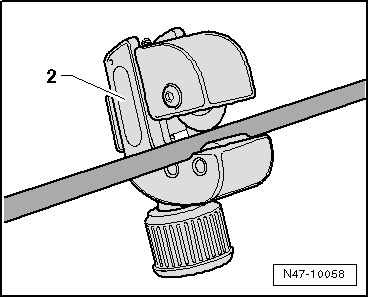
- Cut through the brake line at a suitable point (straight, freely accessible section) using the pipe cutter -2-.
- Remove the section to be replaced.
- Degrease the brake line surface.
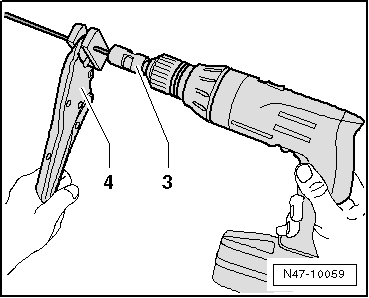
- Clamp the brake line in the grip pliers -4- so that approx. 50 mm protrudes from the plastic clamping jaws.
- Clamp the stripping tool -3- in a drill and place it on the brake line.
- Using a slow drill speed and light pressure against the brake line, strip the coating from the brake line.
The stripping length is set by the stop in the stripping tool.
- Pull the stripping tool off the brake line and remove the stripping residue.
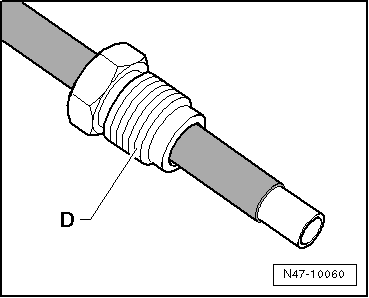
- Remove the grip pliers and slide the pipe nut -D- onto the brake line.
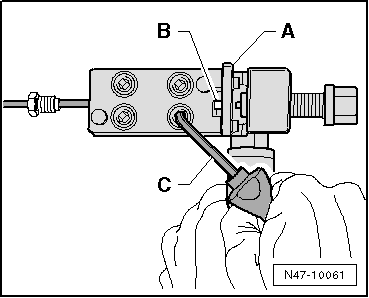
- Push the brake line -B- against the stop -A- in the flaring tool.

Note
The brake line must rest against the stop when tightening the hex socket screws, otherwise the flare will not form correctly.
- Clamp the brake line in the flaring tool up to the point where it can no longer be moved. Then fold up the stop -A- and tighten the hex socket screws crosswise using the angled hex key -C-.
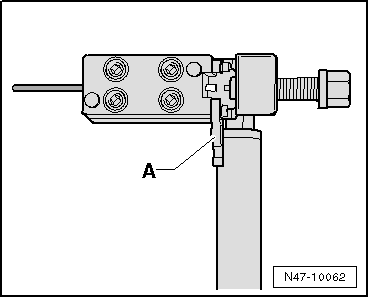
- Turn the spindle into the flaring tool as far as the stop.
- Turn the spindle back out.
- Loosen the hex socket screws crosswise.
- Remove the brake line from the flaring tool, clean and inspect the brake line and the flare.
Briefly flush the remaining section of brake line in the vehicle:
- Connect the brake filling and bleeding unit -VAS 5234-, push the hose of the bleeder bottle onto the flare of the brake line and run the brake filling and bleeding unit -VAS 5234- briefly until some brake fluid has flowed through.
- Blow out the new brake line with compressed air.

- Join the brake lines using connector -E-.
- Install the brake line.
- Bleed the brake system.

Flaring tool - assembly overview
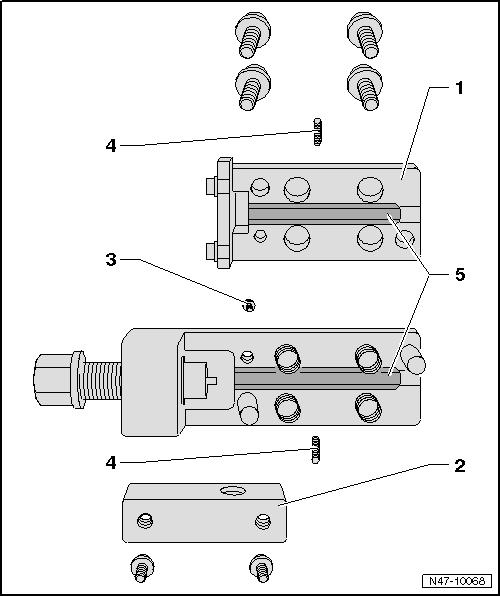
- Flaring tool upper part
- unscrew to change the flaring dies.
- Handle mounting
- must be unscrewed to access the mounting screw for the upper part.
- Mounting screw
- for flaring tool upper part
- Grub screws for flaring dies
- center and hold the flaring dies
- 2 mm hex socket
- Flaring dies
- Different
- Installation instructions
Installation instructions for flaring dies:
- VAS 6056/6 (dark) for black brake lines
- VAS 6056/7 (light) for green brake lines

Note
The arrow on the rounded side of the flaring dies must point toward the housing edge, and the straight side of the flaring dies must face the spindle when installed, otherwise the flare will not form correctly.
