Installed parts
Assembly overview - installed parts
Assembly overview - installed parts

Note
The illustration shows the left side. The right side is handled in the same way.
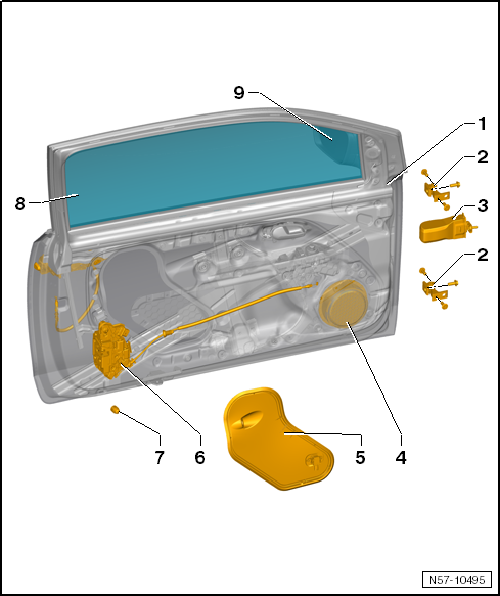
- Front door
- Remove and install
- adjust
- Hinges
- Door check strap
- Remove and install
- Speaker
- riveted into the door
- Cover
- Remove and install
- Door lock
- Remove and install
- Bump stop
- Door glass
- Remove and install
- Exterior mirrors
Assembly overview - fabric tape

Note
The illustration shows the left side. The right side is handled in the same way.
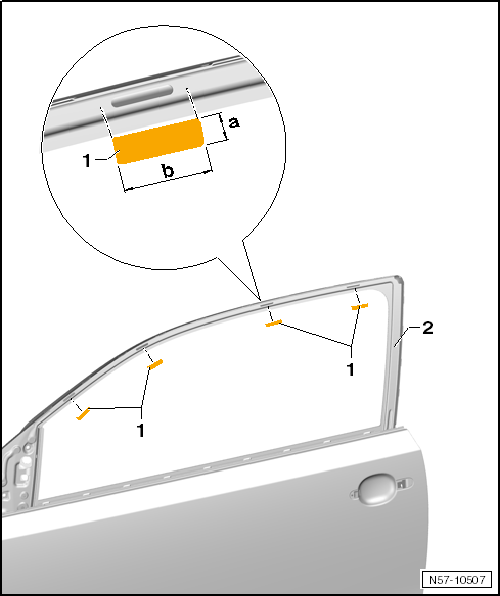
- Fabric tape
- Cut fabric tape from the roll and trim to size.
- Dimensions: dimension -a- 15 mm, dimension -b- 60 mm
- 4 pieces on 2-door vehicles
- 3 pieces on 4-door vehicles
- Self-adhesive
- Door frame
- Slotted holes must be fully covered.
Assembly overview - adhesive pad

Note
The illustration shows the left side. The right side is handled in the same way.
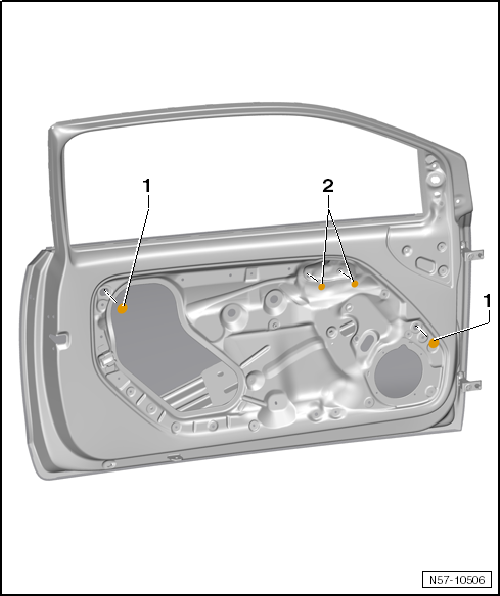
- Adhesive pad
- 2 pieces per front door
- If required, make from commercially available fabric adhesive tape.
- Dimensions: front adhesive pad 30 mm Ø, rear adhesive pad 40 mm Ø
- Adhesive pad
- 2 pieces per front door
- If required, make from commercially available fabric adhesive tape.
- Dimensions: 19 mm Ø
Assembly overview - door handle and door lock

Note
The illustration shows the left side. The right side is handled in the same way.
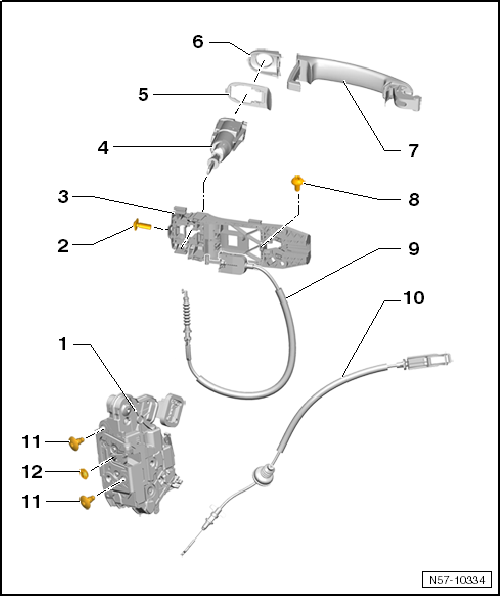
- Door lock
- Remove and install
- Bolt
- Tightening torque: 3 N·m
- for the lock cylinder
- bearing bracket
- Remove and install
- lock cylinder
- Remove and install
- not always installed on passenger door, depending on optional equipment
- Support
- Cover cap
- Removing and installing with lock cylinder
- Removing and installing without lock cylinder
- Door handle
- Remove and install
- Bolt
- Tightening torque: 1.5 N·m
- Loosening this bolt releases the bearing bracket from the door.
- Cable
- from door lock -1- to bearing bracket -3-
- Cable
- from inside door release to door lock -1-
- with grommet for passage through the cover
- Bolt
- 2 pieces
- Tightening torque: 18 N·m
- Cover cap
Removing and installing installed parts
Removing and installing door cover
Required Special Tools, Test and Measuring Equipment and Auxiliary Items
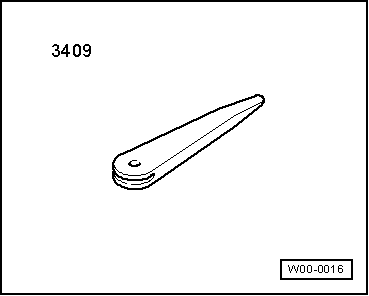
- Release Wedge -3409-

Note
Removing and installing applies only to the left cover. The right side is to be derived accordingly.
Removing

Note
There are no further working instructions for disconnecting the connector on pressure sensor -4-.
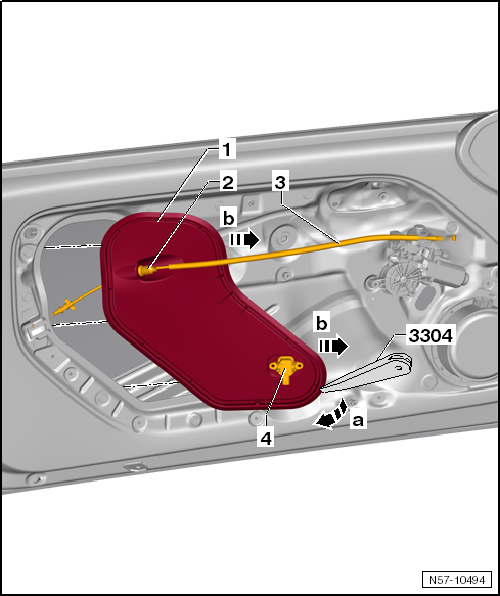
Carry out the following work:
- If equipped, remove window regulator handle.
- Remove the front door trim panel → Body assembly work, interior.
- If necessary, disconnect the connector on pressure sensor -4-.
- Lift cover -1- off at the lower area -arrow a-.
- Pull cover -1- forward out of the door -arrows b-.

Note
If necessary for the following work, pull cable -3- with grommet -2- out of cover -1-. If fitted, disconnect the connector on the grommet.
Installing
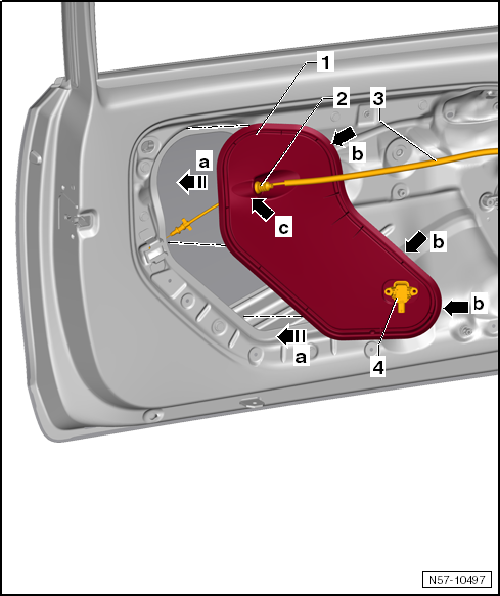
Carry out the following work:
Replace a damaged seal with 1K adhesive sealant -D 469 101 A3-.
- Thread cable -3- with grommet -2- into cover -1-.
- Engage grommet -2- in cover -1-.
- Insert cover -1- into door -2- -arrows a-.
- Snap cover -1- into place all around -arrows b-.

Note
Check the cover by running your fingers around the edge.
Removing and installing door check strap
Required Special Tools, Test and Measuring Equipment and Auxiliary Items
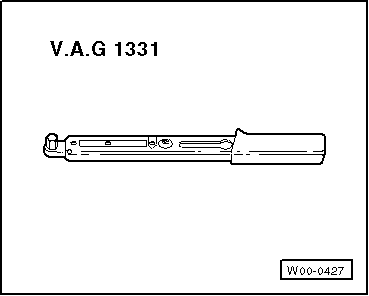
- Torque Wrench -V.A.G 1331-

Note
Removing and installing applies only to the left door check strap. The right side is to be derived accordingly.
Removing
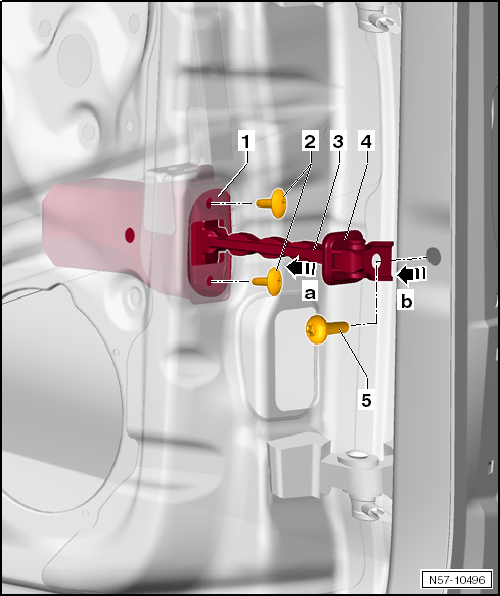
Carry out the following work:
- If equipped, remove window regulator handle.
- Remove the front door trim panel → Body assembly work, interior.
- Remove self-adhesive cover, or remove front speaker → Communication.
- Unscrew bolt -5- on the A-pillar.
- Unscrew bolts -2- and remove door check strap -1- through the speaker opening -arrow a-.
Installing
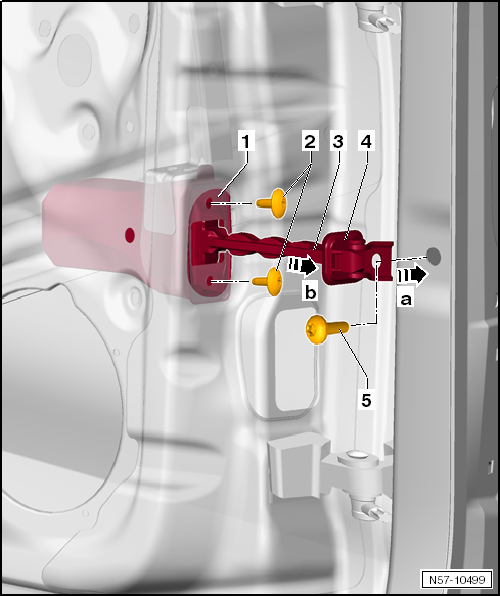
Carry out the following work:
Installation is performed in the reverse order.
Tightening torque bolt -2-: 30 N·m.
Tightening torque, bolts -3-: 9 N·m.
Removing and Installing Striker
Required Special Tools, Test and Measuring Equipment and Auxiliary Items
- Torque Wrench -V.A.G 1331-

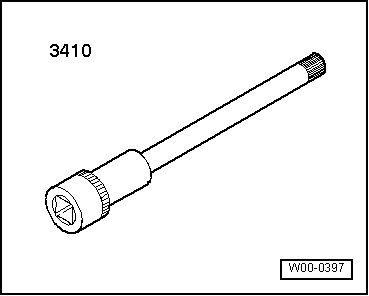
- Socket insert -3410-

Note
Removing and installing applies only to the left door striker. The right side is to be derived accordingly.
Removing
Carry out the following work:
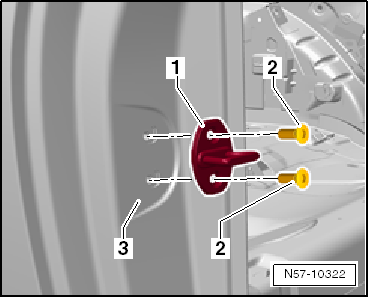
- Unscrew bolts -2- and remove door striker -1-.
Installing
Carry out the following work:
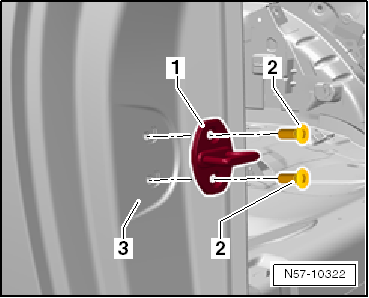
- Position door striker -1- on B-pillar -3- and tighten bolts -2-.

WARNING!
A door striker with curvature must be installed.
The curvature of the door striker points toward the vehicle interior.
Tightening torque bolts -2-: 20 N·m.
- Adjusting the door striker
Removing and installing door handle
Removing and installing

Note
Removing and installing applies only to the left door handle. The right side is to be derived accordingly.
Removing
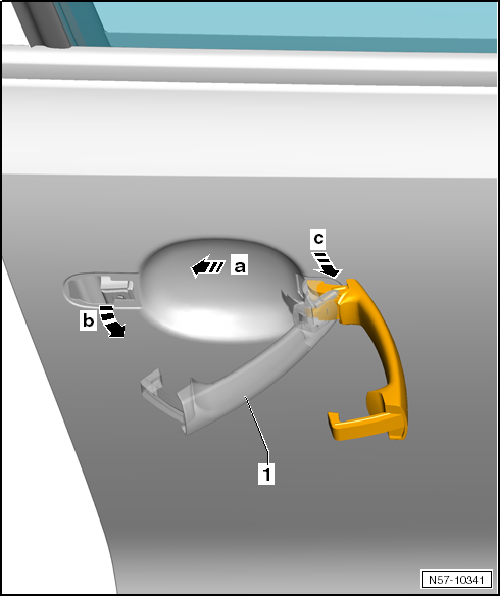
- On driver side, remove lock cylinder cover cap and remove lock cylinder.
- On passenger side, remove cover cap.
- Pull door handle -1- slightly rearward -arrow a- out of the bearing bracket seat.
- Swivel door handle in direction of arrow b.
- Remove door handle from bearing bracket -2- at a right angle -arrow c-.
Installing
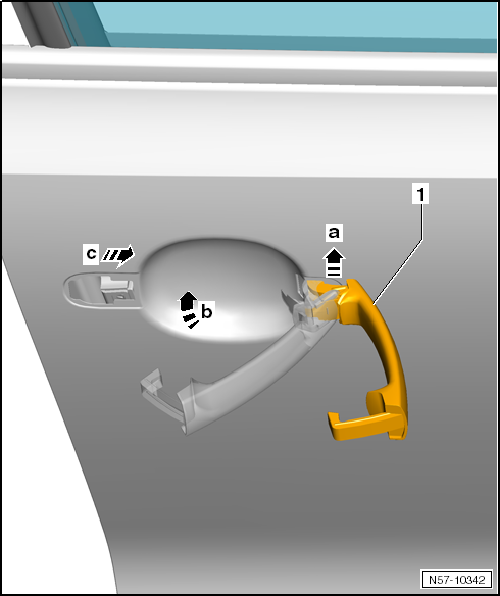
- Insert door handle -1- into bearing bracket at a right angle -arrow a-.
- Swivel door handle -1- into the door -arrow b-.
- Press door handle firmly forward -arrow c- into the seat in the bearing bracket.
Install lock cylinder or install cover cap.
- Afterwards, a function check must be performed with the door open.
Removing and installing lock cylinder cover cap
Removing

Note
- When removing the lock cylinder cover cap, do not turn the screwdriver and do not use the screwdriver as a lever.
- The lock cylinder and cover cap are only installed on the driver side.
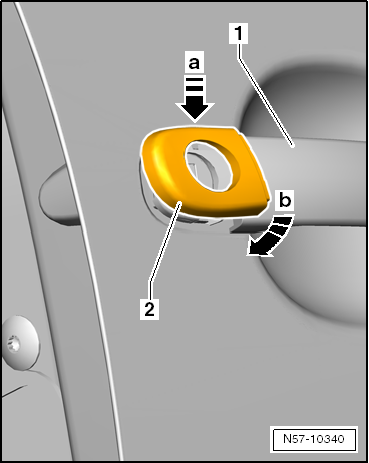
- Pull door handle off the door.
- Lightly press a small screwdriver -3- -arrow a- into the opening on the underside of the lock cylinder cover cap.
- Together with the screwdriver, gently pull lock cylinder cover cap -1- off the door at the underside -arrow b-.
- Slide cover cap upward off the lock cylinder.
Installing
Carry out the following work:
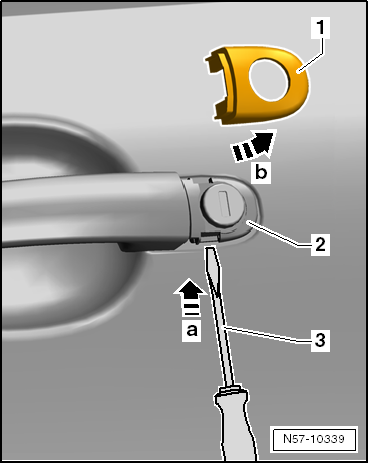
- Pull door handle -1- off the door.
- Slide lock cylinder cover cap -2- onto the lock cylinder from above at a slight angle -arrow a-.
- Press lock cylinder cover cap -2- against the door -arrow b- until the cover cap engages with the lock cylinder.
Removing and installing cover cap (without lock cylinder)
Required Special Tools, Test and Measuring Equipment and Auxiliary Items
- Installation tool -T10389-
Removing


Note
Other shapes may be installed for cover -4- shown.
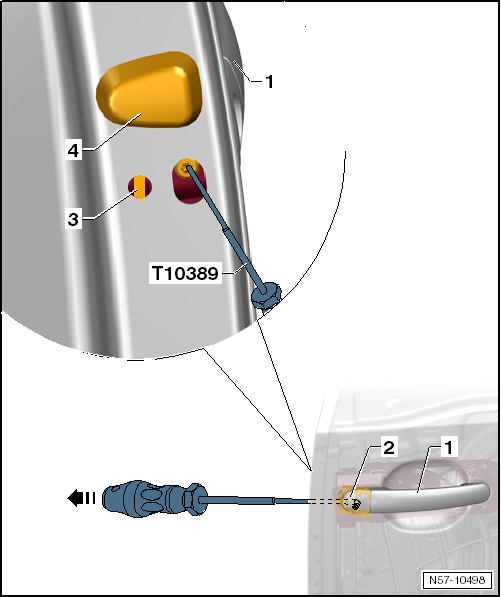
- Remove plug -4-.
- Guide installation tool -T10389- approx. 44 mm behind locking hook -3- of the bearing bracket.
- Pull installation tool -T10389- approx. 5 mm rearward -arrow-, until the hook unlocks.
- Pull door handle -1- off the door.
- Pull cover cap -1- out of the bearing bracket -arrow b-.
Installing
Carry out the following work:
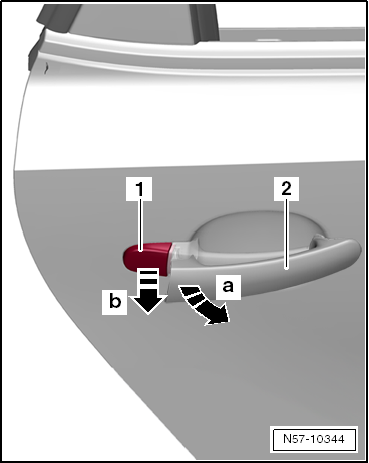
- Pull door handle -2- off the door in direction of arrow a.
- Slide cover cap -1- into the bearing bracket -arrow b-.
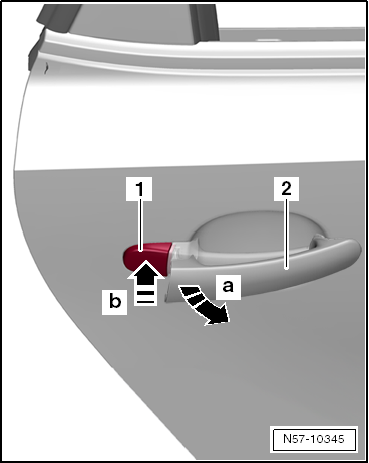
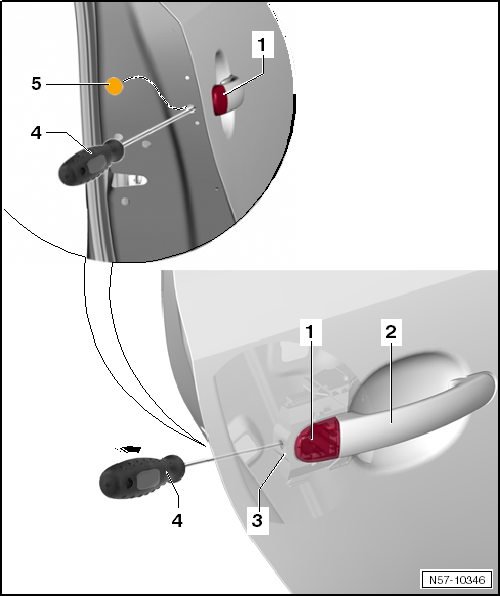
- Guide a flat-blade screwdriver -4- approx. 40 mm up to the locking hook -3- of the bearing bracket.
- Press cover cap -1- against the door.
- Push the screwdriver approx. 5 mm in -arrow-, until the hook locks.
- Attach plug -5-.
Removing and installing lock cylinder
Required Special Tools, Test and Measuring Equipment and Auxiliary Items
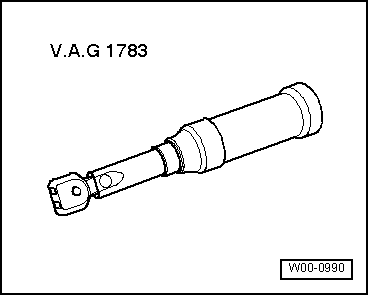
- Torque wrench -V.A.G 1783-

Note
Removing and installing applies only to a left lock cylinder. The right side is to be derived accordingly.
Removing

Note
Other shapes may be installed for covers -4 and 6- shown.
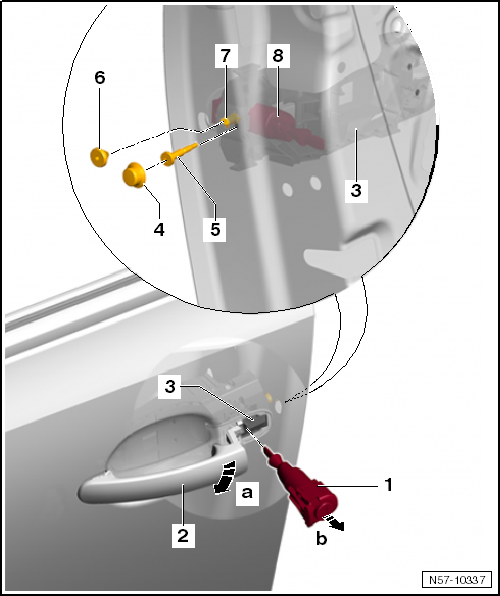
- Lock cylinder cover cap removed
- Remove covers -4 and 6-.
- Unscrew bolt -5-.
- Unscrew bolt -7- as far as it will go.
- Press in bolt -7-. Only then is the lock cylinder released.
- Pull door handle -2- off door -8-.
- Pull lock cylinder housing -1- out of bearing bracket -3- at a right angle to the door -arrow b-.
Installing
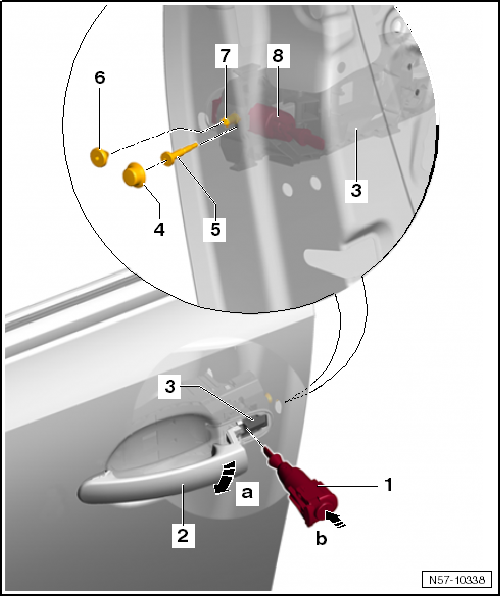
- Pull door handle -2- off door -8- -arrow a-.
- Push lock cylinder housing -1- into bearing bracket -3- at a right angle -arrow b-.
- Screw bolts -5 and 7- into bearing bracket.
- Tightening torque of bolts -5 and 7-: 3.5 N·m.

Note
During installation, the lock cylinder housing must be pressed against the outer door panel.
Installation is carried out in reverse order.
- Afterwards, be sure to carry out a function check with the door open.
Removing and installing door lock
Required Special Tools, Test and Measuring Equipment and Auxiliary Items
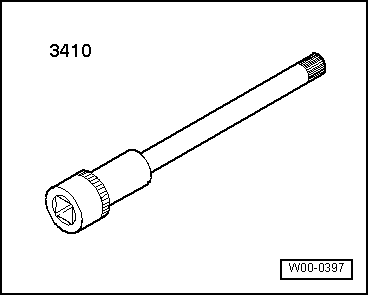
- Torque Wrench -V.A.G 1331-
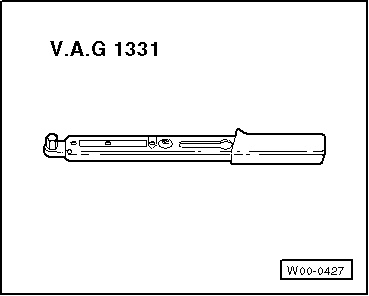
- Socket insert -3410-

Note
Removal and installation are described only for the right door lock. The left side is performed analogously.
Removing
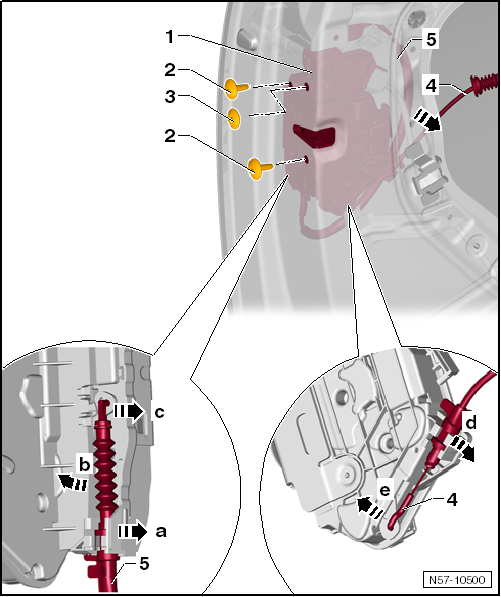
Carry out the following work:
- If equipped, remove window regulator handle.
- Remove the front door trim panel → Body assembly work, interior.
- Remove cover.
- On driver side, remove lock cylinder cover cap and remove lock cylinder.
- On passenger side, remove cover cap.
- If fitted, disconnect plug connector.
- Unscrew bolts -2-.
- Remove door lock -1- from door -arrow-.

Note
If required for the following work, the cables can be detached.
Detaching cable from bearing bracket
- Turn cable -5- 90º and remove it from holder.
- Swivel cable as far as necessary -arrow b- until it can be threaded out of the eyelet in door lock -1- -arrow c-.
Detaching cable to inside door release
- Turn cable -4- 90º and remove it from holder.
- Swivel cable as far as necessary -arrow d- until it can be threaded out of the eyelet in door lock -1- -arrow e-.
Installing

Carry out the following work:
- Install removed cables -4- and -5- on door lock -1-.
- Insert door lock -1- into door.
- If fitted, connect plug connector.
- Screw in bolts -2-.
Tightening torque bolts -2-: 18 N·m.
- Clip on cap -3-.
Installation is carried out in reverse order.
- Afterwards, be sure to perform a function check. If the cables are not correctly adjusted and locked, the door lock cannot be unlocked and the door therefore cannot be opened.
Removing and installing door seal
Removing and installing door inner seal
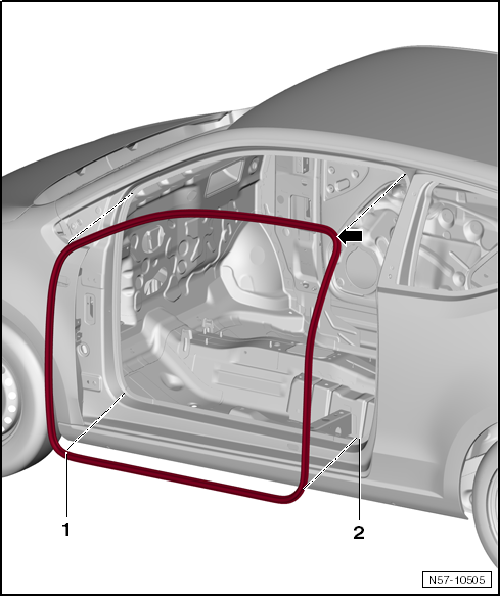
At the factory, the door inner seals are fitted with sealant, slipped onto the door flange and then rolled on.

Note
- When the seal is removed, the sealant is spread over the inside of the seal and the edges are slightly bent up. Once the seal is refitted, sealing and secure fit are no longer guaranteed.
- For this reason, every completely removed seal must be replaced with a so-called "hammer-on seal".
- On partially removed seals, press the edges of the seal together before installation.
- Removal and installation are described only for the left door inner seal. The right side is performed analogously.
- For better illustration, the front door has been removed.
Removing
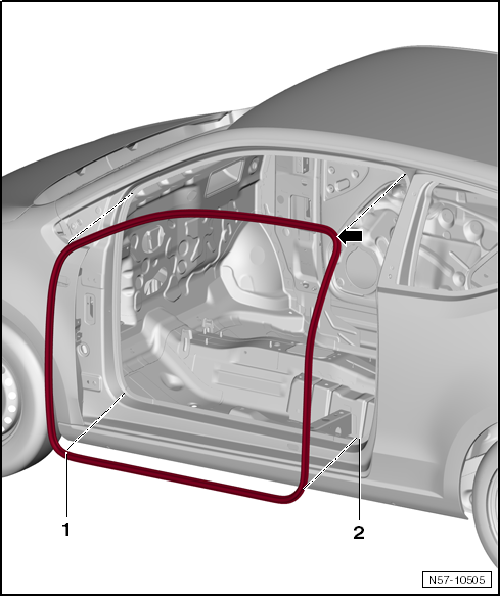
Carry out the following work:
- Remove sill trim → Body assembly work interior.
- To remove the door inner seal, remove the necessary pillar trims → Body assembly work interior.
- Pull door inner seal -1- off body flange -2-.
Installing
Carry out the following work:
- Begin installing door inner seal -1- at the upper radius of the door cutout -arrow-.
- Install pillar trims → Body assembly work interior.
- Install sill trim → Body assembly work interior.