Rear axle
Overview - Rear axle
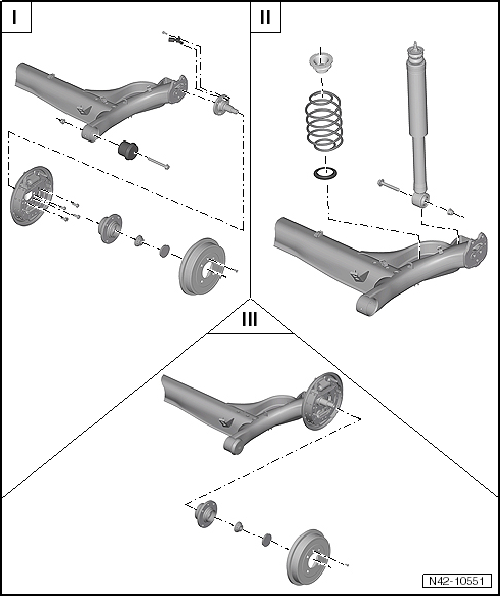
- "Axle beam"
- "Strut/shock absorber, spring"
- "Wheel bearing housing, wheel bearing unit, trailing arm"
Lower rear axle
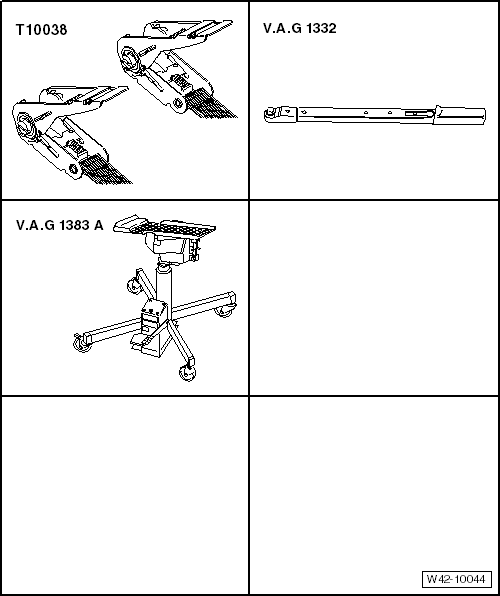
Required Special Tools, Test and Measuring Equipment and Auxiliary Items
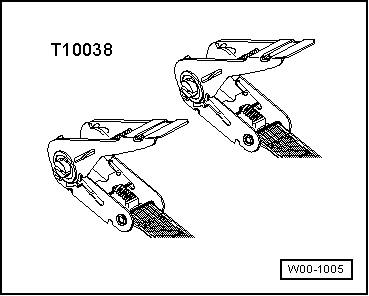
- Tension strap -T10038-
- Torque Wrench -V.A.G 1332-
- Engine and Transmission Hoist -V.A.G 1383 A-
Carry out the following work:
Lower axle beam
- Loosen wheel bolts.
- Raise the vehicle.
- Remove wheels.
- Remove coil springs
- Disconnect plug from speed sensor.
- Unclip wire -1- for speed sensor from retainers -arrows-.
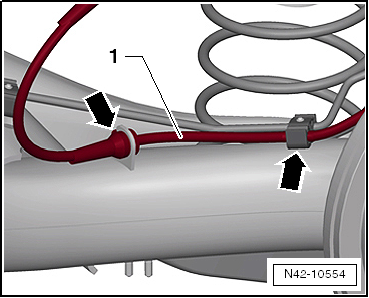
- Unclip brake lines -1- from guides on underbody -arrows-.

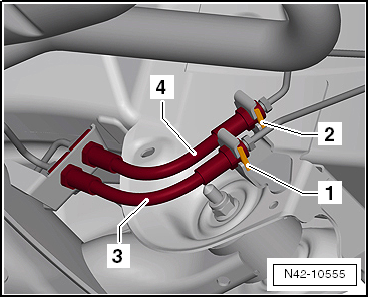
- Pry off retaining springs -1- and -2-.
- Remove brake lines -3- and -4- from bearing bracket.

Caution!
Brake lines must not be disconnected or kinked!
- Remove handbrake cable from bracket -arrow-.
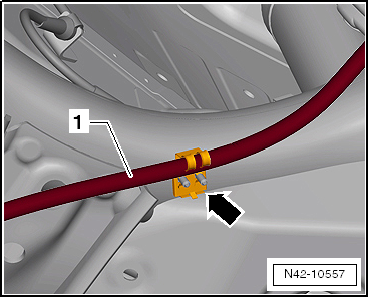
- Remove handbrake cables from brackets -arrows-.
- Position engine and transmission jack -V.A.G 1383 A- under axle beam and support it.
- Unscrew bolts -1- for axle beam, right and left.

- Lower axle beam -1- approx. 20 cm.
- Insert bolt for axle beam back into bearing bracket and secure with nut -2-.
- Secure axle beam with ratchet strap -T10038--3-.
Installing
Install in reverse order.
- Install wheels and tighten.

Tightening torques

Remove and install rear axle
Remove and install rear axle, up!

Required Special Tools, Test and Measuring Equipment and Auxiliary Items
- Torque Wrench -V.A.G 1332-
- Engine and Transmission Hoist -V.A.G 1383 A-
- Spring compressor for struts -V.A.G 1752-
- Brake pedal depressor -V.A.G 1869/2-
- Tension strap -T10038-
Carry out the following work:
Removing
- Remove handbrake lever trim → Body assembly work interior.
- Release handbrake lever.
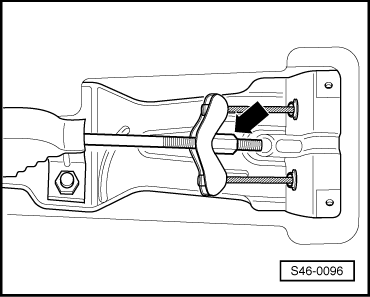
- Loosen adjusting nut -arrow- until the handbrake cables can be pulled out of the compensating bracket.
- Insert brake pedal loader -V.A.G 1869/2-.
This prevents the brake lines and the ABS hydraulic unit from draining!
- Loosen wheel bolts.
- Raise the vehicle.
- Remove wheels.
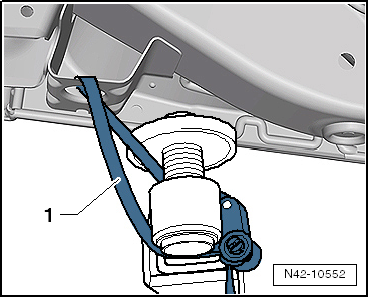
- Secure vehicle on both sides to the support arms of the lift using ratchet straps -T10038-.
- Tension strap -T10038-

WARNING!
If the vehicle is not secured, there is a risk that it may slip off the lift.
- If fitted, remove adapter for wheel housing shell → Body assembly work exterior.
- Remove coil springs
- Disconnect plug from speed sensor.
- Unclip wire -1- for speed sensor from retainers -arrows-.

- Unclip brake lines -1- from guides on underbody -arrows-.
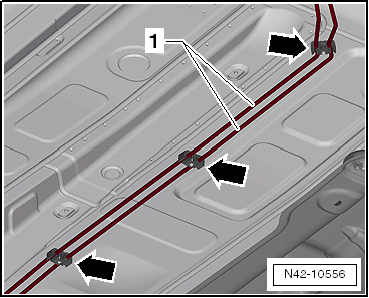
- Disconnect brake lines -arrows-.
- Pry off retaining springs -1- and -2-.
- Pull brake hoses -3- out of bearing brackets.
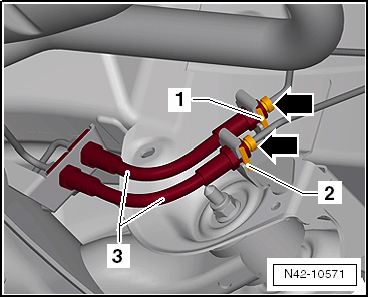
- Remove handbrake cables -1- from bracket -arrow-.
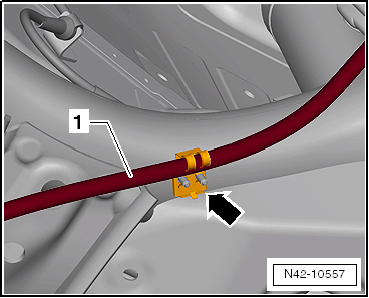
- Remove handbrake cables from brackets -arrows-.
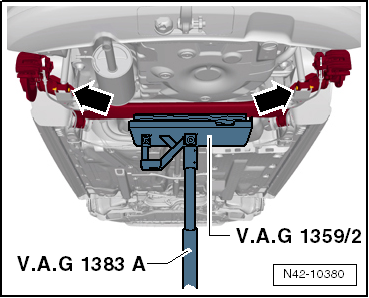
- Position engine and transmission jack -V.A.G 1383 A- under axle beam and support it.
- Secure rear axle with a strap or similar when lowering and removing.
- Unscrew bolts -1- for axle beam, right and left.

- Unscrew rear axle from shock absorbers -arrows-.
- Lower rear axle using engine and transmission jack -V.A.G 1383 A-.
Installing
- Tighten rear axle in unladen position.
Installation is carried out in reverse order.
- Bleed brake system → Brake systems.
- Adjust parking brake → Brake systems.
- Install wheels and tighten.
Tightening torques
