Strut/shock absorber, spring
Assembly overview - strut, shock absorber, spring

Note
- Welding and straightening work on load-bearing and wheel-guiding components of the wheel suspension is not permitted.
- Always replace self-locking nuts.
- Always replace corroded bolts/nuts.
- Rubber-metal bearings have a limited rotation range. Therefore, only tighten the bolted connections on components with rubber-metal bearings once the wheel bearing housing is raised (unladen position).

- Axle body
- Contact surface and threaded holes for stub axle free of paint and dirt
- Remove and install
- Support
- check for damage
- Spring
- Observe color coding
- Assignment → Electronic Parts Catalog "ETKA"
- observe the different suspension versions
- Surface of spring coil must not be damaged
- Remove and install
- Spring seat
- Shock absorber
- Remove and install
- Assignment → Electronic Parts Catalog "ETKA"
- Nut
- Self-locking
- replace after every removal
- Bolt
- Turn a further 180º after 50 N·m
- tighten in unladen position
- replace after every removal
Remove and install shock absorber
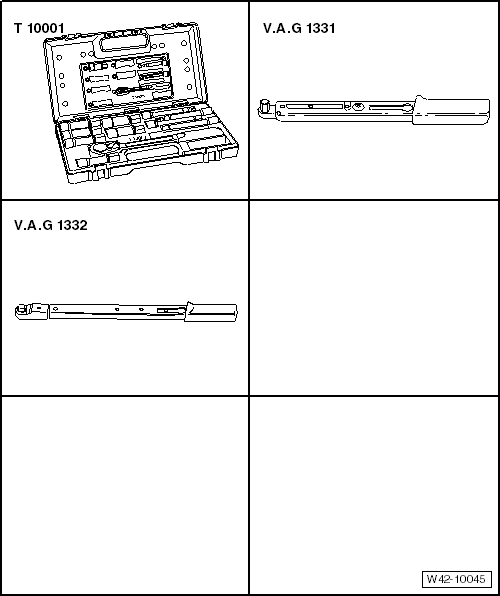
Required Special Tools, Test and Measuring Equipment and Auxiliary Items
- Shock absorber set -T10001-
- Torque Wrench -V.A.G 1331-
- Torque Wrench -V.A.G 1332-
Carry out the following work:
Removing
- Remove luggage compartment side trim → Body assembly work interior.
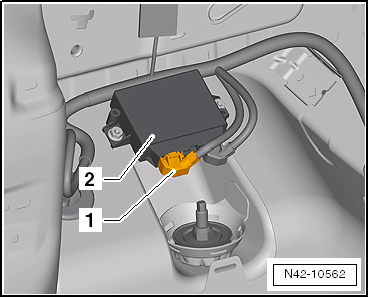
Left side of vehicle only, on vehicles with parking aid
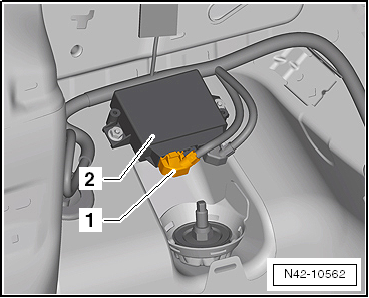
- Disconnect connector -1- from parking aid control module -J446--2-.
Continuation for all vehicles
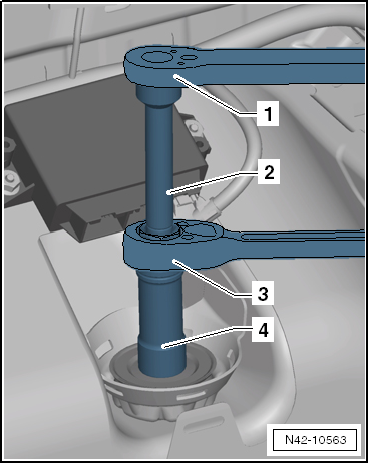
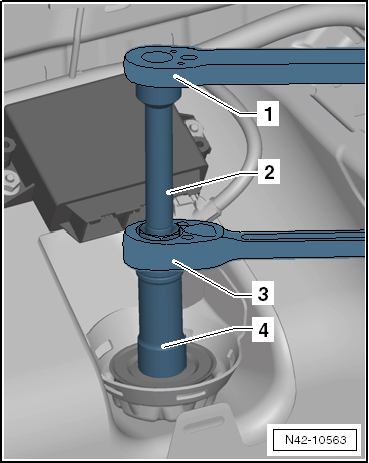
- Unscrew upper shock absorber mounting.
- Ratchet, commercially available
- -T10001/9-
- -T10001/11-
- -T10001/1-
- Raise vehicle to installation height.
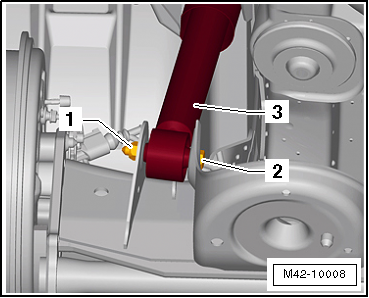
- Unscrew nut -1-, remove hex bolt -2- for damper -3- on rear axle.
- Remove damper.
Installing
- Install damper.
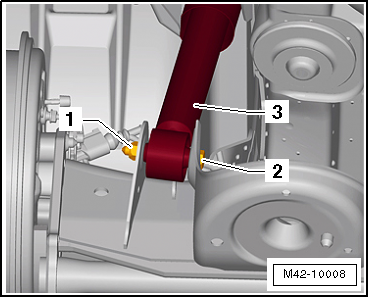
- Bolt damper -3- to rear axle with new hex bolt -2- and new nut -1-.
- Bolt damper to body.
- Torque Wrench -V.A.G 1332-
- -T10001/9-
- -T10001/11-
- -T10001/1-
Left side of vehicle only, on vehicles with parking aid
- Connect connector -1- to parking aid control module -J446--2-.
Continuation for all vehicles
- Tighten bolts in unladen position.
- Install luggage compartment side trim → Body assembly work interior.
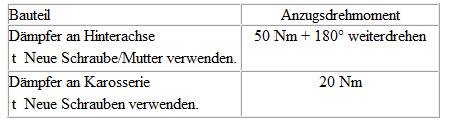
Tightening torques
Repair shock absorber
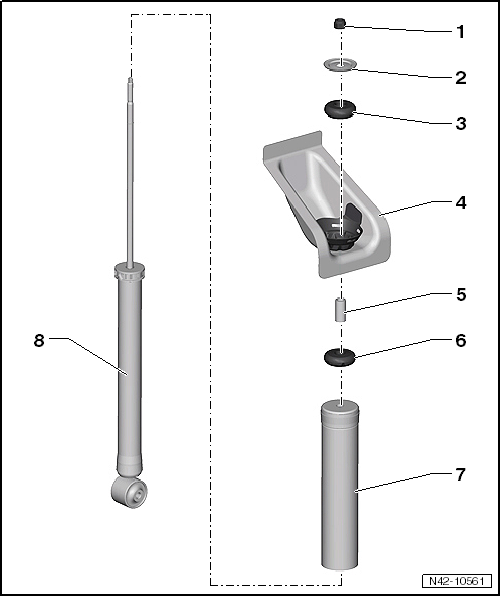
- Nut
- 20 N·m
- Self-locking
- replace after every removal
- unscrew
- bearing ring
- Bump stop
- Body
- spacer tube
- bearing ring
- protective tube
- Gas-pressure shock absorber
- individually replaceable
- Assignment → Electronic Parts Catalog "ETKA"
Function check
Compress damper by hand. The piston rod must slide in over its entire travel smoothly and with even force.
If the damper has sufficient gas filling pressure, the piston rod returns to its initial position.
If the piston rod does not return to its initial position by itself, the damper may still be serviceable provided there is no oil leakage.
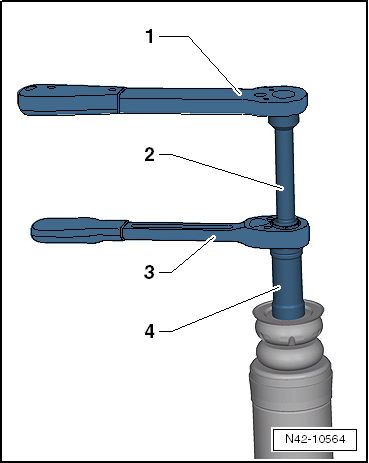
Unscrew hex nut from gas-pressure shock absorber
- Commercially available ratchet
- Insert tool -T10001/9-
- -T10001/11-
- Insert tool -T10001/1-
Remove and install spring
Required Special Tools, Test and Measuring Equipment and Auxiliary Items
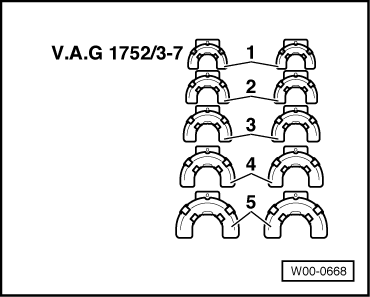
- Spring compressor for struts -V.A.G 1752-

- Spring retainer -V.A.G 1752/3A-
Carry out the following work:
Removing
- Raise the vehicle.
Only for vehicles with natural gas engines
Remove underbody panelling → Body assembly work exterior.
Continuation for all vehicles
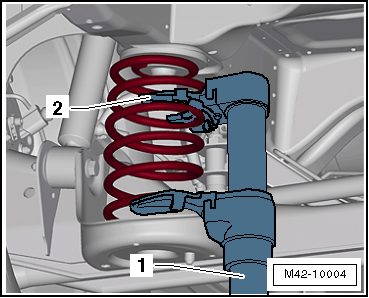
- Install spring compressor -1-.
- Coil spring compressor -V.A.G 1752/1-
- Spring retainer -V.A.G 1752/3A-

WARNING!
Make sure the spring is correctly seated in the spring holder -V.A.G 1752/3A--2- (risk of accident).
- Compress the spring until it can be removed.

Note
Use a wrench or a reversible ratchet to tighten the spring compressor.
Installing
- Check that the pad is not damaged; replace if necessary.
- Insert the spring seat pad into the upper end of the spring.
- The bead of the spring seat pad -arrow- must sit correctly against the spring.
- Release the spring while placing the upper spring seat on the body lug.
- Remove the spring compressor.
