Music media players
INFORMATION AND ADVICE
! MP3, short for MPEG 1, 2 & 2.5 Audio Layer 3, and WMA, short for Windows Media Audio and a Microsoft property, are audio compression standards that allow dozens of music files to be stored on a single disc.! Connecting an iPod: To play MP3 files, connect the iPod using the USB socket (limited functions).
To play iTunes files, connect the iPod using the auxiliary socket (AUX). To play a burned CDR or CDRW, select the ISO 9660 level 1, level 2 or, preferably, Joliet standard when burning.
If the disc is burned in another format, playback may not work correctly.
On the same disc, it is recommended to always use the same burning standard, at the lowest possible speed (4x maximum) for optimum sound quality.
For a multi-session CD, the Joliet standard is recommended.
 To be read, a USB stick must be formatted FAT 32.
 The car radio only plays audio files with the “.mp3” extension at a bit rate from 8 Kbps to 320 Kbps, and with the “.wma” extension at a bit rate from 5 Kbps to 384 Kbps.
It also supports VBR (Variable Bit Rate) mode.
Any other file type (.mp4, .m3u...) cannot be played.
 It is recommended to name files with fewer than 20 characters, excluding special characters (e.g. « » ? ; ù), to avoid any playback or display problems.
 While playing, exit the source
"SD-Card" or "USB" before removing the SD card or USB stick from its reader.
Insert the audio or MP3 CD into the player, the SD card into the card reader or the USB device into the USB port. Playback starts automatically.

! The list of tracks or MP3/WMA files appears below the “Media” menu. 2.

Press this button.

3.

When the "MEDIA" screen
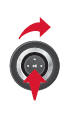
is displayed, turn the rotary control up or down to select the previous or next compatible source.

4.

Press the MEDIA button.

5.
Press the
MEDIA button again or select the "Media" menu function and press OK to confirm.


6.

Select the
"Choose source" function and press OK to confirm.


7.

Select the desired
music source. Press OK to confirm. Playback starts.

! Playback and display of an MP3/WMA compilation may depend on the burning software and/or settings used. We recommend using the ISO 9660 burning standard. JUKEBOX
COPYING A CD TO THE HARD DRIVE, A USB STICK, AN SD CARD
1.  Insert an audio / MP3 CD, a
USB stick or an SD card.

! Check that the active MEDIA source matches the medium in use (CD, USB or SD card).
2.  Press the MEDIA button.
Press the MEDIA button again or select the "Media" menu and press OK to confirm.

3.  Select "Jukebox management"
then "Copy" and press OK at each step to confirm.


4.  Select, for example, "Copy
from MP3 CD" and press OK to confirm.


5.  Select the desired tracks
then "Copy selection", or select all tracks with "Copy all".

6.  Select "[New folder]"
to create a new folder, or select an existing folder (created beforehand).


7.  "Enter file names?"
: choose "Yes" to edit them or "No".


8.  For copying an MP3 CD, then select
"Copy with listening", "Fast copy" / "High quality (192 kbit/s)" or "Normal quality (128 kbit/s)", then select "Start copy".

9.  Confirm the warning message
by pressing "OK" to start copying.


JUKEBOX RENAMING OR DELETING AN ALBUM ! Check that the active audio source is different from the Jukebox in order to rename or delete a track / folder.
1. Activate playback of a source other than Jukebox (CD, radio, etc.).
2.  Press the MEDIA button.

3.  Press the
MEDIA button again or select the "Media" menu and press OK to confirm.

4.  Select "Jukebox management"
and press OK to confirm.


5.  Select "Delete / rename"
and press OK to confirm.


PLAYING THE JUKEBOX
1.  Press the MEDIA button.
Press the MEDIA button again or select the "Media" menu and press OK to confirm.

2.  Select "Jukebox management"
and press OK to confirm.

3.  Select "Playback mode"
and press OK to confirm.
Choose "Folders & files" or "Playlists", then press OK to confirm.

 Press the ESC button to
return to the first file level.
It is possible to create playlists in the Jukebox.
"Media" menu > Jukebox management > Create playlist. Add the desired tracks one by one, then save the change.
Deleting / renaming: you must then select the “Playlists” playback mode. PLAYING A DVD VIDEO1. Insert the DVD into the player. Playback starts automatically.

2.  If the DVD does not appear on the screen,
press the MODE button to access the "MEDIA" screen which displays the DVD screen.

3.  Press the MEDIA button at any time to
access the "DVD menu", or the "Media" menu functions for video settings (brightness/contrast, picture format...).

 The 4-direction selector and the chrome rotary control are used to move the DVD selection pointer. Change chapter by pressing key
 or
 .
! Select the desired video source (“DVD-Video”, “Auxiliary input (video)”). Press OK to confirm. Playback starts. USING THE AUXILIARY (AUX) AUDIO / VIDEO INPUT / RCA CABLE NOT SUPPLIED 1. Connect the portable device (MP3 player, camcorder, camera...) to the RCA socket (white and red for audio; red and yellow for video) located in the glovebox using a JACK/RCA audio cable.
2.  Press the MEDIA button and
press it again or select the "Media" menu function and press OK to confirm.

! If the auxiliary input is not enabled, select “Auxiliary input management (Aux)” to enable it.
3.  Select "Choose source"
then "Auxiliary input (video)" and press OK to activate it.


4.  Select the AUX music source
and press OK to confirm. Playback starts automatically.

! The display and control of functions is done via the portable device.
Test yourself
A quick Citroen C5 quiz: every answer comes with an explanation and a link to the manual page.