General Procedures - Refrigerant Oil Addition
Filling
- Refer to the Refrigerant Oil Addition (when new components are installed) table below for the amount of refrigerant oil to add and the method of addition.
- To select the proper Refrigerant Management Center special tool, refer to
Refer to: Climate Control Tools and Equipment (412-00 Climate Control System - General Information, General Procedures).
- Complete all steps for the component being serviced.
Charge the air conditioning (A/C) system with the specified amount of refrigerant oil.Refrigerant Oil Addition, R-1234yf (when installing new components)
Component Motorcraft® R-1234yf Refrigerant PAG Oil (YN-35) Quantity, fl oz (ml) Method of Addition After installing the A/C compressor. The service compressor contains a full oil charge. Add the required amount of oil plus the amount recovered during refrigerant recovery. Refer to the oil addition steps above. After installing the receiver-drier. 2 fl oz (60 ml) plus the amount recovered during refrigerant recovery. Add through the service port on the low side during system charging. After installing the receiver-drier element. 1 fl oz (30 ml) plus the amount recovered during refrigerant recovery. Add through the service port on the low side during system charging. After installing the condenser core. 1.5 fl oz (45 ml) plus the amount recovered during refrigerant recovery. Add directly into the inlet port or through the service port on the low side during system charging. After installing the condenser core and receiver-drier desiccant element. 2 fl oz (60 ml) plus the amount recovered during refrigerant recovery. Add directly into the inlet port or through the service port on the low side during system charging. After installing the evaporator core. 1.5 fl oz (45 ml) plus the amount recovered during refrigerant recovery. Add directly into the inlet port or through the service port on the low side during system charging. After installing/assembling the thermostatic expansion valve. Amount collected during refrigerant recovery. Add through the service port on the low side during system charging. After installing the refrigerant hose/line. 2 fl oz (60 ml) plus the amount collected during refrigerant recovery a. Add through the service port on the low side during system charging. After repairing an O-ring leak. 1 fl oz (30 ml) plus the amount collected during refrigerant recovery b. Add through the service port on the low side during system charging. After repairing a service port leak. Amount collected during refrigerant recovery. Add through the service port on the low side during system charging. a If excessive amount of Motorcraft® R-1234yf Refrigerant PAG Oil (YN-35) is lost due to a ruptured/separated hose or other damage, the entire system must be replenished with Motorcraft® R-1234yf Refrigerant PAG Oil (YN-35). The receiver-drier must also be replaced. b This amount may be used to repair one or more O-ring leaks. Do not multiply the amount of Motorcraft® R-1234yf Refrigerant PAG Oil (YN-35) by the number of O-ring leaks repaired.
Refrigerant Oil Addition (R-134a) (when installing new components)
Component Motorcraft® PAG Refrigerant Compressor Oil (YN-12-D) Amount, fl oz (ml) Method of Addition After installing the A/C compressor. The service compressor contains a full oil charge. Add the required amount of oil plus the amount recovered during refrigerant recovery. Refer to the oil addition steps above. After installing the receiver-drier. 2 fl oz (60 ml) plus the amount recovered during refrigerant recovery. Add through the service port on the low side during system charging. After installing the receiver-drier element. 1 fl oz (30 ml) plus the amount recovered during refrigerant recovery. Add through the service port on the low side during system charging. After installing the condenser core. 1.5 fl oz (45 ml) plus the amount recovered during refrigerant recovery. Add directly into the inlet port or through the service port on the low side during system charging. After installing the condenser core and receiver-drier desiccant element. 2 fl oz (60 ml) plus the amount recovered during refrigerant recovery. Add directly into the inlet port or through the service port on the low side during system charging. After installing the evaporator core. 1.5 fl oz (45 ml) plus the amount recovered during refrigerant recovery. Add directly into the inlet port or through the service port on the low side during system charging. After installing/assembling the thermostatic expansion valve. Amount collected during refrigerant recovery. Add through the service port on the low side during system charging. After installing the refrigerant hose/line. 2 fl oz (60 ml) plus the amount collected during refrigerant recovery a. Add through the service port on the low side during system charging. After repairing an O-ring leak. 1 fl oz (30 ml) plus the amount collected during refrigerant recovery b. Add through the service port on the low side during system charging. After repairing a service port leak. Amount collected during refrigerant recovery. Add through the service port on the low side during system charging. a If excessive amount of Motorcraft® PAG Refrigerant Compressor Oil (YN-12-D) is lost due to a ruptured/separated hose or other damage, the entire system must be replenished with Motorcraft® PAG Refrigerant Compressor Oil (YN-12-D). The receiver-drier must also be replaced. b This amount may be used to repair one or more O-ring leaks. Do not multiply the amount of Motorcraft® PAG Refrigerant Compressor Oil (YN-12-D) by the number of O-ring leaks repaired.
- To select the proper Refrigerant Management Center special tool, refer to
Oil Injection Using the Refrigerant Oil Injector Kit
- Adjust the oil injector plunger and fill the injector with the correct amount of clean, new Motorcraft® R-1234yf Refrigerant PAG Oil (YN-35) or Motorcraft® PAG Refrigerant Compressor Oil (YN-12-D).
- For proper refrigerant Airsept R134a or R1234yf air conditioning large oil injector special tool,
refer to: Climate Control Tools and Equipment (412-00 Climate Control System - General Information, General Procedures).
- For proper refrigerant Airsept R134a or R1234yf air conditioning large oil injector special tool,
- Install the oil injector onto the low-side service port valve.
- Start the engine and, using the HVAC controls, turn on the air conditioning. Turn the oil injector plunger clockwise and inject the refrigerant oil.
Inspection
Compressor Type
NOTICE: The A/C refrigerant analyzer must be used before recovering any vehicle A/C refrigerant. Failure to do so will put most of the shop's refrigerant at risk of contamination. If the vehicle A/C refrigerant is contaminated, direct the customer to a service center that performed the last A/C service. If the customer wishes to pay the additional cost, use A/C recovery equipment designed to recover contaminated A/C refrigerant. Dispose of all contaminated A/C refrigerant as hazardous waste. For all equipment, follow the manufacturer's instructions.
NOTICE: For R-1234yf refrigerant,
Motorcraft® Refrigerant R-1234yf PAG Oil (YN-35) must only be used as the refrigerant system lubricant. Adding any oil other than Motorcraft® R-1234yf Refrigerant PAG Oil (YN-35) to the refrigerant system will damage the A/C compressor and contaminate the refrigerant system.NOTICE: For R-134a refrigerant,
Motorcraft® PAG Refrigerant Compressor Oil (YN-12-D) must only be used as the refrigerant system lubricant. Adding any oil other than Motorcraft® PAG Refrigerant Compressor Oil (YN-12-D) to the refrigerant system will damage the A/C compressor and contaminate the refrigerant system.NOTICE: During normal air conditioning operation, oil circulates through the refrigerant system and a small amount remains in each component. If certain system components are removed, some refrigerant oil will leave with the component. To maintain the original total oil charge, the oil loss must be compensated by adding oil to the system with the new part.
NOTICE: Perform oil balancing when replacing a compressor in which the system will not be flushed.
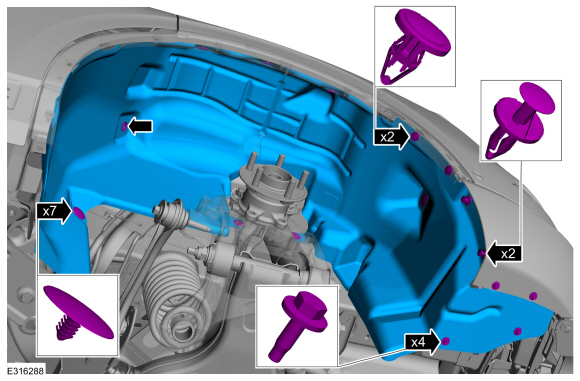
Check the location of the compressor drain plug to identify the compressor type. After identifying the compressor type, go to the appropriate compressor type below for compressor oil selection steps.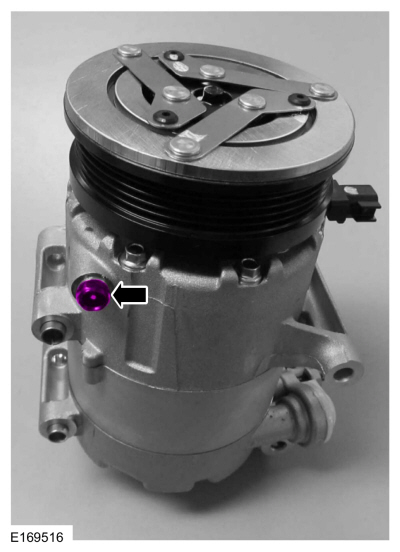
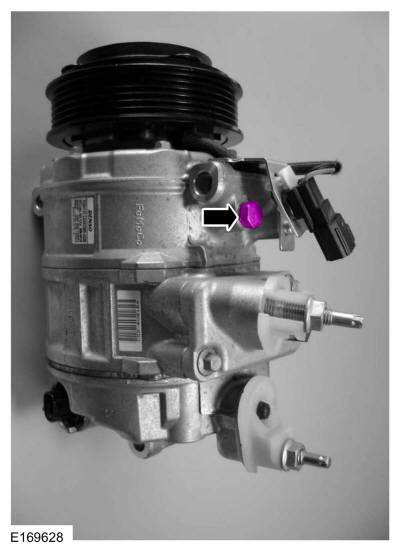
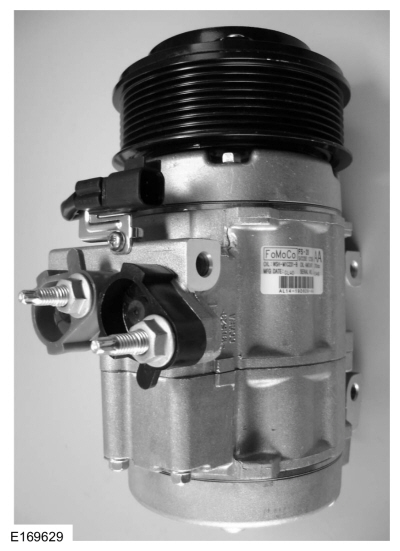
Type 1
NOTICE: Make sure the old A/C compressor shaft rotates, not just the A/C pulley.
Remove the oil drain plug and rotate the old A/C compressor clutch 6 to 8 turns while collecting the oil in a clean graduated container.
- Install the oil drain plug into the old A/C compressor.
- Remove the suction and discharge port plugs from the new A/C compressor.
NOTICE: Make sure the new A/C compressor shaft rotates, not just the A/C pulley.
Remove the drain plug and rotate the new A/C compressor clutch 6 to 8 turns while collecting the oil in a clean graduated container.- Measure the amount of oil drained from the old A/C compressor and add the same amount of new oil to the new A/C compressor.
- Install the oil drain plug into the new A/C compressor.
Torque: 177 lb-in (20 N·m) - Install the suction and discharge port plugs on the new A/C compressor.
Type 2
- Remove the A/C compressor clutch and A/C compressor clutch field coil from the old A/C compressor. Refer to A/C Compressor Clutch and Duct. Refer to A/C Compressor Clutch Field Coil Removal and Installation in Group 412.
- Remove the oil drain plug from the old A/C compressor.
- Press the suction valve to make sure there is proper ventilation while draining oil from the old A/C compressor.
- Drain the oil from the old A/C compressor, collecting the oil in a clean graduated container.
- Install the oil drain plug into the old A/C compressor.
- Remove the A/C compressor clutch and A/C compressor clutch field coil from the new A/C compressor. Refer to A/C Compressor Clutch and Duct. Refer to A/C Compressor Clutch Field Coil Removal and Installation in Group 412.
- Remove the oil drain plug from the new A/C compressor.
- Remove the suction port plug.
- Press the suction valve to make sure there is proper ventilation while draining oil from the new A/C compressor.
- Drain the oil from the new A/C compressor, collecting the oil in a clean graduated container.
- Measure the amount of oil drained from the old A/C compressor and add the same amount of new oil to the new A/C compressor.
- Install the oil drain plug into the new A/C compressor.
Torque: 80 lb-in (9 N·m) - Install the suction port plug.
- Install the A/C compressor clutch and A/C compressor clutch field coil on the new A/C compressor. Refer to A/C Compressor Clutch and Duct. Refer to A/C Compressor Clutch Field Coil Removal and Installation in Group 412.
Type 3
NOTICE: Make sure the old A/C compressor shaft rotates, not just the A/C pulley.
Remove the oil drain plug and rotate the old A/C compressor clutch 6 to 8 turns while collecting the oil in a clean graduated container.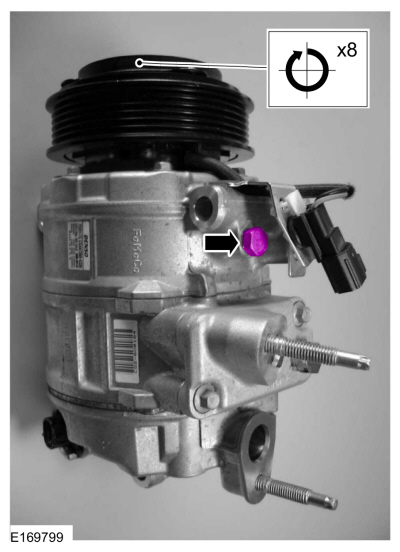
- Install the oil drain plug into the old A/C compressor.
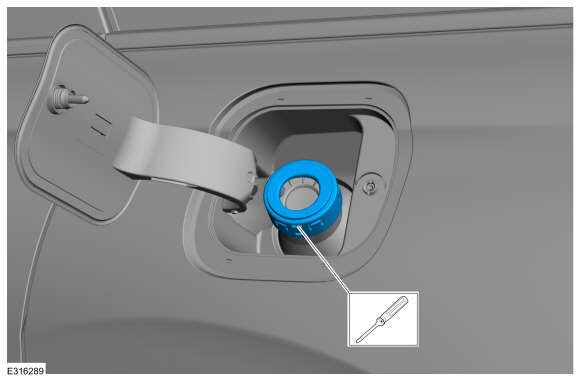
- Remove the suction and discharge port plugs from the new A/C compressor.
NOTICE: Make sure the new A/C compressor shaft rotates, not just the A/C pulley.
Remove the drain plug and rotate the new A/C compressor clutch 6 to 8 turns while collecting the oil in a clean graduated container.- Measure the amount of oil drained from the old A/C compressor and add the same amount of new oil to the new A/C compressor.
- Install the oil drain plug into the new A/C compressor.
Torque: 22 lb-ft (30 N·m) - Install the suction and discharge port plugs on the new A/C compressor.
Type 4
NOTICE: Make sure the old A/C compressor shaft rotates, not just the A/C pulley.
Rotate the old A/C compressor clutch 6 to 8 turns while collecting the oil in a clean graduated container from the A/C compressor discharge port.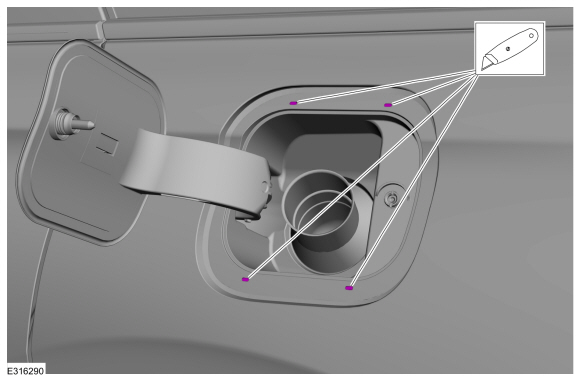
- Remove the suction and discharge port plugs from the new A/C compressor.
NOTICE: Make sure the new A/C compressor shaft rotates, not just the A/C pulley.
Tilt the new A/C compressor at an angle and rotate the new A/C compressor clutch 6 to 8 turns, collecting the oil in a clean graduated container from the A/C compressor discharge port.- Measure the amount of oil drained from the old A/C compressor and add the same amount of new oil to the new A/C compressor.
- Install the suction and discharge port plugs on the new A/C compressor. Suction and discharge port plug retaining bolt assembly torque.
Torque: 52 lb-in (5.9 N·m)
Filling
NOTICE: The A/C refrigerant analyzer must be used before recovering any vehicle A/C refrigerant. Failure to do so will put most of the shop's refrigerant at risk of contamination. If the vehicle A/C refrigerant is contaminated, direct the customer to a service center that performed the last A/C service. If the customer wishes to pay the additional cost, use A/C recovery equipment designed to recover contaminated A/C refrigerant. Dispose of all contaminated A/C refrigerant as hazardous waste. For all equipment, follow the manufacturer's instructions.
NOTICE: For vehicles equipped with R-1234yf refrigerant,
Motorcraft® Refrigerant R-1234yf PAG Oil (YN-35) must only be used as the refrigerant system lubricant. Adding any oil other than Motorcraft® R-1234yf Refrigerant PAG Oil (YN-35) to the refrigerant system will damage the A/C compressor and contaminate the refrigerant system.NOTICE: For vehicles equipped with R-134a refrigerant,
Motorcraft® PAG Refrigerant Compressor Oil (YN-12-D) must only be used as the refrigerant system lubricant. Adding any oil other than Motorcraft® PAG Refrigerant Compressor Oil (YN-12-D) to the refrigerant system will damage the A/C compressor and contaminate the refrigerant system.NOTICE: During normal air conditioning operation, oil circulates through the refrigerant system and a small amount remains in each component. If certain system components are removed, some refrigerant oil will leave with the component. To maintain the original total oil charge, the oil loss must be compensated by adding oil to the system with the new part.
NOTICE: Make sure the equipment is clean and free of foreign material.
REFER TO the table above for the amount of refrigerant oil to add and installation methods.
Test yourself
A quick Ford Escape quiz: every answer comes with an explanation and a link to the manual page.