DTC Chart: BCM
The diagnosis in this manual assumes a certain level of skill and knowledge of Ford-approved diagnostic procedures.
REFER TO: Diagnostic Methods (100-00 General Information, Description and Operation).
DTC Chart
| Trouble Code | Description | Action |
| B1034:12 |
Front Left Seat Heater Element: Short to Battery |
GO to Pinpoint Test B |
| B1034:14 |
Left Front Seat Heater Element: Short to Ground or Open Circuit |
If the seat heater does not operate, GO to Diagnostic Test B. If the seat heater is always on, GO to Diagnostic Test D |
| B1036:12 |
Front Right Seat Heater Element: Short to Battery |
GO to Pinpoint Test C |
| B1036:14 |
Right Front Seat Heater Element: Short to Ground or Open Circuit |
If the heated seat does not operate, GO to Pinpoint Test C. If the heated seat is on all the time, GO to Pinpoint Test D. |
| B115A: 23 |
Front Passenger Seat Heater: Low Signal Level |
GO to Pinpoint Test C |
| B115B: 23 |
Front Driver Seat Heater: Low Signal Level |
GO to Pinpoint Test B |
| All Other Diagnostic Trouble Codes (DTCs) |
- |
REFER TO: Body Control Module (BCM) (419-10 Multifunction Electronic Modules, Diagnosis and Testing). |
Symptom Chart
Symptom Chart: Seats
The diagnosis in this manual assumes a certain level of skill and knowledge of Ford-approved diagnostic procedures.
REFER TO: Diagnostic Methods (100-00 General Information, Description and Operation).
Symptom Chart
| Condition | Possible Sources | Action |
| Driver and passenger heated seats do not operate. |
Refer to Pinpoint Test |
GO to Pinpoint Test A |
| Seat Heater Inoperative/Operates Incorrectly - Driver |
Refer to Pinpoint Test |
GO to Pinpoint Test B |
| Seat Heater Inoperative/Operates Incorrectly - Passenger |
Refer to Pinpoint Test |
GO to Pinpoint Test C |
| Heated seat does not operate correctly - driver or passenger seat heater on with system off |
Refer to Pinpoint Test |
GO to Pinpoint Test D |
| Heated seat does not operate correctly - driver seat heats but heated seat indicator does not illuminate when pressed |
Refer to Pinpoint Test |
GO to Pinpoint Test E |
| Heated seat does not operate correctly - passenger seat heats but heated seat indicator does not illuminate when pressed |
Refer to Pinpoint Test |
GO to Pinpoint Test F |
| Heated Seat Indicator Stays On Constantly - Driver or Passenger Seat Heater |
Refer to Pinpoint Test |
GO to Pinpoint Test G |
Pinpoint Test(s)
Driver and passenger heated seats do not operate.
Refer to Wiring Diagrams Cell 119 for schematic and connector information.
Normal Operation and Fault Symptoms
The heated seat system operates only with the engine running. When the driver or passenger heated seat switch (located in the instrument panel) is activated, it supplies a ground signal to the BCM. When the BCM receives the heated seat switch signal, it activates the corresponding (driver or passenger) heated seat relay (located in the CJB). When the heated seat relay is energized, voltage is supplied to the seat heating mats. The heating mats are directly connected to ground, completing the heated seat electrical circuit.
Possible Sources:
- Fuse
- Wiring, Terminals or Connectors
- BCM
Visual Inspection and Preliminary Diagnosis
- Make sure that CJB fuse 17 (15A) is in good condition.
DIAGNOSTIC TEST A: BOTH SEAT HEATERS INOPERATIVE - DRIVER AND PASSENGER
| A1 CHECK THE DRIVER HEATED SEAT RELAY VOLTAGE |
- Disconnect: Driver Heated Seat Relay.
- Action:
| Positive lead | Measurement/Action | Negative lead |
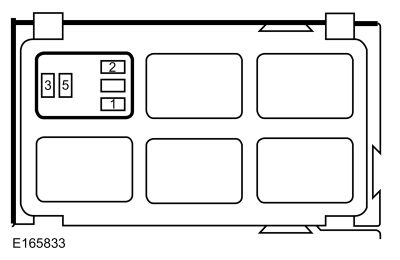 Driver Heated Seat Relay, Terminal 1. |
 |
Ground |
Is the voltage greater than 11 volts?
| No |
CHECK CJB fuse 17 (15A) is in good condition. If OK, REPAIR the circuit. If not OK, REFER to the Wiring Diagrams Manual to determine possible causes of the short circuit. |
|
| A2 CHECK THE HEATED SEAT SWITCH GROUND CIRCUIT |
- Disconnect: Driver Heated Seat Switch C2400.
- Action:
Click to display the connectors
| Positive lead | Measurement/Action | Negative lead |
| C2400-4 |
|
Ground |
Is the resistance less than 3 ohms?
|
| A3 CHECK THE BCM (BODY CONTROL MODULE) FOR PROPER OPERATION |
- Disconnect and inspect all BCM connectors.
- Repair:
- corrosion (install new connector or terminals - clean module pins)
- damaged or bent pins - if necessary, install new terminals/pins
- pushed-out pins - install new pins as necessary
- Reconnect the BCM connectors and all previously disconnected rear window heater system connectors. Make sure they are seated and latched correctly.
- Operate the system and determine if the concern is still present.
Is the concern still present?
| Yes |
CHECK OASIS for any applicable technical service bulletins (TSBs). If a TSB exists for this concern, STOP this test and FOLLOW the TSB instructions. If no TSBs apply to this concern, INSTALL a new BCM.
REFER TO: Body Control Module (BCM) (419-10 Multifunction Electronic Modules, Removal and Installation). |
| No |
The system is currently operating correctly. The concern may have been caused by module connections. ADDRESS the root cause of any connector or terminal issues. |
|
Seat Heater Inoperative/Operates Incorrectly - Driver
Refer to Wiring Diagrams Cell 119 for schematic and connector information.
Normal Operation and Fault Symptoms
The heated seat system operates only with the engine running. When the driver or passenger heated seat switch (located in the instrument panel) is activated, it supplies a ground signal to the BCM. When the BCM receives the heated seat switch signal, it activates the corresponding (driver or passenger) heated seat relay (located in the CJB). When the heated seat relay is energized, voltage is supplied to the seat heating mats. The heating mats are directly connected to ground, completing the heated seat electrical circuit.
DTC Fault Trigger Conditions
| Trouble Code | Description | Fault Trigger Conditions |
| B1034:12 |
Front Left Seat Heater Element: Short to Battery |
If the driver heated seat relay control circuit is shorted to voltage and the BCM attempts to activate the driver heated seat relay, this DTC sets and the seat does not heat. |
| B1034:14 |
Left Front Seat Heater Element: Short to Ground or Open Circuit |
If the driver heated seat relay control circuit is open or shorted to ground and the BCM attempts to activate the driver heated seat relay, this DTC sets and the seat does not heat (open circuit) or may heat only once (short to ground) until the ignition is turned off. |
| B115B: 23 |
Front Driver Seat Heater: Low Signal Level |
Sets when the BCM detects that the driver heated seat switch is active during an on-demand self-test or has been active for more than 2 minutes. |
Possible Sources
- Heated Seat Relay
- Heated Seat Switch
- Wiring, Terminals or Connectors
- Heater Pad
- BCM
DIAGNOSTIC TEST B: SEAT HEATER INOPERATIVE/INCORRECT OPERATION - DRIVER
| B1 RETRIEVE THE BCM (BODY CONTROL MODULE) DIAGNOSTIC TROUBLE CODES (DTCS) |
- Using a scan tool, perform the BCM self-test.
Is DTC B1034:12, B1034:14 or B115B:23 present?
| Yes |
If DTC B1034:14 is present, GO to B7.
If DTC B1034:12 is present, GO to B6.
If DTC B115B:23 is present, GO to B4.
For information on all other diagnostic trouble codes (DTCs), REFER to the BCM DTC Chart. |
| No |
If the seat cushion and seatback heating mats do not operate, GO to B2.
If only the seat cushion heating mat does not operate, INSTALL a new driver seat cushion heating mat.
If only the seatback heating mat does not operate, INSTALL a new driver seatback heating mat. |
|
| B2 CHECK THE DRIVER HEATED SEAT (CC_SW_D_HSEATS) PID (PARAMETER IDENTIFICATION) OPERATION |
- Using the diagnostic scan tool, view the BCM CC_SW_D_HSEATS PID while pressing and releasing the driver heated seat switch.
Does the PID agree with the driver heated seat switch state?
|
| B3 CHECK THE DRIVER HEATED SEAT SWITCH GROUND CIRCUIT FOR OPEN |
- Disconnect: Driver Heated Seat Switch C2400.
- Action:
Click to display the connectors
| Positive lead | Measurement/Action | Negative lead |
| C2400-4 |
 |
Ground |
Is the resistance less than 3 ohms?
|
| B4 CHECK THE BCM (BODY CONTROL MODULE) DRIVER HEATED SEAT (CC_SW_D_HSEATS) PID (PARAMETER IDENTIFICATION) OPERATION |
- Disconnect: Driver Heated Seat Switch C2400.
- Connect a fused jumper wire between:
Click to display connectors
| Positive lead | Measurement/Action | Negative lead |
| C2400-1 |
 |
C2400-4 |
- Using the diagnostic scan tool, view the BCM parameter identification (PID) data.
- Using the diagnostic scan tool, select the BCM. Observe the CC_SW_D_HSEATS PID state.
- While observing the PID, remove the fused jumper wire.
Does the PID state change when the fuse jumper is removed?
| Yes |
INSTALL a new driver heated seat switch. |
|
| B5 CHECK THE DRIVER HEATED SEAT SWITCH SIGNAL CIRCUIT FOR OPEN OR SHORT TO GROUND |
- Action:
Click to display the connectors
| Positive lead | Measurement/Action | Negative lead |
| C2400-1 |
|
C2280F-8 |
- Action:
Click to display the connectors
| Positive lead | Measurement/Action | Negative lead |
| C2400-1 |
|
Ground |
Is the resistance between the heated seat switch and the BCM less than 5 ohms, and more than 10,000 ohms between the heated seat switch and ground?
|
| B6 CHECK THE RELAY CONTROL CIRCUIT FOR A SHORT TO VOLTAGE |
- Disconnect: Driver Heated Seat Relay.
- Action:
| Positive lead | Measurement/Action | Negative lead |
| Driver Heated Seat Relay, Terminal 2. |
|
Ground |
Is there voltage present?
| No |
INSTALL a new driver heated seat relay. RECONNECT all connectors and REPEAT the self-test. If the DTC resets, GO to B13. |
|
| B7 CHECK THE RELAY CONTROL CIRCUIT FOR A SHORT TO GROUND |
- Disconnect: Driver Heated Seat Relay.
- Action:
| Positive lead | Measurement/Action | Negative lead |
| Driver Heated Seat Relay, Terminal 2. |
|
Ground |
Is the resistance greater than 10000 Ohms?
|
| B8 CHECK THE RELAY CONTROL CIRCUIT FOR AN OPEN |
- Action:
| Positive lead | Measurement/Action | Negative lead |
| Driver Heated Seat Relay, Terminal 2. |
|
C2280D-5 |
Is the resistance less than 3 ohms?
| Yes |
INSTALL a new driver heated seat relay. RECONNECT all connectors and REPEAT the self-test. If the DTC resets, GO to B13. |
|
| B9 CHECK THE DRIVER HEATED SEAT RELAY VOLTAGE |
- Disconnect: Driver Heated Seat Relay.
- Action:
| Positive lead | Measurement/Action | Negative lead |
| Driver Heated Seat Relay, Terminal 1. |
|
Ground |
| Driver Heated Seat Relay, Terminal 3. |
|
Ground |
Is the voltage greater than 11 volts for both measurements?
|
| B10 CHECK THE HEATING MAT CIRCUIT VOLTAGE |
- Connect: Driver Heated Seat Relay.
- De-power the SRS.
REFER to: Supplemental Restraint System (SRS) Disabling and Re-enabling (501-20B Supplemental Restraint System, General Procedures).
- Disconnect the driver seat side airbag module C367.
- Disconnect: Driver Seat Cushion Heater C364.
-
 WARNING: Make sure no one is in the vehicle and nothing is blocking or positioned in front of any airbag while the battery is connected. Failure to follow these instructions may result in serious injury in the event of accidental deployment. Connect the battery ground cable.
REFER TO: Battery Disconnection and Connection (414-01 Battery, Mounting and Cables, General Procedures).
- Activate the driver seat heater switch.
- Action:
Click to display the connectors
| Positive lead | Measurement/Action | Negative lead |
| C364-1 |
|
Ground |
Is the voltage greater than 11 volts?
|
| B11 CHECK THE HEATER CIRCUIT FOR AN OPEN |
- Driver seat heater relay.
- Action:
| Positive lead | Measurement/Action | Negative lead |
| Driver seat heater relay, socket pin 5. |
|
C364-1 |
Is the resistance less than 3 ohms?
| No |
REPAIR the circuit. CLEAR the Diagnostic Trouble Codes (DTCs). REPEAT the self-test. CHECK the system for normal operation. DISCONNECT the battery ground cable. CONNECT the driver seat side airbag module C367. REPEAT the SRS.
REFER TO: Supplemental Restraint System (SRS) Disabling and Re-enabling (501-20B Supplemental Restraint System, General Procedures). |
|
| B12 CHECK THE SEAT HEATING MAT GROUND CIRCUIT FOR AN OPEN |
- Action:
Click to display the connectors
| Positive lead | Measurement/Action | Negative lead |
| C364-2 |
|
Ground |
Is the resistance less than 3 ohms?
| Yes |
CHECK the connector and wiring for loose or damaged terminals. If OK, INSTALL a new driver seat cushion heating mat. CLEAR the Diagnostic Trouble Codes (DTCs). REPEAT the self-test. CHECK the system for normal operation. DISCONNECT the battery ground cable. CONNECT the driver seat side airbag module C367. REPEAT the SRS.
REFER TO: Supplemental Restraint System (SRS) Disabling and Re-enabling (501-20B Supplemental Restraint System, General Procedures). |
| No |
REPAIR the circuit. CLEAR the Diagnostic Trouble Codes (DTCs). REPEAT the self-test. CHECK the system for normal operation. DISCONNECT the battery ground cable. CONNECT the driver seat side airbag module C367. REPEAT the SRS.
REFER TO: Supplemental Restraint System (SRS) Disabling and Re-enabling (501-20B Supplemental Restraint System, General Procedures). |
|
| B13 CHECK THE BCM (BODY CONTROL MODULE) FOR PROPER OPERATION |
- Disconnect all BCM connectors.
- Repair:
- corrosion (install new connector or terminals - clean module pins)
- damaged or bent pins - if necessary, install new terminals/pins
- pushed-out pins - install new pins as necessary
- Reconnect the BCM and all previously disconnected system connectors. Make sure they are fully seated and locked.
- Operate the system and determine if the concern is still present.
Is the concern still present?
| Yes |
CHECK OASIS for any applicable technical service bulletins (TSBs). If a TSB exists for this concern, STOP this test and FOLLOW the TSB instructions. If no TSBs apply to this concern, INSTALL a new BCM.
REFER TO: Body Control Module (BCM) (419-10 Multifunction Electronic Modules, Removal and Installation). |
| No |
The system is currently operating correctly. The concern may have been caused by module connections. ADDRESS the root cause of any connector or terminal issues. |
|
| B14 CHECK THE BCM (BODY CONTROL MODULE) FOR PROPER OPERATION |
- Disconnect all BCM connectors.
- Repair:
- corrosion (install new connector or terminals - clean module pins)
- damaged or bent pins - if necessary, install new terminals/pins
- pushed-out pins - install new pins as necessary
- Reconnect the BCM and all previously disconnected system connectors. Make sure they are fully seated and locked.
- Operate the system and determine if the concern is still present.
Is the concern still present?
| Yes |
CHECK OASIS for any applicable Technical Service Bulletins (TSBs). If a TSB exists for this concern, STOP this test and FOLLOW the TSB instructions. If no TSB applies to this concern, INSTALL a new BCM.
REFER TO: Body Control Module (BCM) (419-10 Multifunction Electronic Modules, Removal and Installation).
DISCONNECT the battery ground cable. CONNECT the driver seat side airbag module C367. REPEAT the SRS.
REFER TO: Supplemental Restraint System (SRS) Disabling and Re-enabling (501-20B Supplemental Restraint System, General Procedures). |
| No |
The system is currently operating correctly. The concern may have been caused by module connections. ADDRESS the root cause of any connector or terminal problems. DISCONNECT the battery ground cable. CONNECT the driver seat side airbag module C367. REPEAT the SRS.
REFER TO: Supplemental Restraint System (SRS) Disabling and Re-enabling (501-20B Supplemental Restraint System, General Procedures). |
|
Seat Heater Inoperative/Operates Incorrectly - Passenger
Refer to Wiring Diagrams Cell 119 for schematic and connector information.
Normal Operation and Fault Symptoms
The heated seat system operates only with the engine running. When the driver or passenger heated seat switch (located in the instrument panel) is activated, it supplies a ground signal to the BCM. When the BCM receives the heated seat switch signal, it activates the corresponding (driver or passenger) heated seat relay (located in the CJB). When the heated seat relay is energized, voltage is supplied to the seat heating mats. The heating mats are directly connected to ground, completing the heated seat electrical circuit.
DTC Fault Trigger Conditions
| Trouble Code | Description | Fault Trigger Conditions |
| B1036:12 |
Front Right Seat Heater Element: Short to Battery |
If the passenger seat heater relay control circuit is shorted to voltage and the BCM attempts to activate the passenger seat heater relay, this DTC is set and the seat does not heat. |
| B1036:14 |
Right Front Seat Heater Element: Short to Ground or Open Circuit |
If the passenger seat heater relay control circuit is open or shorted to ground and the BCM attempts to activate the passenger seat heater relay, this DTC is set and the seat does not heat (open circuit) or may not heat at all (short to ground) until the ignition is turned off. |
| B115A: 23 |
Front Passenger Seat Heater: Low Signal Level |
Sets when the BCM detects that the passenger seat heater switch is active during an on-demand self-test or has been active for more than 2 minutes. |
Possible Sources
- Heated Seat Relay
- Heated Seat Switch
- Wiring, Terminals or Connectors
- Heater Pad
- BCM
DIAGNOSTIC TEST C: SEAT HEATER INOPERATIVE/INCORRECT OPERATION - PASSENGER
| C1 RETRIEVE BCM (BODY CONTROL MODULE) DIAGNOSTIC TROUBLE CODES (DTCS) |
- Using a scan tool, perform the BCM self-test.
Is DTC B1034:12, B1034:14 or B115B:23 present?
| Yes |
If DTC B1036:14 is present, GO to C7.
If DTC B1036:12 is present, GO to C6.
If DTC B115A:23 is present, GO to C4.
For information on all other diagnostic trouble codes (DTCs), REFER TO the BCM DTC Chart. |
| No |
If the seat cushion and seat back heating mats do not operate, GO to C2.
If only the seat cushion heating mat does not operate, INSTALL a new passenger seat cushion heating mat.
If only the seat back heating mat does not operate, INSTALL a new passenger seat back heating mat. |
|
| C2 CHECK THE PASSENGER SEAT HEATER (CC_SW_P_HSEATS) PID (PARAMETER IDENTIFICATION) OPERATION |
- Using a diagnostic scan tool, monitor the BCM CC_SW_P_HSEATS PID while pressing and releasing the passenger seat heater switch.
Does the PID match the passenger heater switch status?
|
| C3 CHECK THE PASSENGER SEAT HEATER SWITCH GROUND CIRCUIT FOR AN OPEN |
- Disconnect: passenger seat heater/ambient lighting switch C2401.
- Action:
Click to display the connectors
| Positive lead | Measurement/Action | Negative lead |
| C2401-4 |
|
Ground |
Is the resistance less than 3 ohms?
|
| C4 CHECK THE BCM (BODY CONTROL MODULE) PASSENGER SEAT HEATER (CC_SW_D_HSEATS) PID (PARAMETER IDENTIFICATION) OPERATION |
- Disconnect: passenger seat heater/ambient lighting switch C2401.
- Connect a fused jumper wire between:
Click to display connectors
| Positive lead | Measurement/Action | Negative lead |
| C2401-4 |
|
C2401-6 |
- Using the diagnostic scan tool, view the BCM parameter identification (PID) data.
- Using a diagnostic scan tool, select the BCM. Check the status of the CC_SW_P_HSEATS PID.
- While observing the PID, remove the fused jumper wire.
Does the PID state change when the fuse jumper is removed?
| Yes |
INSTALL a new passenger seat heater/ambient lighting switch. |
|
| C5 CHECK THE PASSENGER HEATER SWITCH SIGNAL CIRCUIT FOR AN OPEN OR SHORT TO GROUND |
- Action:
Click to display the connectors
| Positive lead | Measurement/Action | Negative lead |
| C2401-6 |
|
C2280F-6 |
- Action:
Click to display the connectors
| Positive lead | Measurement/Action | Negative lead |
| C2401-6 |
|
Ground |
Is the resistance between the heated seat switch and the BCM less than 5 ohms, and more than 10,000 ohms between the heated seat switch and ground?
|
| C6 CHECK THE RELAY CONTROL CIRCUIT FOR A SHORT TO VOLTAGE |
- Disconnect: passenger seat heater relay.
- Action:
| Positive lead | Measurement/Action | Negative lead |
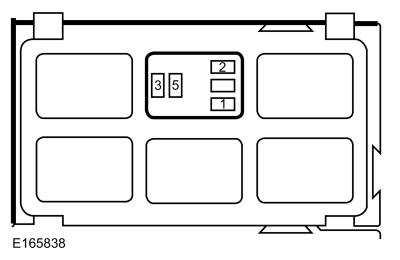 Passenger seat heater relay, socket pin 2. |
|
Ground |
Is there voltage present?
| No |
INSTALL a new passenger seat heater relay. RECONNECT all connectors and REPEAT the self-test. If the DTC resets, GO to C13. |
|
| C7 CHECK THE RELAY CONTROL CIRCUIT FOR A SHORT TO GROUND |
- Disconnect: passenger seat heater relay.
- Action:
| Positive lead | Measurement/Action | Negative lead |
| Passenger seat heater relay, socket pin 2. |
|
Ground |
Is the resistance greater than 10000 Ohms?
|
| C8 CHECK THE RELAY CONTROL CIRCUIT FOR AN OPEN |
- Action:
| Positive lead | Measurement/Action | Negative lead |
| Passenger seat heater relay, socket pin 2. |
|
C2280D-16 |
Is the resistance less than 3 ohms?
| Yes |
INSTALL a new passenger seat heater relay. RECONNECT all connectors and REPEAT the self-test. If the DTC is logged again, GO to C13. |
|
| C9 CHECK THE VOLTAGE AT THE PASSENGER SEAT HEATER RELAY |
- Disconnect: passenger seat heater relay.
- Action:
| Positive lead | Measurement/Action | Negative lead |
| Passenger seat heater relay, terminal 1. |
|
Ground |
| Passenger seat heater relay, terminal 3. |
|
Ground |
Is the voltage greater than 11 volts for both measurements?
|
| C10 CHECK THE VOLTAGE IN THE HEATING ELEMENT CIRCUIT |
- Connect: passenger seat heater relay.
- De-power the SRS.
REFER to: Supplemental Restraint System (SRS) Disabling and Re-enabling (501-20B Supplemental Restraint System, General Procedures).
- Disconnect the passenger side airbag module C337.
- Disconnect: passenger seat cushion heater C334.
- WARNING: Make sure no one is in the vehicle and nothing is blocking or positioned in front of any airbag while the battery is connected. Failure to follow these instructions may result in serious injury in the event of accidental deployment. Connect the battery ground cable.
REFER TO: Battery Disconnection and Connection (414-01 Battery, Mounting and Cables, General Procedures).
- Activate the passenger seat heater switch.
- Action:
Click to display the connectors
| Positive lead | Measurement/Action | Negative lead |
| C334-1 |
|
Ground |
Is the voltage greater than 11 volts?
|
| C11 CHECK THE HEATER CIRCUIT FOR AN OPEN |
- Passenger seat heater relay.
- Action:
| Positive lead | Measurement/Action | Negative lead |
| Passenger seat heater relay, terminal 5. |
|
C334-1 |
Is the resistance less than 3 ohms?
| No |
REPAIR the circuit. CLEAR the Diagnostic Trouble Codes (DTCs). REPEAT the self-test. CHECK the system for normal operation. DISCONNECT the battery ground cable. CONNECT the passenger seat airbag module C337. REPEAT the SRS.
REFER TO: Supplemental Restraint System (SRS) Disarming and Re-arming (501-20B Supplemental Restraint System, General Procedures). |
|
| C12 CHECK THE HEATING ELEMENT GROUND CIRCUIT FOR AN OPEN |
- Action:
Click to display the connectors
| Positive lead | Measurement/Action | Negative lead |
| C334-2 |
|
Ground |
Is the resistance less than 3 ohms?
| Yes |
CHECK the connector and wiring for loose or damaged terminals. If OK, INSTALL a new passenger seat cushion heating element. CLEAR the Diagnostic Trouble Codes (DTCs). REPEAT the self-test. CHECK the system for normal operation. DISCONNECT the battery ground cable. CONNECT the passenger side airbag module C337. REPEAT the SRS.
REFER TO: Supplemental Restraint System (SRS) Disarming and Re-arming (501-20B Supplemental Restraint System, General Procedures). |
| No |
REPAIR the circuit. CLEAR the Diagnostic Trouble Codes (DTCs). REPEAT the self-test. CHECK the system for normal operation. DISCONNECT the battery ground cable. CONNECT the passenger seat airbag module C337. REPEAT the SRS.
REFER TO: Supplemental Restraint System (SRS) Disarming and Re-arming (501-20B Supplemental Restraint System, General Procedures). |
|
| C13 CHECK THE BCM (BODY CONTROL MODULE) FOR PROPER OPERATION |
- Disconnect all BCM connectors.
- Repair:
- corrosion (install new connector or terminals - clean module pins)
- damaged or bent pins - if necessary, install new terminals/pins
- pushed-out pins - install new pins as necessary
- Reconnect the BCM and all previously disconnected system connectors. Make sure they are fully seated and locked.
- Operate the system and determine if the concern is still present.
Is the concern still present?
| Yes |
CHECK OASIS for any applicable technical service bulletins (TSBs). If a TSB exists for this concern, STOP this test and FOLLOW the TSB instructions. If no TSBs apply to this concern, INSTALL a new BCM.
REFER TO: Body Control Module (BCM) (419-10 Multifunction Electronic Modules, Removal and Installation). |
| No |
The system is currently operating correctly. The concern may have been caused by module connections. ADDRESS the root cause of any connector or terminal issues. |
|
| C14 CHECK THE BCM (BODY CONTROL MODULE) FOR PROPER OPERATION |
- Disconnect all BCM connectors.
- Repair:
- corrosion (install new connector or terminals - clean module pins)
- damaged or bent pins - if necessary, install new terminals/pins
- pushed-out pins - install new pins as necessary
- Reconnect the BCM and all previously disconnected system connectors. Make sure they are fully seated and locked.
- Operate the system and determine if the concern is still present.
Is the concern still present?
| Yes |
CHECK OASIS for any applicable Technical Service Bulletins (TSBs). If a TSB exists for this concern, STOP this test and FOLLOW the TSB instructions. If no TSB applies to this concern, INSTALL a new BCM.
REFER TO: Body Control Module (BCM) (419-10 Multifunction Electronic Modules, Removal and Installation).
DISCONNECT the battery ground cable. CONNECT the passenger side airbag module C337. REPEAT the SRS.
REFER TO: Supplemental Restraint System (SRS) Disarming and Re-arming (501-20B Supplemental Restraint System, General Procedures). |
| No |
The system is currently operating correctly. The concern may have been caused by module connections. ADDRESS the root cause of any connector or terminal problems. DISCONNECT the battery ground cable. CONNECT the passenger side airbag module C337. REPEAT the SRS.
REFER TO: Supplemental Restraint System (SRS) Disarming and Re-arming (501-20B Supplemental Restraint System, General Procedures). |
|
Seat heater operates incorrectly - driver or passenger seat heats when the system is off
Refer to Wiring Diagrams Cell 119 for schematic and connector information.
Normal Operation and Fault Symptoms
The seat heater system operates only with the engine running. When the driver or passenger seat heater switch (located in the instrument panel) is activated, it supplies a ground signal to the BCM. When the BCM receives the seat heater switch signal, it activates the corresponding (driver or passenger) seat heater relay (located in the CJB). When the seat heater relay is energized, voltage is supplied to the seat cushion heater mat. The seat cushion heater mats are directly connected to ground to complete the seat heater electrical circuit.
DTC Fault Trigger Conditions
| Trouble Code | Description | Fault Trigger Conditions |
| B1034:14 |
Left Front Seat Heater Element: Short to Ground or Open Circuit |
If the driver heated seat relay control circuit is open or shorted to ground and the BCM attempts to activate the driver heated seat relay, this DTC sets and the seat does not heat (open circuit) or may heat only once (short to ground) until the ignition is turned off. |
| B1036:14 |
Right Front Seat Heater Element: Short to Ground or Open Circuit |
If the passenger seat heater relay control circuit is open or shorted to ground, and the BCM attempts to activate the passenger seat heater relay, this DTC is set and the seat does not heat (open circuit) or may heat continuously until the ignition is turned off (short to ground). |
Possible Sources
- Heated Seat Relay
- Wiring, Terminals or Connectors
- BCM
DIAGNOSTIC TEST D: SEAT HEATER INOPERATIVE CORRECTLY - DRIVER OR PASSENGER SEAT HEATS WHEN SYSTEM IS OFF
| D1 CHECK THE RELAY OUTPUT CIRCUIT FOR A SHORT TO VOLTAGE |
- Disconnect: driver or passenger seat heater relay.
- For the driver heated seat, measure:
| Positive lead | Measurement/Action | Negative lead |
| Driver seat heater relay, socket pin 5. |
|
Ground |
- For the passenger heated seat, measure:
| Positive lead | Measurement/Action | Negative lead |
| Passenger seat heater relay, terminal 5. |
|
Ground |
Is there voltage present?
|
| D2 CHECK THE RELAY CONTROL CIRCUIT FOR A SHORT TO GROUND |
- For the driver heated seat, measure:
| Positive lead | Measurement/Action | Negative lead |
| Driver Heated Seat Relay, Terminal 2. |
|
Ground |
- For the passenger heated seat, measure:
| Positive lead | Measurement/Action | Negative lead |
| Passenger seat heater relay, socket pin 2. |
|
Ground |
Is the resistance greater than 10000 Ohms?
| Yes |
INSTALL a new driver or passenger seat heater relay. CONNECT all connectors. CHECK the system for normal operation. If the concern persists, GO to D3. |
|
| D3 CHECK THE BCM (BODY CONTROL MODULE) FOR PROPER OPERATION |
- Disconnect all BCM connectors.
- Repair:
- corrosion (install new connector or terminals - clean module pins)
- damaged or bent pins - if necessary, install new terminals/pins
- pushed-out pins - install new pins as necessary
- Reconnect the BCM and all previously disconnected system connectors. Make sure they are fully seated and locked.
- Operate the system and determine if the concern is still present.
Is the concern still present?
| Yes |
CHECK OASIS for any applicable technical service bulletins (TSBs). If a TSB exists for this concern, STOP this test and FOLLOW the TSB instructions. If no TSBs apply to this concern, INSTALL a new BCM.
REFER TO: Body Control Module (BCM) (419-10 Multifunction Electronic Modules, Removal and Installation). |
| No |
The system is currently operating correctly. The concern may have been caused by module connections. ADDRESS the root cause of any connector or terminal issues. |
|
Seat heater operates incorrectly - driver seat heats but the seat heater indicator does not illuminate when pressed
Refer to Wiring Diagrams Cell 119 for schematic and connector information.
Normal Operation and Fault Symptoms
The seat heater system operates only with the engine running. When the driver or passenger seat heater switch (located in the instrument panel) is activated, it supplies a ground signal to the BCM. When the BCM receives the seat heater switch signal, it activates the corresponding (driver or passenger) seat heater relay (located in the CJB). When the seat heater relay is energized, the BCM supplies voltage to illuminate the seat heater on indicator.
Possible Sources
- Wiring, Terminals or Connectors
- Heated Seat Switch
- BCM
DIAGNOSTIC TEST E: SEAT HEATER OPERATING INCORRECTLY - DRIVER SEAT HEATS BUT SEAT HEATER INDICATOR DOES NOT ILLUMINATE WHEN PRESSED
| E1 CHECK THE INDICATOR CIRCUIT FOR A SHORT TO GROUND |
- Disconnect: Driver Heated Seat Switch C2400.
- Action:
Click to display the connectors
| Positive lead | Measurement/Action | Negative lead |
| C2400-2 |
|
Ground |
Is the resistance greater than 10000 Ohms?
|
| E2 CHECK THE INDICATOR CIRCUIT FOR AN OPEN |
- Action:
Click to display the connectors
| Positive lead | Measurement/Action | Negative lead |
| C2400-2 |
|
C2280E-15 |
Is the resistance less than 3 ohms?
|
| E3 CHECK THE INDICATOR OPERATION |
- Connect: driver seat heater switch C2400.
- While observing the seat heater switch indicator, momentarily connect a fused jumper wire between:
| Positive lead | Measurement/Action | Negative lead |
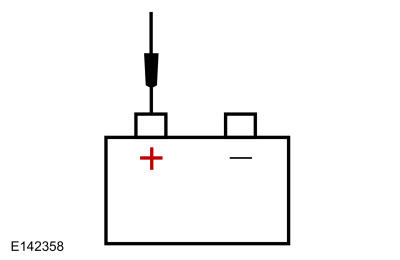 Battery positive |
|
C2280E-15 |
Did the seat heater switch indicator illuminate when the fused jumper wire was connected?
| No |
INSTALL a new driver heated seat switch. |
|
| E4 CHECK THE BCM (BODY CONTROL MODULE) FOR PROPER OPERATION |
- Disconnect all BCM connectors.
- Repair:
- corrosion (install new connector or terminals - clean module pins)
- damaged or bent pins - if necessary, install new terminals/pins
- pushed-out pins - install new pins as necessary
- Reconnect the BCM and all previously disconnected system connectors. Make sure they are fully seated and locked.
- Operate the system and determine if the concern is still present.
Is the concern still present?
| Yes |
CHECK OASIS for any applicable technical service bulletins (TSBs). If a TSB exists for this concern, STOP this test and FOLLOW the TSB instructions. If no TSBs apply to this concern, INSTALL a new BCM.
REFER TO: Body Control Module (BCM) (419-10 Multifunction Electronic Modules, Removal and Installation). |
| No |
The system is currently operating correctly. The concern may have been caused by module connections. ADDRESS the root cause of any connector or terminal issues. |
|
Seat heater operates incorrectly - passenger seat heats but the seat heater indicator does not illuminate when pressed
Refer to Wiring Diagrams Cell 119 for schematic and connector information.
Normal Operation and Fault Symptoms
The seat heater system operates only with the engine running. When the driver or passenger seat heater switch (located in the instrument panel) is activated, it supplies a ground signal to the BCM. When the BCM receives the seat heater switch signal, it activates the corresponding (driver or passenger) seat heater relay (located in the CJB). When the seat heater relay is energized, the BCM supplies voltage to illuminate the seat heater on indicator.
Possible Sources
- Wiring, Terminals or Connectors
- Heated Seat Switch
- BCM
DIAGNOSTIC TEST F: SEAT HEATER OPERATING INCORRECTLY - PASSENGER SEAT HEATS BUT SEAT HEATER INDICATOR DOES NOT ILLUMINATE WHEN PRESSED
| F1 CHECK THE INDICATOR CIRCUIT FOR A SHORT TO GROUND |
- Disconnect: passenger seat heater/ambient lighting switch C2401.
- Action:
Click to display the connectors
| Positive lead | Measurement/Action | Negative lead |
| C2401-3 |
|
Ground |
Is the resistance greater than 10000 Ohms?
|
| F2 CHECK THE INDICATOR CIRCUIT FOR AN OPEN |
- Action:
Click to display the connectors
| Positive lead | Measurement/Action | Negative lead |
| C2401-3 |
|
C2280E-3 |
Is the resistance less than 3 ohms?
|
| F3 CHECK THE INDICATOR OPERATION |
- Connect: Passenger/Ambient Lighting Seat Heater Switch C2401.
- While observing the seat heater switch indicator, momentarily connect a fused jumper wire between:
| Positive lead | Measurement/Action | Negative lead |
| Battery positive |
|
C2280E-3 |
Did the seat heater switch indicator illuminate when the fused jumper wire was connected?
| No |
INSTALL a new passenger seat heater/ambient lighting switch. |
|
| F4 CHECK THE BCM (BODY CONTROL MODULE) FOR PROPER OPERATION |
- Disconnect all BCM connectors.
- Repair:
- corrosion (install new connector or terminals - clean module pins)
- damaged or bent pins - if necessary, install new terminals/pins
- pushed-out pins - install new pins as necessary
- Reconnect the BCM and all previously disconnected system connectors. Make sure they are fully seated and locked.
- Operate the system and determine if the concern is still present.
Is the concern still present?
| Yes |
CHECK OASIS for any applicable technical service bulletins (TSBs). If a TSB exists for this concern, STOP this test and FOLLOW the TSB instructions. If no TSBs apply to this concern, INSTALL a new BCM.
REFER TO: Body Control Module (BCM) (419-10 Multifunction Electronic Modules, Removal and Installation). |
| No |
The system is currently operating correctly. The concern may have been caused by module connections. ADDRESS the root cause of any connector or terminal issues. |
|
Seat heater operates incorrectly - driver or passenger seat heater indicator stays on
Refer to Wiring Diagrams Cell 119 for schematic and connector information.
Normal Operation and Fault Symptoms
The seat heater system operates only with the engine running. When the driver or passenger seat heater switch (located in the instrument panel) is activated, it supplies a ground signal to the BCM. When the BCM receives the seat heater switch signal, it activates the corresponding (driver or passenger) seat heater relay (located in the CJB). When the seat heater relay is energized, the BCM supplies voltage to illuminate the seat heater on indicator.
Possible Sources
- Wiring, Terminals or Connectors
- BCM
DIAGNOSTIC TEST G: SEAT HEATER INOPERATIVE CORRECTLY - DRIVER OR PASSENGER SEAT HEATER INDICATOR IS ALWAYS ON
| G1 CHECK THE INDICATOR CIRCUIT FOR A SHORT TO VOLTAGE |
- Observe the corresponding seat heater switch.
Does the corresponding seat heater switch indicator light come on?
| Yes |
REPAIR the seat heater switch indicator circuit for a short to the power supply voltage. |
|
| G2 CHECK THE BCM (BODY CONTROL MODULE) FOR PROPER OPERATION |
- Disconnect all BCM connectors.
- Repair:
- corrosion (install new connector or terminals - clean module pins)
- damaged or bent pins - if necessary, install new terminals/pins
- pushed-out pins - install new pins as necessary
- Reconnect the BCM and all previously disconnected system connectors. Make sure they are fully seated and locked.
- Operate the system and determine if the concern is still present.
Is the concern still present?
| Yes |
CHECK OASIS for any applicable technical service bulletins (TSBs). If a TSB exists for this concern, STOP this test and FOLLOW the TSB instructions. If no TSBs apply to this concern, INSTALL a new BCM.
REFER TO: Body Control Module (BCM) (419-10 Multifunction Electronic Modules, Removal and Installation). |
| No |
The system is currently operating correctly. The concern may have been caused by module connections. ADDRESS the root cause of any connector or terminal issues. |
|