Automatic Transmission
Transmission Fluid Temperature Sensor Repair Procedures
In this manual: Automatic Transmission
22steps
~132min
4/5difficulty
Done 0 of 22
Inspection
- Turn the ignition off.
- Remove the battery and battery tray.
- Disconnect the solenoid valve connector (A).

- Measure the resistance between the sensor signal terminal and the sensor ground terminal.
- Make sure the resistance is within specification.

- If an input/output speed sensor DTC is detected, replace the sensor in accordance with the Removal/Installation procedures.
Removal
- Remove the air cleaner assembly and air duct. (Refer to Engine Mechanical System - "Air Cleaner")
- Remove the drain plug (A) and drain all ATF, then reinstall the drain plug.
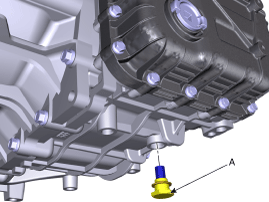

- Replace the gasket before reinstalling the drain plug.
- After installation, start the engine, then check for leaks from the drain plug.
- Remove the wiring harness clamp (A).
- Disconnect the breather hose (B) from the valve body cover.
Tightening torque: 9.8 ~ 11.8 N·m
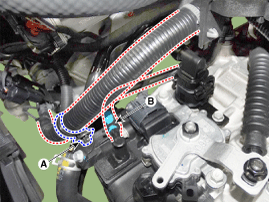
- Disconnect the hose (A) after removing the hose clamp from the automatic transmission fluid cooler.
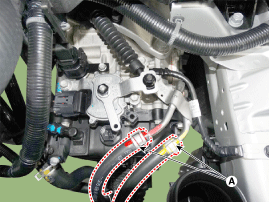
- Carefully install the clamp so as not to damage the hose.
- Install the clamp in the correct direction so that it does not interfere with other parts.
- After installation, start the engine and check the hose for leaks.
- Disconnect the ATF warmer hose (A).
- Remove the heater pipe mounting bolt.

- Carefully install the clamp so as not to damage the hose.
- Install the clamp in the correct direction so that it does not interfere with other parts.
- After installation, start the engine and check the hose for leaks.
- Remove the valve body cover (A).
Tightening torque: 11.8 ~ 13.7 N·m
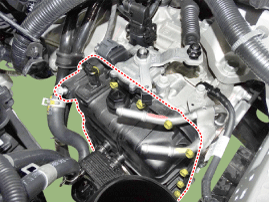

- Replace the gasket (A) before reinstalling the valve body cover.
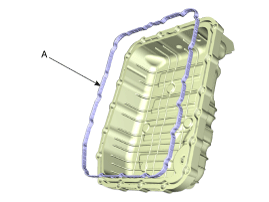
- After installation, start the engine, then check for leaks from the valve body cover.
- Replace the gasket (A) before reinstalling the valve body cover.
- Disconnect the fluid temperature sensor and solenoid valve connector (A) from the valve body.
Tightening torque: 9.8 ~ 11.8 N·m
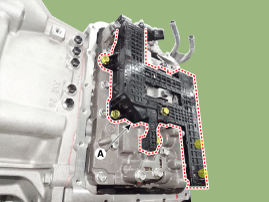
- Check for looseness, poor connection, bending, corrosion, contamination, wear, or damage before reinstalling the solenoid valve connector.
- Remove the valve body assembly (A).
Tightening torque: 9.8 ~ 11.8 N·m

- Disconnect the input and output speed sensor connector (A).
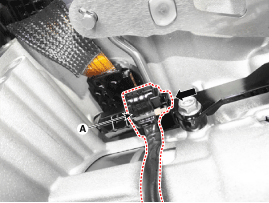
- Loosen the main connecting bolt (B).
Tightening torque: 9.8 ~ 11.8 N·m

- Disconnect the solenoid valve connector (A).
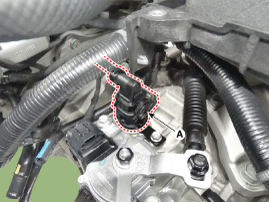
- Remove the mounting clip of the solenoid valve connector (A).
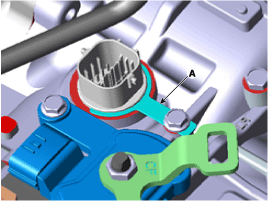
- Disconnect the solenoid valve connector (A) by pressing down from the transaxle.

- Replace the O-ring (A) before reinstalling the solenoid valve connector.
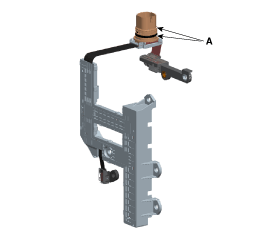
- Replace the O-ring (A) before reinstalling the solenoid valve connector.
Installation
- To install, reverse the removal procedure.
- Check the fluid level after filling the automatic transaxle with fluid. (Refer to Hydraulic System - Fluid)
Test yourself
A quick Hyundai Elantra AD quiz: every answer comes with an explanation and a link to the manual page.
Was this page helpful?