Automatic Transmission
Shift Lever Repair Procedures
In this manual: Automatic Transmission
5steps
~30min
2/5difficulty
Done 0 of 5
Removal
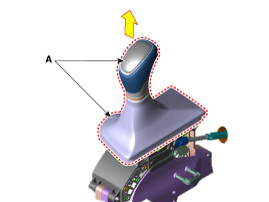
- Pull the knob (A) in the direction "F" and remove the knob.
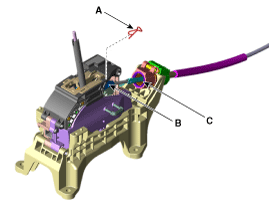
- Disconnect the connector (B) from the shift lever.
- Disconnect the wiring retaining clip (A).

- Disconnect the shift cable.
- Remove the stop pin (A).
- Disconnect the cable end (B) from the shift lever.
- Disconnect the cable connector (C) from the shift lever.
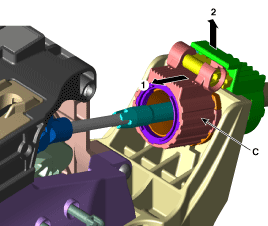

- The ear must be assembled facing upward.
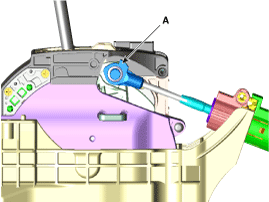
- The bent area (A) must face the front.
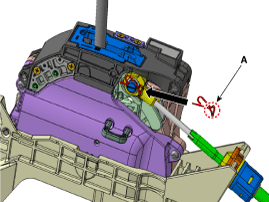
- Insert the cable connector into the AT lever bracket and make sure you hear a click, and that part (A) of the boot protrudes from the connector cover. - Part (A) located inside the cover before assembly. - Part (A) must protrude after the socket is assembled.
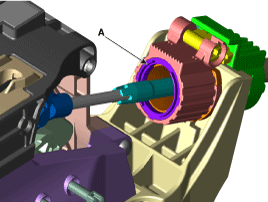
- The ear must be assembled facing upward.
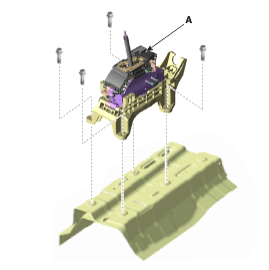
- Remove the bolts, then remove the shift lever assembly (A).
Tightening torque: 8.8 ~ 13.7 N·m
Installation
- To install, reverse the removal procedure.

- Adjust the cable after installing the shift lever and manual control lever in the N position.
Test yourself
A quick Hyundai Elantra AD quiz: every answer comes with an explanation and a link to the manual page.
Was this page helpful?