Automatic Transmission System (SBC)
Automatic Transmission Repair Procedures
In this manual: Automatic Transmission System (SBC)
29steps
~174min
4/5difficulty
Done 0 of 29
Removal
- Turn the ignition switch OFF and disconnect the negative (-) battery cable.
- Remove the under cover. (Refer to Engine Mechanical System - "Engine Room Under Cover")
- Remove the left strut brace (A) and right strut brace (B).
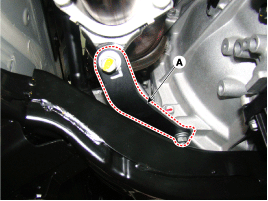
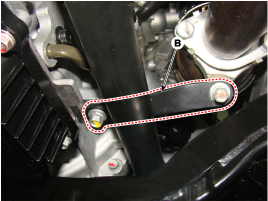
- Remove the engine and transmission assembly. (Refer to Engine Mechanical System - "Engine and Transmission Assembly")
- For AWD, remove the front propeller shaft assembly. (Refer to Drive Shaft and Axle - "Front Axle Assembly")
- Using a jack, support the engine.
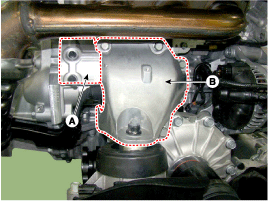
- Remove the starter cover (A).
- Remove the engine support bracket (B). Tightening torque: Starter cover: 8.8 ~ 13.7 N·m Engine support bracket bolt: 49.0 ~ 64 N·m Engine mount nut: 63.7 ~ 83 N·m
- Disconnect the starter connector (A) and cable (B) from the starter B terminal.
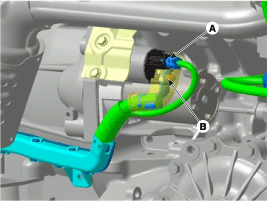
- Remove the starter (A).
Tightening Torque: 49.0 ~ 64 N·m
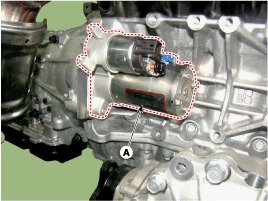
- Disconnect the oil cooler tube (A).
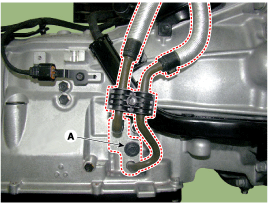

- Replace the O-ring (A) before reinstalling the oil cooler tube.
- After installation, start the engine and check the hose for leaks.
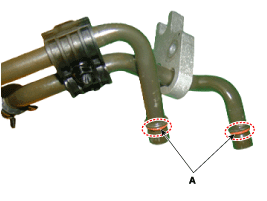
- Disconnect the cooler hose (A).
- Remove the ATF warmer (B) by loosening the mounting bolts.
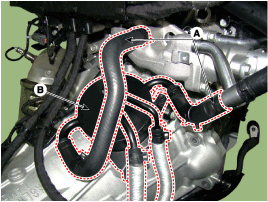
- Carefully install the clamp so as not to damage the hose.
- Install the clamp in the correct direction so that it does not interfere with other parts.
- After installation, start the engine and check the hose for leaks.
- Remove the CKPS (A).
Tightening torque: 6.9 ~ 9.8 N·m
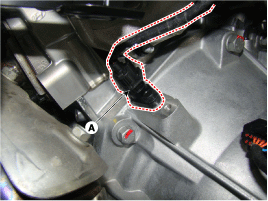
- Remove the torque converter mounting bolts (A-6EA) while turning the crankshaft pulley.
Tightening torque: 45.1 ~ 52 N·m
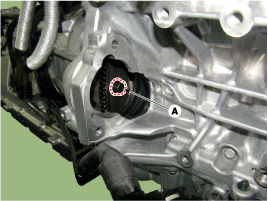
- Disconnect the AWD ECU connector (A).
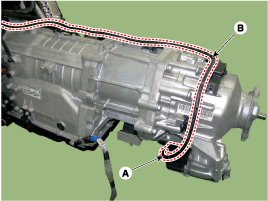
- Disconnect the wiring harness (B) from the transfer case (AWD) and transmission.
- Remove the transfer case (AWD) (A) from the transmission.
Tightening torque: 29.4 ~ 41 N·m
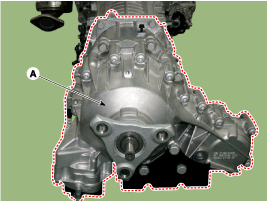
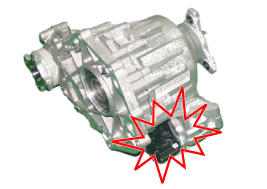
Precautions when handling the transfer case. A. Preventing damage to the ITA (Integrated Transfer Actuator) 1) When transporting the transfer case- Be careful that the ITA does not hit other parts when removing it from the shipping packaging.
- Be careful that the floor or structure does not strike the ITA.
- Be careful that the ITA is not affected by the transmission, floor, or structure.
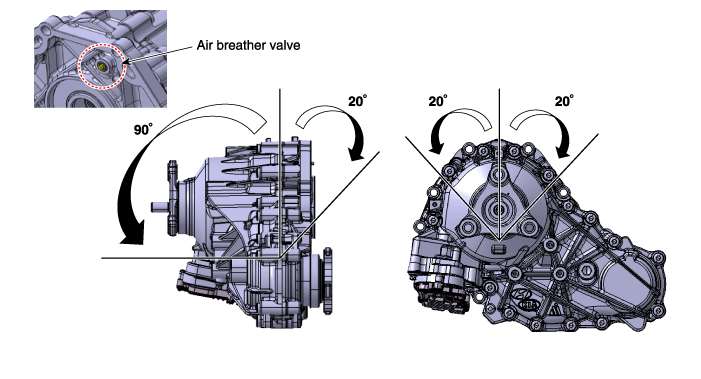
- Be careful when disassembling/installing the transfer case. If the horizontal position is not maintained, oil may leak even with the breather valve installed, because oil remains inside the transfer case.
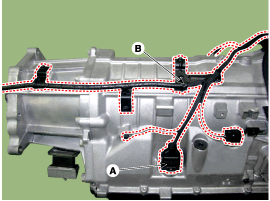
- Remove the electronic module connector (A).
- Disconnect the wiring harness (B) from the transmission.
- Disconnect the starter B terminal (A) after removing the mounting bolts.
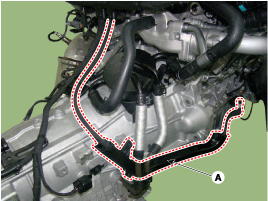
- Disconnect the shift lock switch connector (A).
- Disconnect the wiring harness (B) from the transmission.
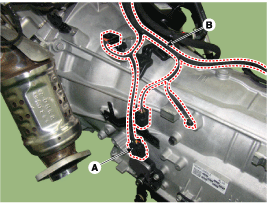
- Using a transmission jack, support the transmission.
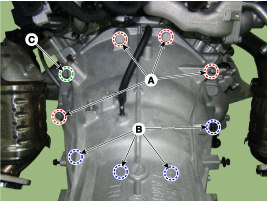
- Loosen the mounting bolts and remove the transmission from the engine. Tightening torque: [A] 63.7 ~ 83 N·m [B] 39.2 ~ 46 N·m [C] 34.3 ~ 46 N·m
Installation
- To install, reverse the removal procedure.
Perform the separate procedures below when reinstalling or replacing the automatic transmission.
- When reinstalling the transmission.
- Check the ATF level after adding fluid to the automatic transmission. (Refer to Hydraulic System - "Fluid")
- Erase the diagnostic trouble codes (DTC) using GDS.
DTCs are not erased even when the negative battery cable is disconnected. Therefore, be sure to erase the DTCs using GDS.
- When replacing with a new automatic transmission.
The new automatic transmission is already filled with the specified amount of ATF. For this reason, it is not necessary to fill and check the ATF, but any remaining ATF inside the ATF cooler must be removed.- Erase the diagnostic trouble codes (DTC) using GDS.
Even if the negative battery cable is disconnected, DTCs will not be erased. Therefore, be sure to erase the DTCs using GDS. - Reset the automatic transmission adaptive values using GDS.

- Perform the oil pressure characteristics input procedure.
- If internet access is available, perform the oil pressure characteristics input procedure using GDS.
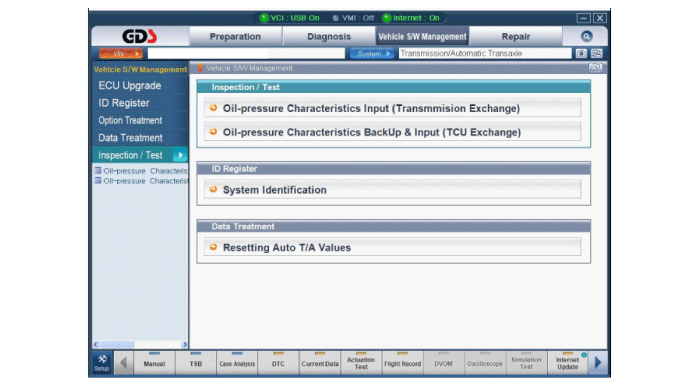
- If internet access is not available, record the barcode data (oil pressure characteristics) on the transmission case and then enter it manually into GDS.
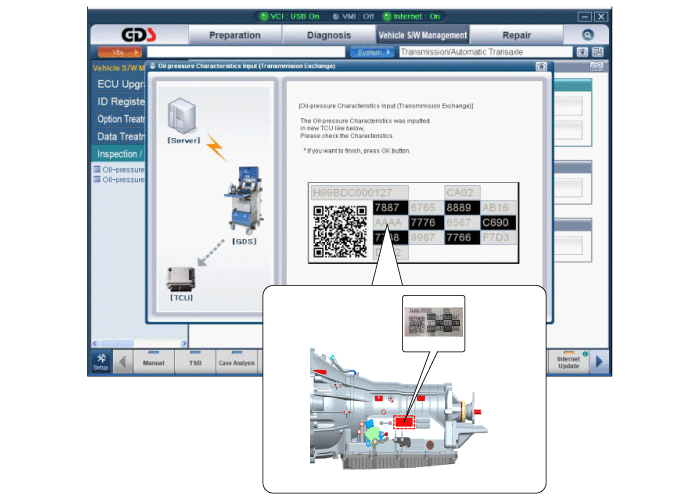
- If internet access is available, perform the oil pressure characteristics input procedure using GDS.
- Perform the procedure to store the TCM adaptive values. (Refer to "Automatic Transmission Control System - Repair Procedures")
- Erase the diagnostic trouble codes (DTC) using GDS.
- When replacing with a remanufactured automatic transmission.
The remanufactured automatic transmission is not filled with the specified amount of ATF. For this reason, add and check the ATF.- Check the ATF level after adding fluid to the automatic transmission. (Refer to Hydraulic System - "Fluid")
- Erase the diagnostic trouble codes (DTC) using GDS.
Even if the negative battery cable is disconnected, DTCs will not be erased. Therefore, be sure to erase the DTCs using GDS. - Reset the automatic transmission adaptive values using GDS.
- Perform the oil pressure characteristics input procedure.
- If internet access is available, perform the oil pressure characteristics input procedure using GDS.
- If internet access is not available, record the barcode data (oil pressure characteristics) on the transmission case and then enter it manually into GDS.
- If internet access is available, perform the oil pressure characteristics input procedure using GDS.
- Perform the procedure to store the TCM adaptive values. (Refer to "Automatic Transmission Control System - Repair Procedures")
Test yourself
A quick Hyundai Genesis DH quiz: every answer comes with an explanation and a link to the manual page.
Was this page helpful?