Engine Mechanical System
Engine and Transaxle Assembly Repair Procedures
In this manual: Engine Mechanical System
25steps
~150min
4/5difficulty
Done 0 of 25
Removal
|
|

- Disconnect the negative (-) battery cable from the battery.
- Remove the engine cover.
- Remove the engine room cover. (Refer to Engine and Transaxle Assembly - "Engine Cover")
- Remove the under cover.
- Loosen the drain plug and drain the engine coolant. (Refer to Cooling System - "Coolant")
- After recovering the refrigerant, remove the high and low pressure lines. (Refer to Heating, Ventilation, and Air Conditioning - "Compressor")
- Remove the air intake hose and air cleaner assembly. (Refer to Intake and Exhaust System - "Air Cleaner")
- Remove the front wheel.
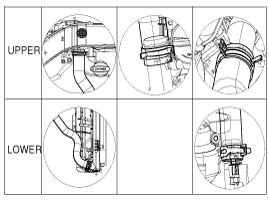
- Disconnect the upper radiator hose (A) and lower hose (B).

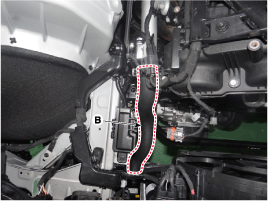
When installing the radiator hoses, install them as shown in the illustrations.
- Disconnect the heater inlet and outlet hoses (A).
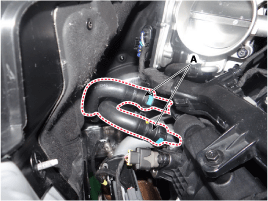
When installing the radiator hoses, install them as shown in the illustrations.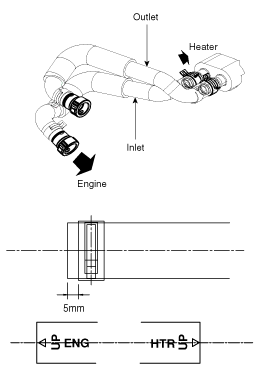
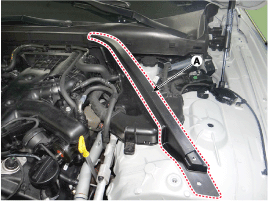
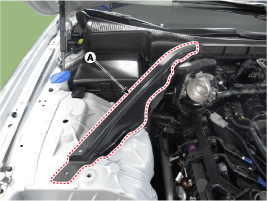
- Remove the strut cover (A).
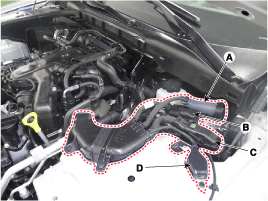
- Disconnect the engine wiring harness.
- Engine control module connector (A)
- TCM connector (B)
- IDB connector (C)
- Ground cable (D)
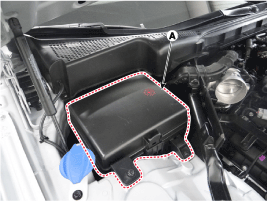
- Remove the fuse and relay box cover (A).
- Disconnect the fuse and relay box wiring.
- Front control connector (A).
- Generator extension wiring (B).
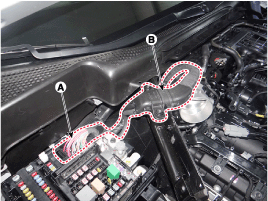
- Disconnect the fuel hose (A), PCSV hose (B), and brake vacuum hose (C).
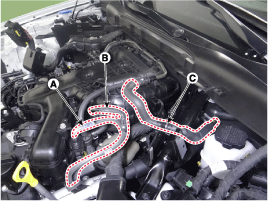
- Disconnect the engine ground cable (A).

- Remove the steering universal joint mounting bolts (A). (Refer to Steering System - "Steering Column and Shaft")
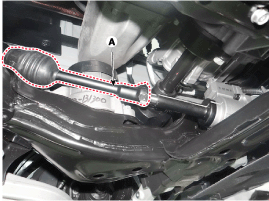
- Disconnect the MDPS connector (A).
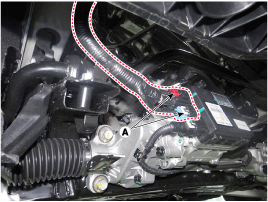
- Remove the front muffler. (Refer to Intake and Exhaust System - "Muffler")
- Remove the front steering knuckle assembly. (Refer to Drive Shaft and Axle - "Front Hub/Steering Knuckle")
- Remove the transmission range cable (A) and ground (B).
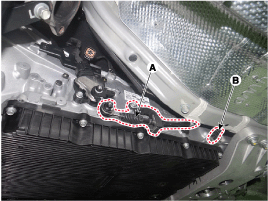
- Remove the left and right subframe brackets (A).
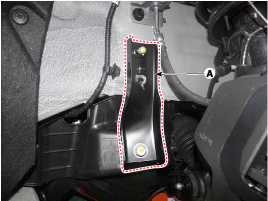
- Remove the propeller shaft. (Refer to Drive Shaft and Axle - "Propeller Shaft")
- Securely support the subframe (A) with a jack, then remove the subframe mounting bolts and transmission mounting bolts (B). Tightening torque: Subframe: 137.3 ~ 157 N·m (14.0 ~ 16.0 kgf·m, 101.3 ~ 115.7 ft-lbf) Transmission mounting: 49.0 ~ 64 N·m
- After removing the subframe mounting bolts, the engine and transmission assembly may drop. Securely support it with a floor jack.
- Make sure all cables, harness connectors, and hoses are disconnected from the engine and transaxle assembly.
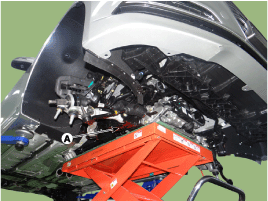
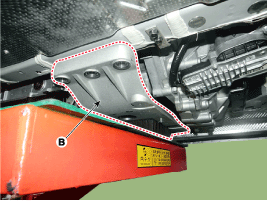
- Remove the engine and subframe assembly by lifting the vehicle.
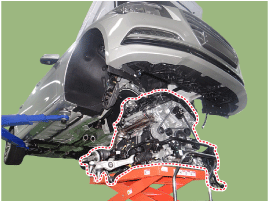
When removing the engine and transmission assembly, be careful not to damage surrounding parts or body components.
Installation
To install, reverse the removal procedure. Perform the following procedures:- Adjust the shift cable.
- Fill the engine with engine oil.
- Fill the transmission with fluid.
- Fill the power steering fluid.
- Fill the radiator and the coolant reservoir with engine coolant.
- Inspect for fuel leaks.
- After assembling the fuel line, turn the ignition ON (do not crank the engine) so the fuel pump runs for approximately two seconds and the fuel line is pressurized.
- Repeat this procedure two or three times, then check all fuel line connections for leaks.
- Set the heater control lever to the "HOT" position.
- Bleed air from the cooling system.
- Start the engine and let it run until warm (until the radiator fan cycles 3 or 4 times).
- Turn the engine off. Check the coolant level in the radiator and add coolant if necessary. This allows trapped air to be removed from the cooling system.
- Tightly close the radiator cap, then restart the engine and check for leaks.
- Clean the battery terminals and cable terminals with sandpaper, then assemble them, applying grease to prevent corrosion.
Test yourself
A quick Hyundai Genesis DH quiz: every answer comes with an explanation and a link to the manual page.
Was this page helpful?