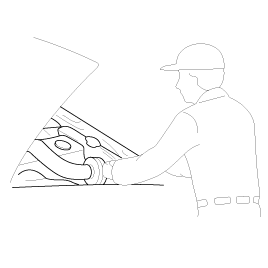
Vehicle Protection. Always cover the fenders, seats and floor before starting work.
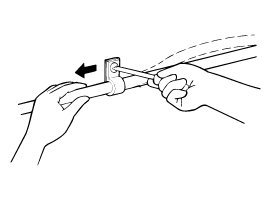
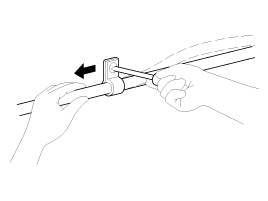
The prop rod must be inserted into the hole near the edge of the hood whenever you inspect the engine compartment, to prevent the hood from falling and causing possible injury. Make sure the prop rod has been released before closing the hood. Always check that the hood is securely latched before driving the vehicle.
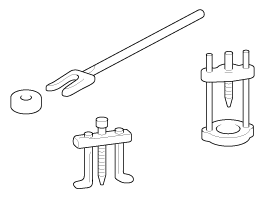
Tool and Measuring Equipment Preparation. Before starting work, make sure all necessary tools and measuring equipment are available. Special Service Tools. Use special service tools when required.Part Removal. First locate the cause of the problem, then determine whether removal and disassembly are required before starting work.Disassembly. If the disassembly procedure is so complex that it involves many parts, all parts must be disassembled in a manner that does not affect their function or appearance.
Parts Inspection. Each part after removal must be carefully inspected for malfunction, deformation, damage and other problems.
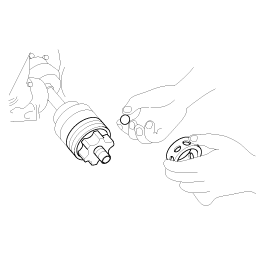
Arrangement of Parts: All disassembled parts must be neatly arranged for efficient reassembly. Be sure to separate and identify parts to be replaced from those to be reused.
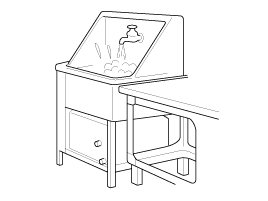
Cleaning of Parts for Reuse: All parts to be reused must be thoroughly cleaned using an appropriate method.
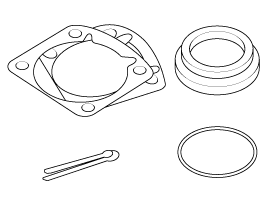
Oil Seals
Gaskets
O-rings
Lock Washers
Cotter Pins
Plastic NutsDepending on their location.
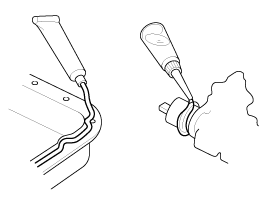
Apply sealant to gaskets.
Apply oil to the moving parts.
Before assembly, apply specified oil or grease to the designated locations (oil seals, etc.).
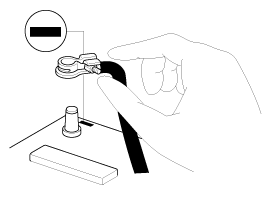
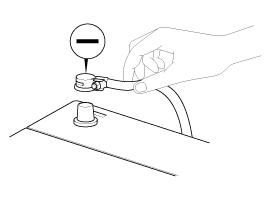
Be sure to disconnect the battery cable from the negative (-) battery terminal.
Never pull on the wires when disconnecting connectors.
Locking connectors will click when securely connected.
Handle sensors and relays carefully. Be careful not to drop them onto other parts.
In general, all measurements in this manual are made with a caliper.
When using a measuring tape, make sure it does not stretch, twist, or bend.
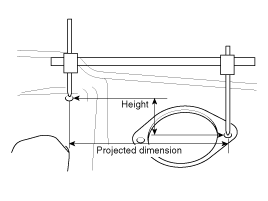
Both projected and actual dimensions are used for measurements in this manual.
Dimensions are measured by projecting the measuring points on the vehicle surfaces onto the reference dimensions.
If the length of the tracer gauge is adjustable, measure the dimensions by extending one of the two probes to the height difference between the two measuring surfaces.
These dimensions indicate the actual linear distance between measuring points and are used as reference dimensions when a gauge is used for measurement.
First adjust both probes to the same length (A=A') before measuring.
Check the gauges and the caliper to make sure there is no free play.
Check the terminal for tightness.
Check terminals and wires for corrosion from battery electrolyte, etc.
Check terminals and wires for open circuits.
Check wire insulation and coating for damage, cracks, and wear.
Check that the conductive parts of terminals do not contact other metal parts (vehicle body and other components).
Check continuity between the grounding bolt(s) and the vehicle body.
Check for correct connections.
Make sure wiring is clamped to prevent contact with sharp body edges or hot parts (exhaust manifold, pipe, etc.).
Make sure wiring is secured with sufficient clearance from the fan pulley, fan belt, and other rotating or moving parts.
Make sure wiring has enough slack to allow vibration between stationary (vehicle body) and moving parts (wires, engine, etc.).
Before servicing the electrical system, be sure to turn the ignition off and disconnect the battery ground cable.
When diagnosing the MFI or ELC system, disconnecting the battery cable will erase any stored diagnostic trouble codes from the computer memory. Therefore, record diagnostic data before disconnecting the battery cable if necessary.
Secure wiring harnesses with clamps so that there is no slack in the wiring. However, for any harness that passes near the engine or other vibrating parts, allow some slack within a range that does not let engine vibration pull the harness into contact with any surrounding parts, then secure the harness with a clamp.
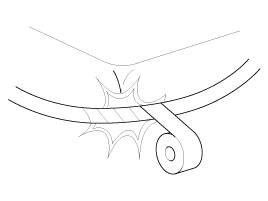
If any section of the wiring harness interferes with the edge of a part or a corner, wrap the section with tape or similar material to protect it from damage.
When installing any parts, take care not to pinch or damage the wiring harness.
Never drop relays, sensors, or electrical parts, or subject them to strong impact.
Electronic parts such as computers, relays, etc. are easily damaged by heat. If service operations are required that may cause the temperature to exceed 80 °C, remove the electronic parts beforehand.
Loose connectors may cause malfunctions. Make sure connectors are always securely connected.
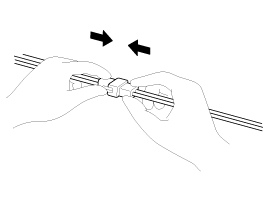
When disconnecting a connector, hold only the connector, not the wires.
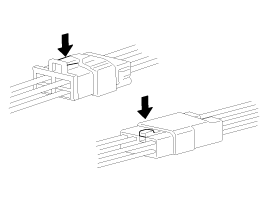
To disconnect connectors with locks, press in the direction indicated by the arrows in the illustration.
To connect locking connectors, insert the connectors until they click.
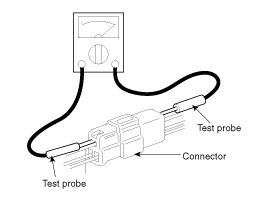
When using a circuit tester to check continuity or voltage at a connector, insert the test probe from the harness side. If the connector is a waterproof connector, insert the test probe through the hole in the rubber cap until the probe contacts the terminal, being careful not to damage the wire insulation.
To prevent overloading the wiring, consider the current load of additional equipment when determining the appropriate wire size.
Recommended Wire Size
SAE Gauge No.
Allowable Current
In Engine Compartment
Other Areas
0.3 mm²
AWG 22
-
5A
0.5 mm²
AWG 20
7A
13A
0.85 mm²
AWG 18
9A
17A
1.25 mm²
AWG 16
12A
22A
2.0 mm²
AWG 14
16A
30A
3.0 mm²
AWG 12
21A
40A
5.0 mm²
AWG 10
31A
54A
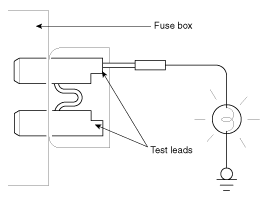
Parts. When replacing parts, use genuine HYUNDAI parts. Replacement. Standard values such as torque and specified adjustments must be strictly observed when reassembling all parts. After removal, the following parts must always be replaced with new ones. Adjustment. Use gauges and testers to adjust parts to standard values correctly. Electrical System. Rubber Parts and Hoses. Always avoid contact of gasoline or oil with rubber parts or hoses. Body Dimension Measurement. Projection Dimensions. Actual Dimension Measurement. Measurement Point. Measurements should be taken at the center of the hole. Checking Cables and Wires. Checking Fuses. A blade-type fuse has test taps that allow the fuse to be checked without removing it from the fuse block. The fuse is in good condition if the test lamp lights when one lead is connected to a test tap (one at a time) and the other lead is grounded. (Turn the ignition switch so that the fuse circuit is energized.) Electrical System Service. Precautions for Catalytic Converter.
If a large amount of unburned gasoline enters the catalytic converter, it may overheat and create a fire hazard. To prevent this, observe the following precautions and explain them to customers.
Use only unleaded gasoline.
Do not run the engine when the vehicle has been stationary for a long time. Avoid running the engine at high idle speed for more than 10 minutes or at idle for more than 20 minutes.
Do not measure engine compression for a long period of time. Engine compression test must be performed as quickly as possible. Remove the fuel pump relay before performing the compression test.
Do not dispose of a used catalytic converter together with parts contaminated with gasoline or oil.
?
Test yourself
A quick Hyundai Genesis DH quiz: every answer comes with an explanation and a link to the manual page.