Drive Shaft and Axle
Propeller Shaft Repair Procedures
In this manual: Drive Shaft and Axle
14steps
~84min
3/5difficulty
Done 0 of 14
Inspection
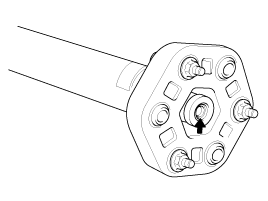
Inspect Flexible Coupling- Check the front and rear flexible couplings for cracks or damage.
- Inspect the flexible coupling centering bushing. If the bushing is damaged, replace the propeller shaft assembly.
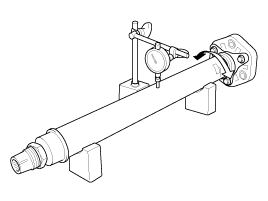
- Install a dial indicator so that its stylus contacts the center of the front or rear propeller shaft.
- Slowly rotate the propeller shaft and check the runout. Repeat this procedure for the other propeller shaft.
Front propeller shaft runout: 0.3 mm (0.012 in.)
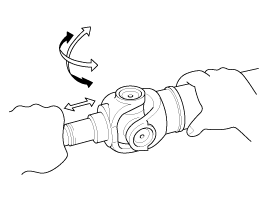
- Check that the universal joint bearing rotates smoothly.
- Check that there is no play in the universal joint bearing, and replace the propeller shaft if necessary.
Removal
- Loosen the wheel nuts slightly. Raise the vehicle and make sure it is securely supported.
- Remove the muffler. (Refer to Engine Mechanical System - "Muffler")
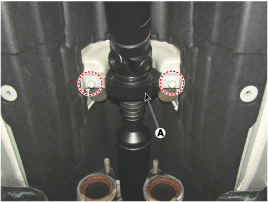
- Loosen the mounting bolts, then remove the aluminum cover (A).
Tightening torque: 6.9 ~ 13.7 N·m
- Remove the center bearing bracket mounting bolts (A).
Tightening Torque: 49.0 ~ 64 N·m
- Remove the crossmember (A), leaving the mounting bracket (B) in place. [2WD]
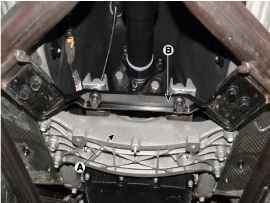
When removing the crossmember (A), use a jack to support it for safety.
- Make alignment marks (C) on the rubber coupling (A) and the rear differential companion flange (B), then remove the propeller shaft mounting bolts (D). [4WD]
Tightening torque: 88.3 ~ 108 N·m
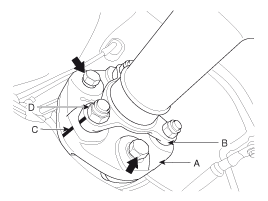

- When reinstalling the propeller shaft bolts after removal, each bolt and washer must be returned to its original position and the bolt insertion direction must be the same as before. Therefore, make marks to avoid mixing up the bolts and washers before removing the propeller shaft.
- If the propeller shaft bolts and washers are installed in the wrong position or direction, it may cause vibration and noise at high vehicle speed due to propeller shaft imbalance.
- If abnormal vibration and noise occur at high vehicle speed after replacing the propeller shaft with a new one, balance the propeller shaft with a balancing machine.
- Make alignment marks (C) on the rubber coupling (A) and the companion flange, and on the differential carrier (B), then remove the propeller shaft bolts (D).
Tightening torque: 88.3 ~ 108 N·m
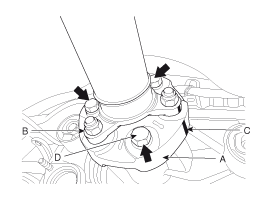
- Install in the reverse order of removal.
Test yourself
A quick Hyundai Genesis DH quiz: every answer comes with an explanation and a link to the manual page.
Was this page helpful?