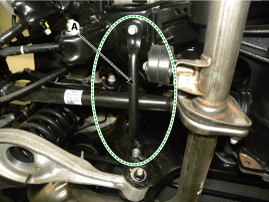
Remove the rear wheel and tire (A) from the rear hub.
Tightening torque: 88.3 ~ 108 N·m
Be careful not to damage the hub bolts when removing the rear wheel and tire (A).
While applying the brake, remove the cotter pin (A) from the rear axle hub and remove the castellated nut (B).
Torque: 196.1 - 274 N·m N·m (20.0 - 28.0 kgf·m, 144.7 - 202.5 ft·lbf)
Remove the bracket (A).
Tightening Torque: 49.0 ~ 64 N·m
Remove the muffler. (Refer to Engine Mechanical System - "Muffler")
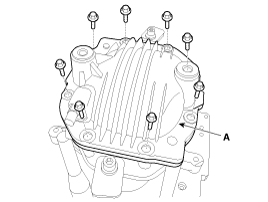
Loosen the mounting bolts, then remove the aluminum cover (A).
Tightening torque: 6.9 ~ 13.7 N·m
Make alignment marks (C) on the rubber coupling of the propeller shaft (A) and companion flange, and matching marks on the differential carrier (B), then remove the propeller shaft set bolt (D).
Tightening torque: 88.3 ~ 108 N·m
Make alignment marks before removing the propeller shaft to prevent the bolts and washers from being tightened in the wrong position or direction.
Installing the bolts and washers in the wrong direction may cause propeller shaft imbalance, which may cause the propeller shaft to vibrate at high speeds.
If the propeller shaft vibrates excessively at high speeds after replacement or removal from its original installation position, use shaft balancing equipment to correctly adjust the shaft balance.
Remove the rear propeller shaft. (Refer to Rear Propeller Shaft Assembly - "Rear Propeller Shaft")
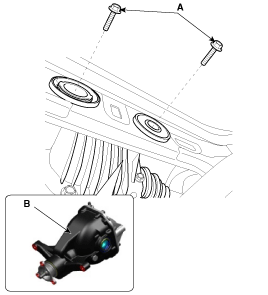
Loosen the differential mounting bolts (A, 4 pcs) and remove the differential assembly (B).
Tightening torque: 78.5 - 98 N·m
Install in the reverse order of removal.
Disassembly
Disassembly of Rear Differential Carrier
Drain the oil by removing the drain plug (A).
Use a new gasket (A) when reinstalling the drain plug.
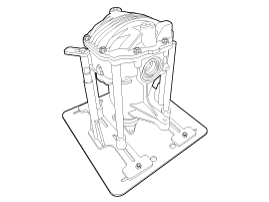
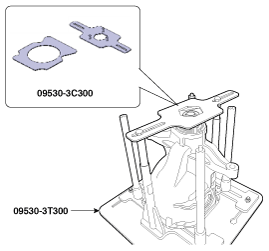
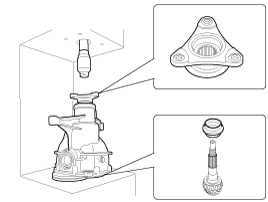
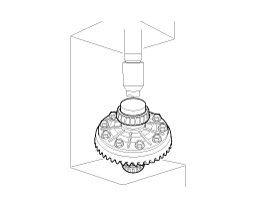
Install the differential case assembly on SST (09530-3T300).
Remove the filler plug (A).
Use a new washer (A) when reinstalling the filler plug.
Remove the auxiliary shaft. (With Lambda engine)
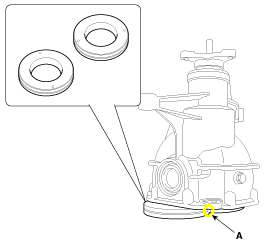
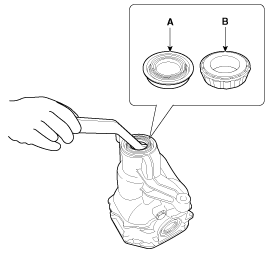
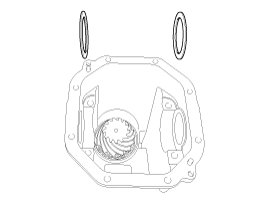
Remove the side seal (A) using a screwdriver.
Use a new oil seal when reinstalling the rear differential carrier.
Loosen the bolts (A) to remove the cover (B).
Use a hammer and chisel when removing the rear differential cover.
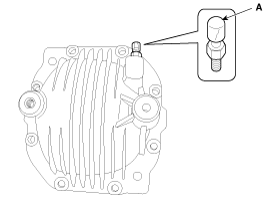
Remove the breather plug (A).
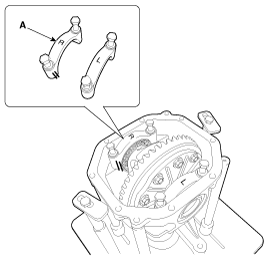
Remove the bearing caps (A).
Mark each bearing cap so that they can be installed in the same position and direction.
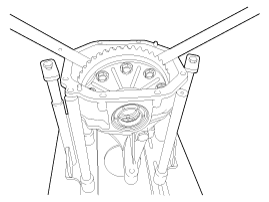
Remove the differential case assembly (A) using pry bars.
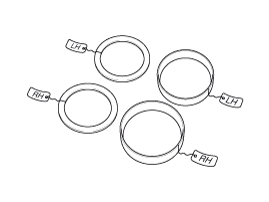
Attach "Left" or "Right" marks to the bearing outer races and shims so that they can be installed in their original positions.
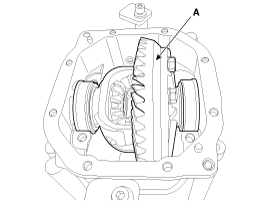
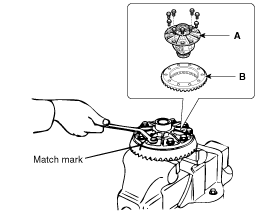
Loosen the lock bolts, then remove the drive pinion carrier (A) and ring gear (B).
Make alignment marks on the gear carrier and ring gear.
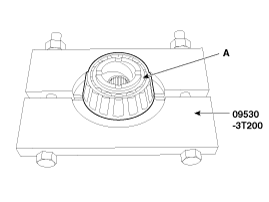
Remove the side bearings using SST (09530-3T200 or 09530-3C100). With Lambda engine, use SST 09530-3T200; with Tau engine, use SST 09530-3C100. [With Lambda engine][With Tau Engine]
Aerosol lubricant can be used to make bearing removal easier.
Remove the bearings, then attach "Left" or "Right" marks to each bearing.
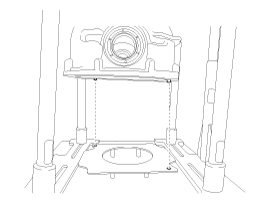
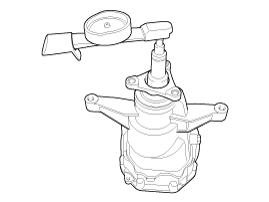
Install the differential carrier assembly on SST (09530-3T300). With Tau engine, use additional SST (09530-3C300). [With Lambda engine][With Tau Engine]
Insert the pin on the differential carrier flange into the holes in the SST, as shown below.
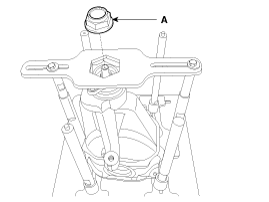
Remove the pinion lock nut (A).
Remove the drive pinion using a press.
Install supports on the press as shown below to prevent damage to the locating pin (A) on the differential carrier flange.
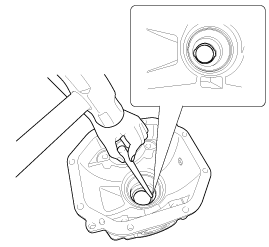
Remove the pinion oil seal (A) using a pry bar or screwdriver.
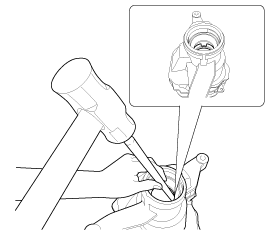
Remove the front and rear pinion bearing races using a hammer and chisel.
Locate the tip of the chisel in the grooves in the carrier shown below.
[Front][Rear]
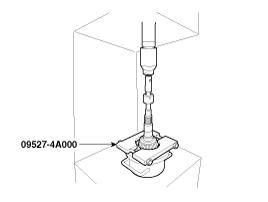
Press out the drive pinion using SST (09527-4A000), then remove the pinion bearing spacer (A), front bearing (B) and inner bearing preload shims (C) in order.
Disassembly of Differential Case Assembly and Drive Pinion Assembly
Installation
Use the previously selected shim to check the inner bearing of the front differential assembly. (Use the same thickness check shim in case of failure.) Replace the rear differential assembly with a new one when the differential case or differential case assembly fails. Noise or vibration may be caused by the current inner bearing not matching the gear transmission shim when the carrier or differential carrier block is replaced as a single unit.
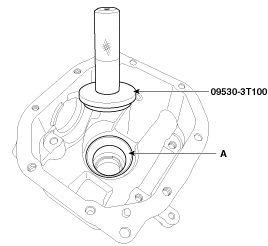
Install the drive pinion inner bearing outer race (A) using SST (09530-3T100).
Install the drive pinion outer bearing outer race (A) using SST (09530-3T100).
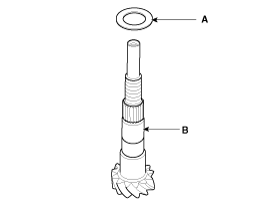
Install the inner bearing preload shim (A) on the drive pinion (B).
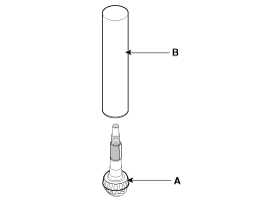
Press the rear pinion bearing (A) on using a round tube (B).
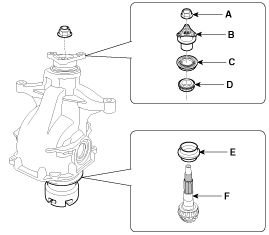
Install the stainless steel lock nut (A), flange (B), pinion oil seal (C), front pinion bearing (D), spacer (E) and drive pinion (F) to the differential carrier.
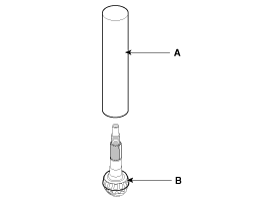
Using a round pipe (A), press in the pinion rear bearing (B).
Install the pinion bearing spacer (B) onto the drive pinion (A).
Do not reuse the spacer. Be sure to install a new one.
Using a round tube (A), press in the front bearing (B).
Install the pinion oil seal using SST (09530-3T600).
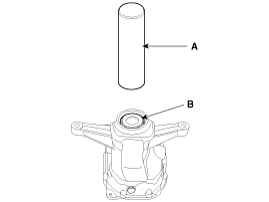
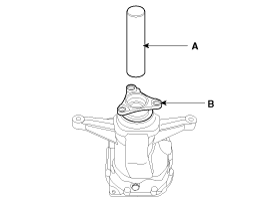
Using a round tube (A), press on the companion flange (B).
Install the pinion lock nut.
The preload must be 11.5 - 16.5 kgf·cm, and the stainless steel lock nut must be tightened to a torque of 0.9 - 1.4 N·m. Measure the preload while maintaining a constant rotation speed (60 rpm).
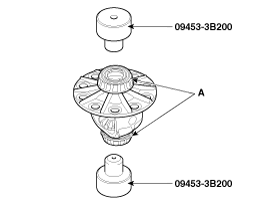
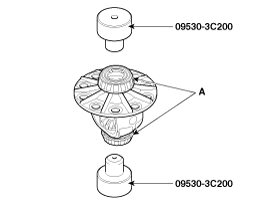
Install the side bearing (A) using SST (09453-3B200). With Tau engine, use SST (09530-3C300). [With Lambda engine][With Tau Engine]
Install the left and right side bearing adjusting shims on the differential carrier.
Install the left and right side bearing outer races (A) onto the drive pinion carrier.
Hold the left and right side bearing outer races with both hands and install the differential case assembly (A) into the carrier.
Install the bearing cap (A), aligning the alignment marks.
Tightening Torque: 53.9 ~ 64 N·m
Measure the preload. Total preload: Lambda engine: 1.33 - 2.4 N·m N·m; Tau engine: 1.36 - 2.5 N·m N·m
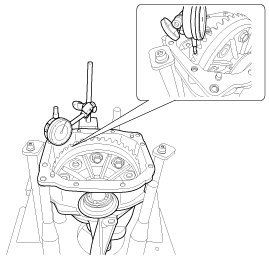
Check the backlash.
Backlash: 0.10 - 0.15 mm (0.004 - 0.006 in.)
If the backlash exceeds the limit, adjust it using the side bearing adjusting shims.
If adjustment is not possible, replace the side gear and drive pinion as a set.
Check the drive pinion contact.
Evenly coat the teeth of the ring gear with a thin layer of marking compound.
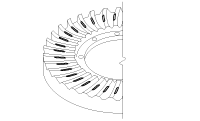
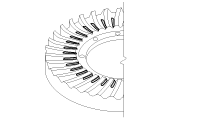
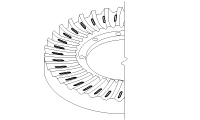
Install the ring gear onto the drive pinion, aligning each painted mark, and rotate the ring gear or flange clockwise and counterclockwise several times to check that the gear teeth are engaged correctly.
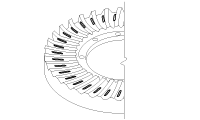
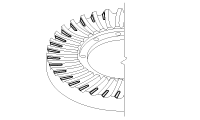
Check the gear tooth contact pattern of the ring gear.
Tooth Contact
Contact Condition
Solution
Standard Contact
1. Heel Contact
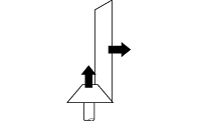
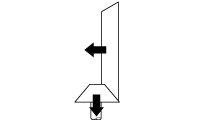
Increase the thickness of the pinion height adjusting shim to move the drive pinion closer to the ring gear. Also, to adjust the backlash, move the ring gear farther away from the drive pinion.
2. Face Contact
3. Toe Contact
Decrease the thickness of the pinion height adjusting shim to move the drive pinion farther from the ring gear. Also, to adjust the backlash, move the ring gear closer to the drive pinion.
4. Flank Contact
The tooth contact pattern is a method of evaluating the results of pinion height and final gear backlash adjustment. Repeat the pinion height and final gear backlash adjustments until the tooth contact pattern matches the standard tooth contact pattern.
If the tooth contact pattern is incorrect, the drive pinion and ring gear are out of specification. Both gears must be replaced as a set.
Install the breather (A).
Tightening torque: 9.8 ~ 19.6 N·m
Apply sealant (A) to the rear cover surface.
Sealant: LT5060
Remove all old sealant before applying.
Apply evenly to the rear cover surface at a thickness of 2 to 3 mm.
Install the rear differential cover (A).
Tightening torque: 39.2 ~ 49 N·m
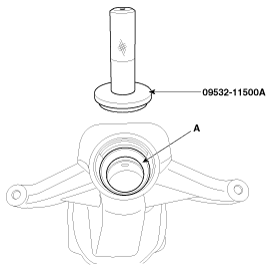
Install the LH and RH oil seals using SST (09530-3T000).
Install the drain plug (A) and the filler plug (B). Tightening torque: Filler plug: 39.2 ~ 59 N·m Drain plug: 49.0 ~ 69 N·m
Install the companion flange.
Install the rear differential assembly in the vehicle and fill it with oil. Oil type (~2015.02.28): Hypoid gear oil MS517-15 GT 75W/90 (GL-5) (SHELL HD AXLE OIL 75W90), or equivalent SK HK G-5 75W90. Oil capacity (liters): 1.4 ± 0.05. Oil type (2015.03.01~): Hypoid gear oil MS517-15 GT 75W/85 (GL-5) (or equivalent SK HK SYN GEAR OIL 75W/85). Oil capacity (liters): 1.4 ± 0.05
Inspection
After cleaning, inspect the parts for damage or wear. If any problems are found, follow the procedure below.
Item
Identify
Gear Set (Drive Pinion and Ring Gear)
Replace the gear set with a new one if the gear teeth are damaged (cracks/pits/dents).
Bearing
Replace the bearing with a new one if the roller or race is damaged (cracks/pits/dents).
Seal
Replace the seal with a new one whenever the differential is disassembled.
Differential Case
Replace the carrier with a new one if the inside bearing support is damaged (cracks/pits/dents) or if a crack is found on the inside or outside.
Companion Flange
Replace the pinion seal with a new one if the contact surface is damaged (cracks/pits/dents).
Open Type
Differential Gear Set (Differential Side Gear and Differential Pinion Gear)
Replace the gear set with a new one if the gear teeth or tooth surfaces are damaged (cracks, pitting, or dents).
Differential Washer (Differential Side Gear Washer and Differential Pinion Gear Washer)
Replace the washer with a new one if its surface is damaged (cracks/pits/dents).
?
Test yourself
A quick Hyundai Genesis DH quiz: every answer comes with an explanation and a link to the manual page.