Body (Interior and Exterior)
Rear Door Trim Repair Procedures
In this manual: Body (Interior and Exterior)
7steps
~42min
2/5difficulty
Done 0 of 7
Replacement
|

|

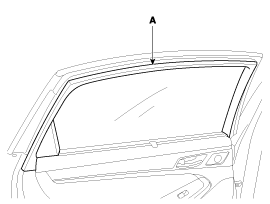
- Using a screwdriver or a remover, remove the inner frame cover (A).
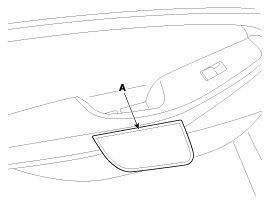
- Using a flat-tip or a remover, remove the rear door cap (A).
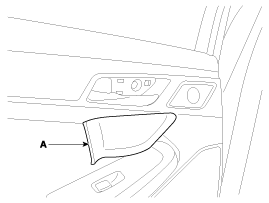
- Pulling the rear door handle, remove the cap (A) from the inside using a flat-tip screwdriver.
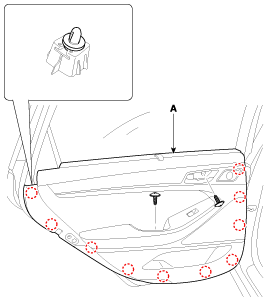
- After loosening the mounting screws, remove the rear door trim panel (A) using a flat-tip screwdriver.
- Remove the rear door inside handle (A).
- Disconnect the window regulator switch connector (B).
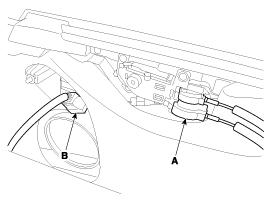
- Install in the reverse order of removal.

- Make sure the connector is properly connected.
- Make sure the door locks/unlocks and opens/closes properly. Make sure the glass moves correctly.
- Replace all damaged clips.
Test yourself
A quick Hyundai Genesis DH quiz: every answer comes with an explanation and a link to the manual page.
Was this page helpful?