Body Electrical System
Front Wiper Motor Repair Procedures
In this manual: Body Electrical System
22steps
~132min
5/5difficulty
Done 0 of 22
Removal
- Disconnect the negative (-) battery terminal.
- If necessary, loosen the wiper blade lock, pull it upward, and remove the wiper blade from the inner radius of the wiper arm.
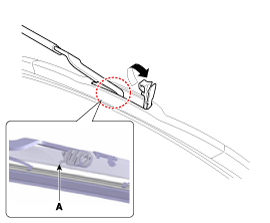
- Remove the upper hood cover. (Refer to Body - "Upper Cover Panel")
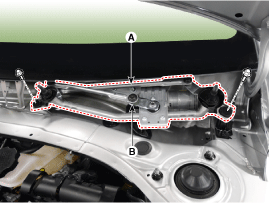
- Disconnect the windshield de-icer connector (B) after loosening the mounting bolts of the wiper motor assembly (A).
- While holding the wiper motor crank, remove the upper link (A).
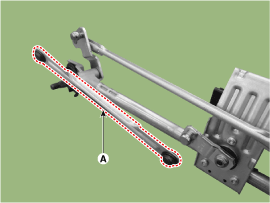
- While holding the wiper motor crank, remove the upper link (A).
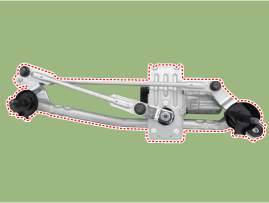
- Remove the lower link (A) from the wiper motor crank.
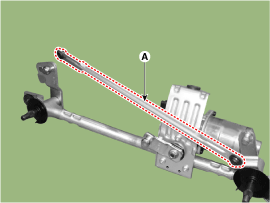
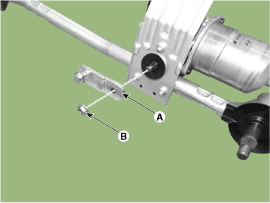
- Remove the crank (A) after loosening the nut (B).
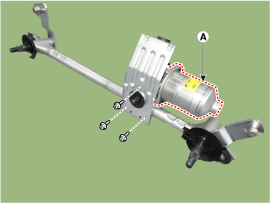
- Remove the wiper motor (A) after loosening the bolts.
Installation
- Install the wiper motor.
- Install the crank.
Tightening torque: 14.7–19.6 N·m
- Install the lower and upper links to the wiper motor crank.
- Install the wiper motor and linkage assembly, then connect the wiper motor connector.
Tightening torque: 7.0 - 11 N·m
- Install the hood upper cover.
- Install the windshield wiper arm and blade.
Tightening Torque: 23.0–27 N·m
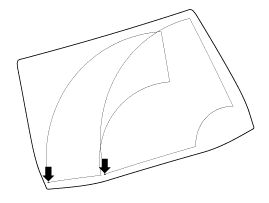
- Install the wiper arm and blade to the specified position. A: Automatic stop position (blade)
Inspection
- Disconnect the connector (A) from the wiper motor.
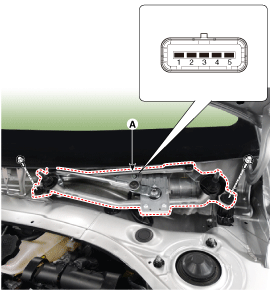
- Connect the positive (+) battery cable to terminal 3 and the negative (-) cable to terminal 5.
No Description 1 - 2 Battery + 3 Wiper Motor Park Position 4 High speed 5 Ground 6 Low speed
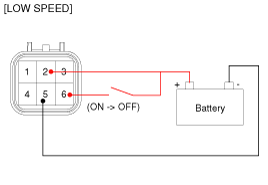
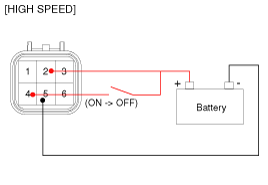
Inspection (with Multifunction Switch)
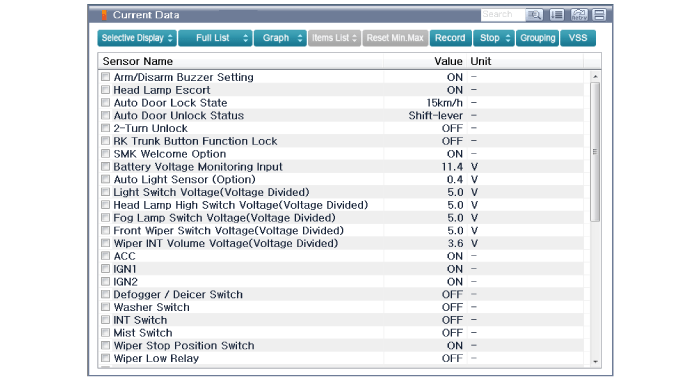
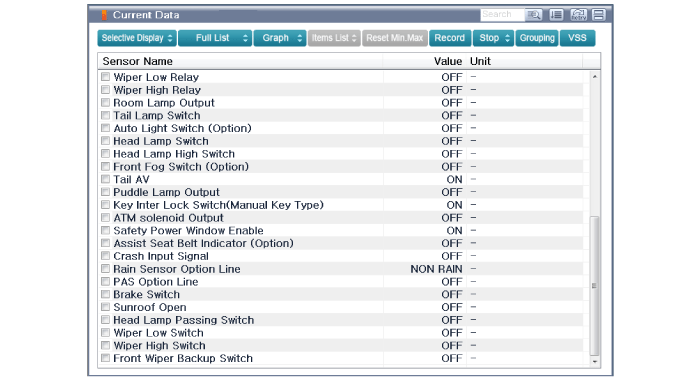
- The body wire harness system can check faulty parts faster with the Global Diagnostic System (GDS) tester. The GDS tester provides the following information.
- Self-test: Diagnostic trouble code (DTC) check and display
- Data list: Check the status of system inputs/outputs.
- Forced operation: Check the operating status of the system
- Additional function: other control such as option system and zero point setting
- Select "Vehicle Model" and the system to be checked to inspect the vehicle with the tester.
- After selecting BCM, select the module to check.
- Select the "Input/Output Monitor" menu to check the current input/output status. The input/output data for the sensors connected to the Instrument Panel Module (IPM) can be checked.
Test yourself
A quick Hyundai Kona quiz: every answer comes with an explanation and a link to the manual page.
Was this page helpful?