Automatic Transmission System (A8LF1)
Valve Body
In this manual: Automatic Transmission System (A8LF1)
23steps
~138min
4/5difficulty
Done 0 of 23
Description and Operation
Description
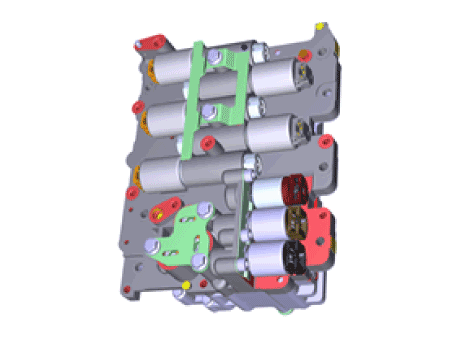
- The installed valve body is located inside the transmission.
- The valve body is necessary to control the automatic transmission and consists of various valves used to control the oil flow from the oil pump.
- Specifically, these valves consist of pressure regulator valves, oil redirection valves, shift valves and manual valves.
- The valve body also features electronic solenoid valves that ensure smooth shifting.
Repair Procedures
Removal
|

- Turn the ignition switch OFF and disconnect the negative (-) battery cable.
- Remove the battery and battery tray. (Refer to Engine Electrical System - "Battery")
- Remove the air duct and air cleaner assembly. (Refer to Engine Mechanical System - "Air Cleaner")
- Remove the under cover. (Refer to Engine Mechanical System - "Engine Room Under Cover")
- Drain the engine coolant. (If equipped with ATF warmer) (Refer to Engine Mechanical System — "Engine Coolant").
- Loosen the drain plug (A) and reinstall it after draining the ATF completely.
Tightening torque: 33.3–43 N·m
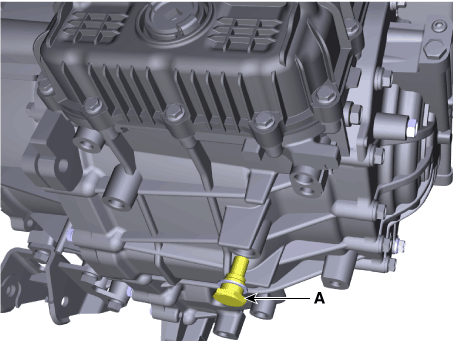

- Replace the gasket before reinstalling the drain plug.
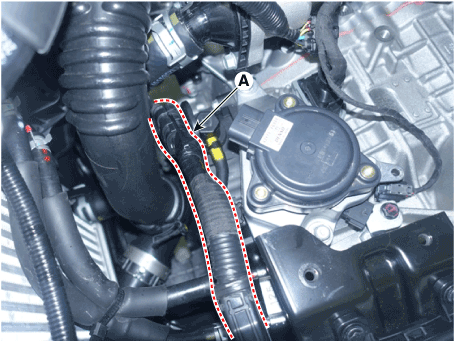
- Loosen the locking bolt (A) and remove the bracket.
Tightening Torque: 9.8–11.8 N·m
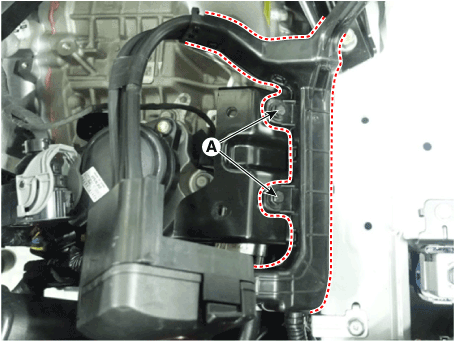
- Loosen the mounting bolts (A) and remove the bracket.
Tightening Torque: 9.8–11.8 N·m
- Disconnect the ATF cooler hose (A).
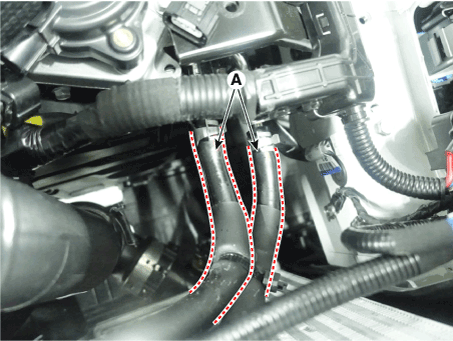

- Carefully install the clamp so as not to damage the hose.
- Install the clamp in the correct direction so that it does not interfere with other parts.
- After installation, start the engine and check for leaks from the hose.
- Loosen the upper bolts (A) of the valve body cover.
Tightening torque: 11.8–13.7 N·m
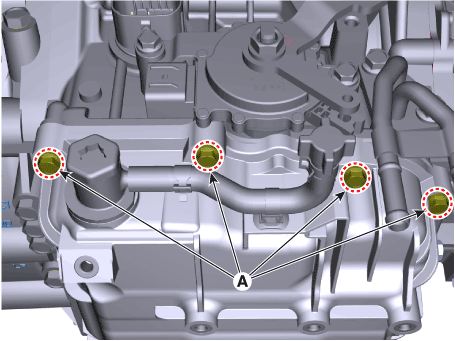
- Remove the valve body cover (A) after removing the bolts.
Tightening torque: 11.8–13.7 N·m

- Be careful when removing the valve body cover, because residual ATF remains in the cover.
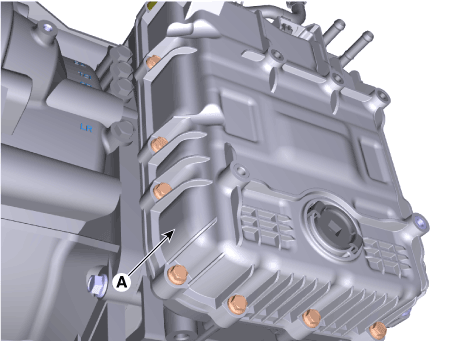

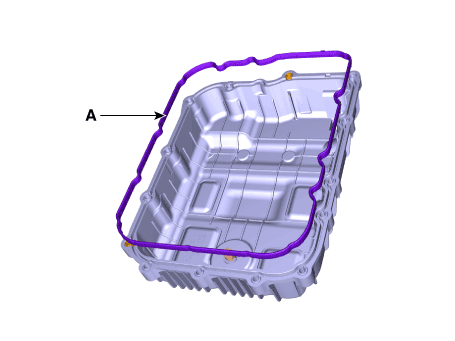
- Replace the gasket (A) before reinstalling the valve body cover.
- After installation, start the engine and check for leaks from the valve body cover.
- Loosen the bolts and then disconnect the main harness (A).
Tightening Torque: 9.8–11.8 N·m
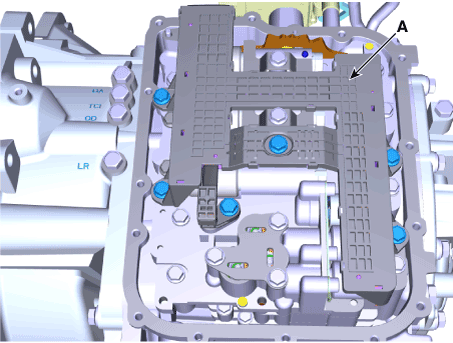
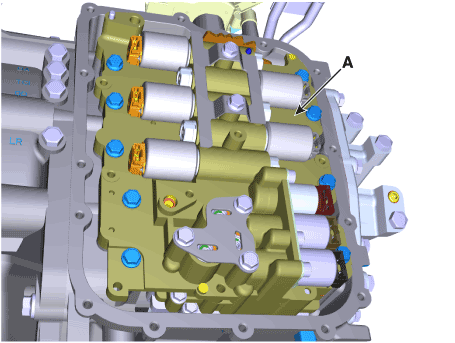
- Remove the valve body assembly (A).
Tightening torque: (A) 9.8–11.8 N·m

- Attach the manual pin (B) to the detent lever (A) and assemble the valve body.
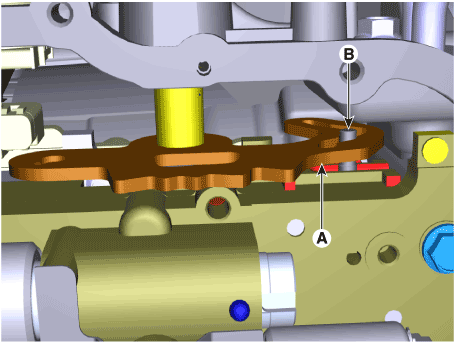
- Attach the manual pin (B) to the detent lever (A) and assemble the valve body.
Installation
- To install, reverse the removal procedure.
- The existing valve body cover gasket (A) must be replaced with a new one. (Do not reuse.)
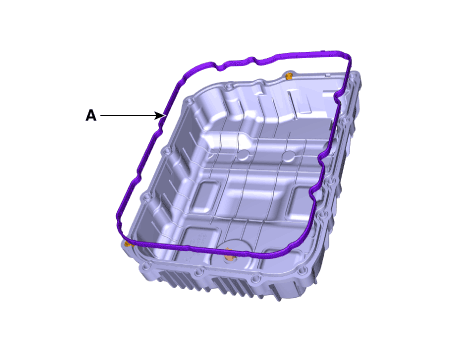
- Perform the procedures described below after replacing the valve body assembly.
- Fill the automatic transmission with fluid. (Refer to Hydraulic System — "Fluid").
- Add engine coolant. [If equipped with ATF warmer] (Refer to Engine Mechanical System — "Engine Coolant").
- Erase diagnostic trouble codes (DTC) using the diagnostic scan tool. Disconnecting the negative battery terminal will not clear DTCs. Always clear DTCs using the diagnostic scan tool.
- Reset the automatic transmission adaptive values using the diagnostic scan tool.
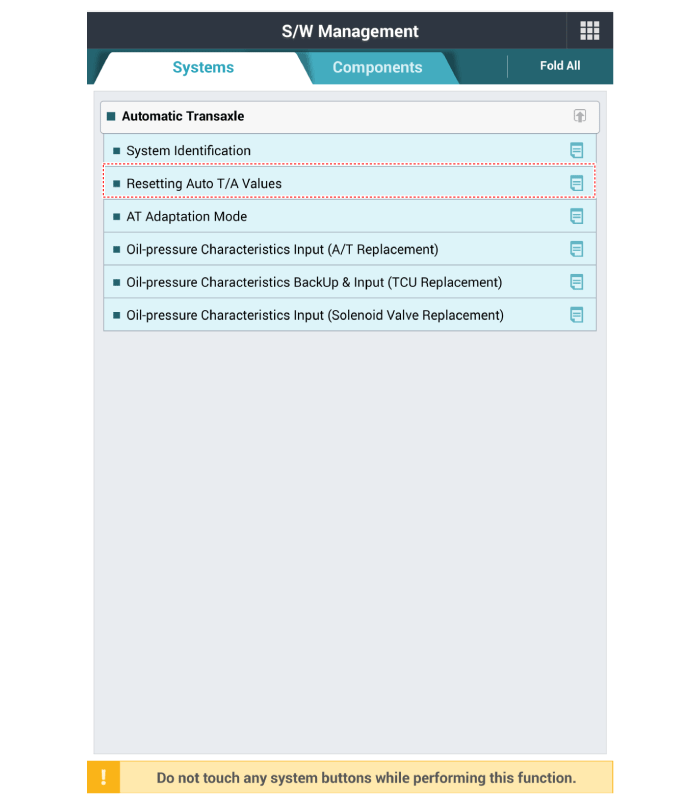
- Perform the oil pressure characteristic input procedure using the diagnostic scan tool.
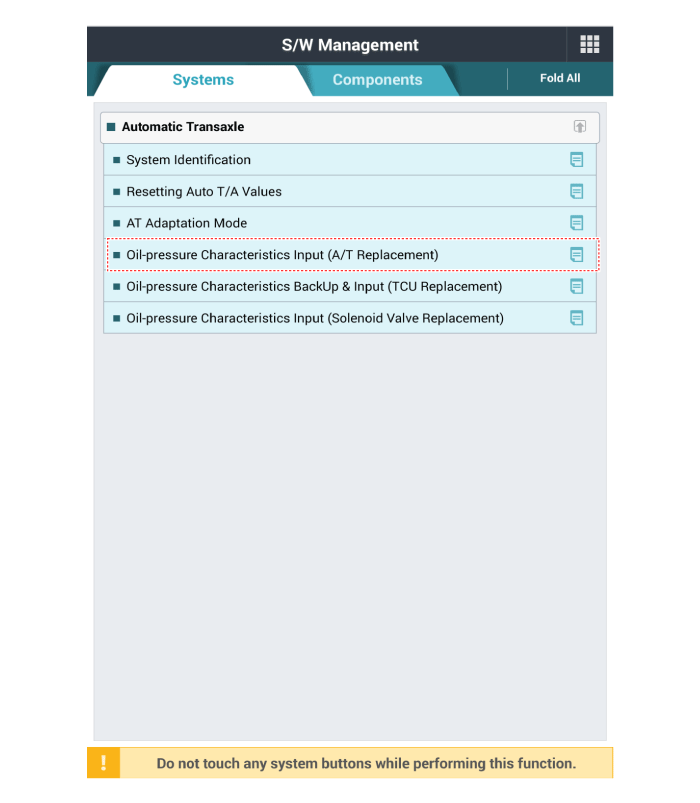
- Perform the procedure to store the TCM adaptive values. (Refer to "Automatic Transmission Control System - Repair Procedures")
- After installation, check for fluid leaks from the hose connection while starting the engine.
Test yourself
A quick Hyundai Palisade quiz: every answer comes with an explanation and a link to the manual page.
Was this page helpful?