Four-Wheel Drive (4WD) System
Direct Electro-Hydraulic Coupling Repair Procedures
In this manual: Four-Wheel Drive (4WD) System
7steps
~42min
2/5difficulty
Done 0 of 7
Inspection
|
Removal
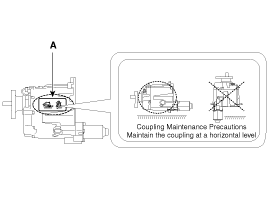 |
- Remove the bolts securing the 4WD coupling assembly (A-3ea) to the rear propeller shaft (B).
Tightening torque: 49.0~69 N·m
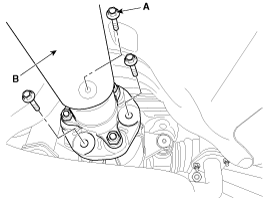
- Using a flat-blade tool, separate the propeller shaft from the 4WD coupling.
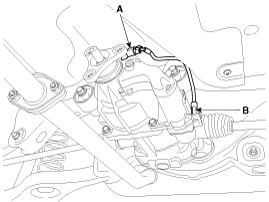
- Disconnect the pressure sensor connector (A) and the oil hydraulic motor connector (B).
- Loosen the coupling assembly mounting bolts (A-4EA).
Tightening torque: 58.8~64 N·m
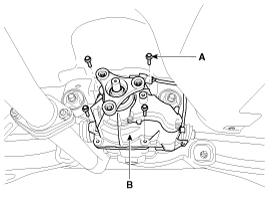
- Using a flat-blade tool, separate the 4WD coupling assembly from the rear differential housing assembly.
Installation
- Install in the reverse order of removal.

- Apply high-pressure molybdenum grease to the splines (A).
- When installing the coupling, be careful not to damage the oil seal (B).
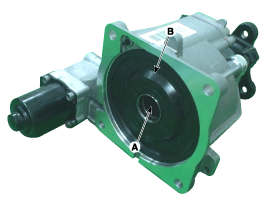
- After replacing the coupling, reset the 4WD ECU coupling learned values using GDS. (Refer to 4WD Control System - "Adjustment")
Test yourself
A quick Hyundai Tucson LM quiz: every answer comes with an explanation and a link to the manual page.
Was this page helpful?