Outline
When a problem occurs with DFI system, the warning indicator light (LED) [A] and FI warning symbol [B] goes on to alert the rider. In addition, the condition of the problem is stored in the memory of the ECU. For models equipped with an immobilizer system, the warning indicator light (LED) and immobilizer warning symbol [C] blinks, when a problem occurs in the system.

With the engine stopped and turned in the self-diagnosis mode, the service code [A] is displayed on the LCD (Liquid Crystal Display) by the number of two digits (see Self -Diagnosis Procedures in the Self-Diagnosis System chapter).
If the problem is with the following parts, the ECU can not recognize these problem. Therefore, the warning indicator light (LED), FI and/or immobilizer warning symbols do not goes on and/or blinks, and service code is not displayed.
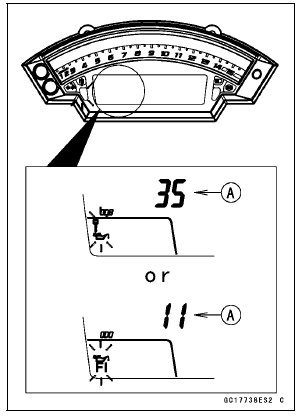
LCD for Meter Unit
Fuel Pump
Primary and Secondary Fuel Injectors
Stick Coil Secondary Wiring and Ground Wiring
ECU Power Source Wiring and Ground Wiring
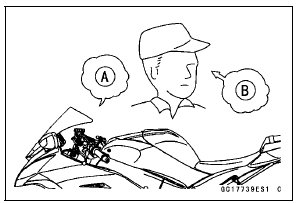
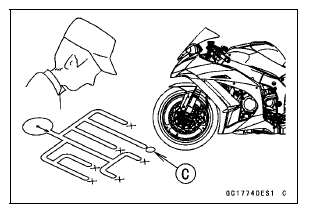
When the service code [A] is displayed, for first ask the rider about the conditions [B] of trouble, and then start to determine the cause [C] of problem.
As a pre-diagnosis inspection, check the ECU for ground and power supply, the fuel line for no fuel leaks, and for correct pressure. The pre-diagnosis items are not indicated by the warning indicator light (LED) and FI warning symbol.
Don’t rely solely on the DFI self-diagnosis function, use common sense.
Even when the DFI system is operating normally, the warning indicator light (LED) and FI warning symbol may goes on under strong electrical interference. Additional measures are not required. Turn the ignition switch to OFF to stop the indicator light and symbol.
If the warning indicator light (LED) and FI warning symbol of the motorcycle brought in for repair still goes on, check the service code.
When the repair has been done, the warning indicator light (LED) and FI warning symbol goes off. But the service codes stored in memory of the ECU are not erased to preserve the problem history. The problem history can be referred using the KDS (Kawasaki Diagnostic System) when solving unstable problems.
When the motorcycle is down, the vehicle-down sensor operates and the ECU shuts off the fuel pump relay, fuel injectors (primary and secondary) and ignition system. The ignition switch is left ON. If the starter button is pushed, the electric starter turns but the engine does not start. When the starter button is pushed, the warning indicator light (LED) and FI warning symbol blink but the service code is not displayed. To start the engine again, raise the motorcycle, turn the ignition switch to OFF, and then ON.
Much of the DFI system troubleshooting work consists of confirming continuity of the wiring. The DFI parts are assembled and adjusted with precision, and it is impossible to disassemble or repair them.
- When checking the DFI parts, use a digital meter which can be read two decimal place voltage or resistance.
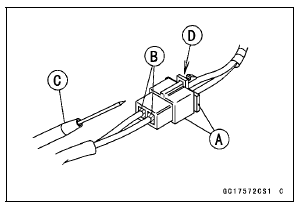
- The DFI part connectors [A] have seals [B], including the ECU. When measuring the input or output voltage with the connector joined, use the needle adapter set [C]. Insert the needle adapter inside the seal until the needle adapter reaches the terminal.
Special Tool - Needle Adapter Set: 57001-1457
NOTICE
Insert the needle adapter straight along the terminal in the connector to prevent short-circuit between terminals.
- Make sure that measuring points are correct in the connector, noting the position of the lock [D] and the lead color before measurement. Do not reverse connections of a digital meter.
- Be careful not to short-circuit the leads of the DFI or electrical system parts by contact between adapters.
- Turn the ignition switch to ON and measure the voltage with the connector joined.
NOTICE
Incorrect, reverse connection or short circuit by needle adapters could damage the DFI or electrical system parts.
- After measurement, remove the needle adapters and apply silicone sealant to the seals [A] of the connector [B] for waterproofing.

Sealant - Liquid Gasket, TB1211: 56019-120
- Always check battery condition before replacing the DFI parts. A fully charged battery is a must for conducting accurate tests of the DFI system.
- Trouble may involve one or in some cases all items.
If any wiring is deteriorated, replace the wiring.
- Pull each connector [A] apart and inspect it for corrosion, dirt, and damage.
If the connector is corroded or dirty, clean it carefully. If it is damaged, replace it. Connect the connectors securely.
- Check the wiring for continuity.
Use the wiring diagram to find the ends of the lead which is suspected of being a problem.
Connect the hand tester between the ends of the leads.
Special Tool - Hand Tester: 57001-1394
- Set the tester to the × 1 Ω range, and read the tester.
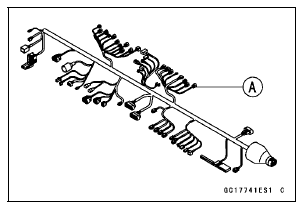
If the tester does not read 0 Ω, the lead is defective. Replace the lead or the main harness.
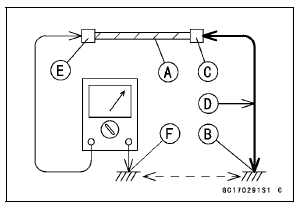
- If both ends of a harness [A] are far apart, ground [B] the one end [C], using a jumper lead [D] and check the continuity between the end [E] and the ground [F]. This enables to check a long harness for continuity. If the harness is open, repair or replace the harness.
- When checking a harness [A] for short circuit, open one end [B] and check the continuity between the other end [C] and ground [D]. If there is continuity, the harness has a short circuit to ground, and it must be repaired or replaced.

- Narrow down suspicious locations by repeating the continuity tests from the ECU connectors.
If no abnormality is found in the wiring or connectors, the DFI parts are the next likely suspects. Check the part, starting with input and output voltages. However, there is no way to check the ECU itself.
If an abnormality is found, replace the affected DFI part.
If no abnormality is found in the wiring, connectors, and DFI parts, replace the ECU.
Test yourself
A quick Kawasaki Ninja ZX-10R quiz: every answer comes with an explanation and a link to the manual page.