Engine Electrical System
Smart Cruise Control Unit Repair Procedures
In this manual: Engine Electrical System
14steps
~84min
3/5difficulty
Done 0 of 14
Removal
- Turn the ignition switch OFF and disconnect the negative (-) battery cable.
- Remove the front bumper. (Refer to Body - "Front Bumper")
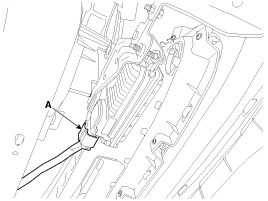
- Disconnect the Smart Cruise Control unit connector (A).
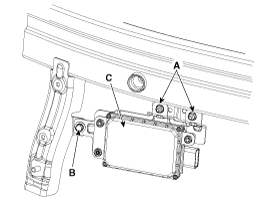
- Loosen the nuts (A) and bolt (B), then remove the Smart Cruise Control unit (C) from the vehicle.
Installation
- Install in the reverse order of removal.
Smart Cruise Control Unit Mounting Bolt/Nut: 7.8 ~ 11.8 N·m
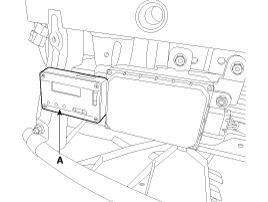
Using SST 0K964-3T000 (A), make sure the side surface of the Smart Cruise Control (SCC) unit installation is perpendicular to the horizontal surface.
- Perform the alignment procedure for the Smart Cruise Control radar sensor. (Refer to "Smart Cruise Control Sensor Adjustment")
- Install the front bumper. (Refer to Body - "Front Bumper")
Smart Cruise Control (SCC) Radar Sensor Alignment
The Smart Cruise Control (SCC) unit detects the vehicle ahead and then recognizes the distance to the vehicle ahead and the relative speed using the built-in radar sensor. For the radar sensor to operate properly, it must be correctly aligned parallel to the vehicle's driving direction. Therefore, the radar sensor alignment procedure must be performed after reinstalling or replacing the sensor with a new one. If sensor alignment is not performed under the conditions specified above, the Smart Cruise Control system may not operate correctly.
|
- Park the vehicle on a level surface.
- Remove the front bumper. (Refer to Body - "Front Bumper")
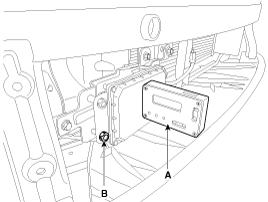
- Check the vertical alignment of the radar sensor using SST 0K964-3T000 (A). If the vertical alignment is out of tolerance, turn the adjusting screw (B) until the alignment is within tolerance.
Tolerance: ±1.25⁰ or less
- Install the front bumper. (Refer to Body - "Front Bumper")
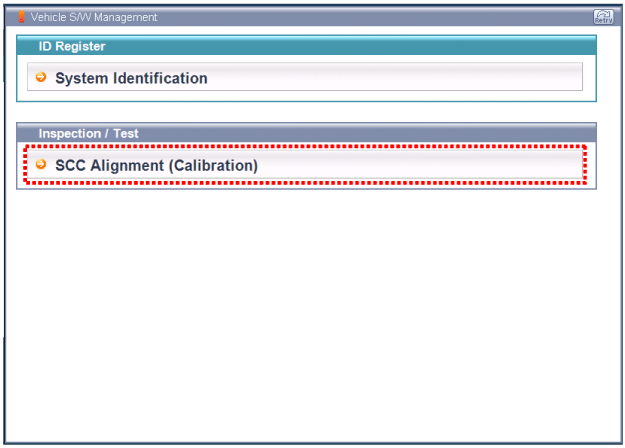
- To perform horizontal alignment, connect the GDS with the engine running and select "SCC Alignment (Calibration)".
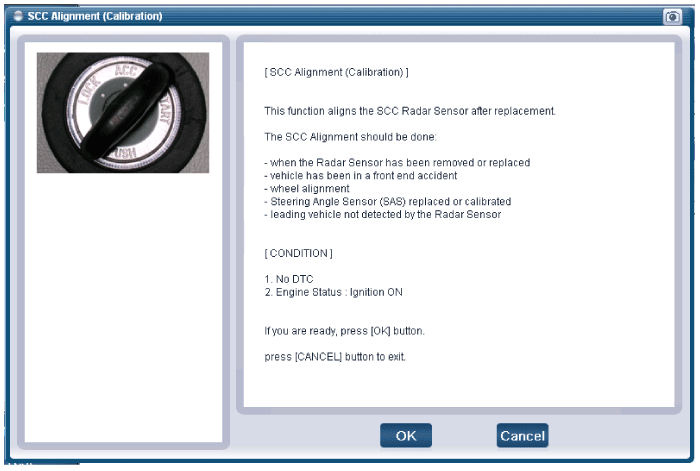
- Press "OK" to start sensor alignment.
- Follow the driving mode procedure described in the GDS.
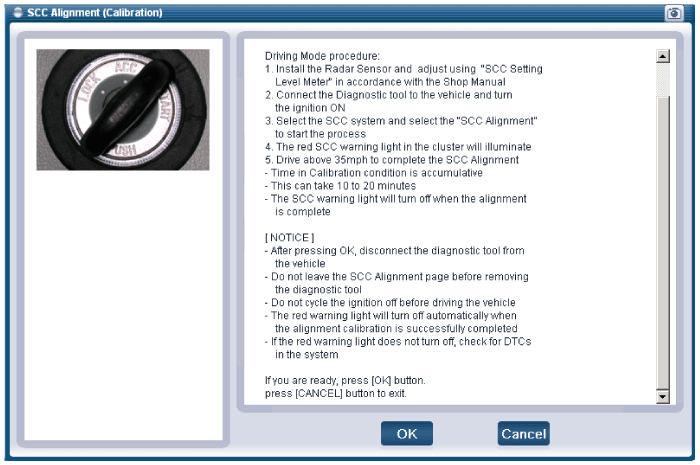
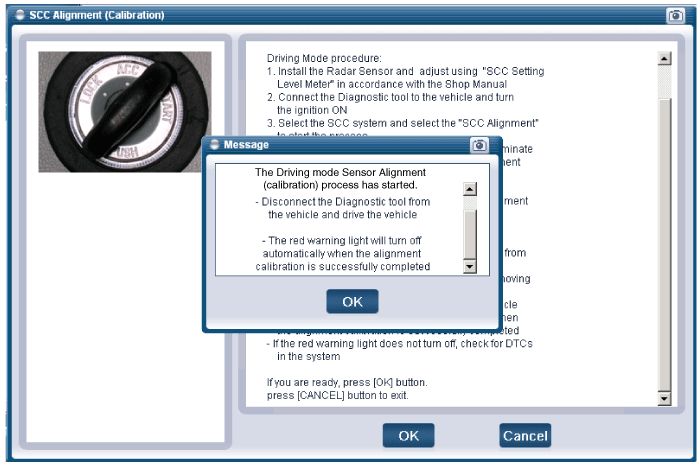
Horizontal alignment normally takes 5 to 15 minutes, but it may be shorter or longer depending on road conditions or driving conditions.- Road or driving conditions that shorten alignment:
- Driving at a speed above 65 km/h
- Driving on a road without curves or slopes
- Driving on a thick, wide, paved road
- Driving on a road with repeated fixed targets (metal objects such as street lights or guardrails)
- Driving on a dry road without rain or snow
- Road or driving conditions that may interrupt the alignment process:
- Driving on a road with a sharp curve with a radius of 100 m (328.0 ft) or less.
- Driving at a lower speed than recommended above, or stopping at a red traffic light
- Driving in a tunnel or under an overpass
- Excessive steering wheel input to the left or right, or sudden lane changes
Be sure to observe the following safety rules when driving the vehicle to perform horizontal alignment:
- Observe the regulated speed
- Do not drive too fast to shorten sensor alignment. Drive safely, considering road conditions and traffic situations.
- Do not look at the GDS screen or operate the GDS while driving. Operate the GDS only while the vehicle is stopped.
If horizontal alignment is not completed successfully, check the alignment using the GDS. If the value is outside ±3⁰, check that the rear beam or the bracket on which the SCC unit is installed is in good condition, and then, if there are no problems, replace the SCC unit with a new one. After replacing the SCC unit, repeat the alignment procedure described above.
Test yourself
A quick Kia Cadenza VG Owner's Manual quiz: every answer comes with an explanation and a link to the manual page.
Was this page helpful?