Kia Sorento XM 2011-2023 Repair Manual
Front Propeller Shaft Removal and Installation
In this manual: Kia Sorento XM 2011-2023 Repair Manual
13steps
~83min
5/5difficulty
1special tools
Done 0 of 13
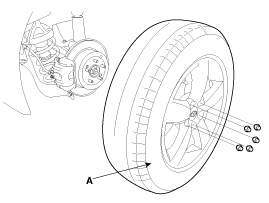
- Remove the front wheel and tire (A) from the front hub.
Tightening torque: 88.2 - 108 N·m
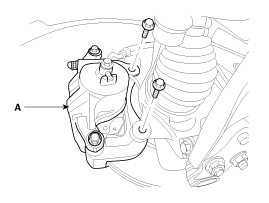
- Remove the caliper mounting bolts, then secure the brake caliper assembly (B) with wire.
Tightening torque: 78.4 ~ 98 N·m
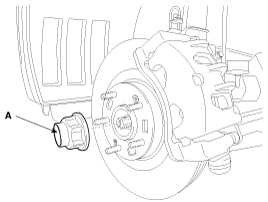
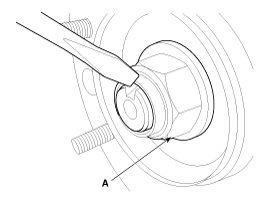
- Remove the caulked nut (A).
Tightening torque: 240.3~ 270 N·m (24.5 ~ 27.5 kgf·m, 177.2 ~ 198.9 lb-ft)
- Disconnect the brake hose (A) and the wheel speed sensor (B).
Tightening torque: 6.8 - 10.8 N·m
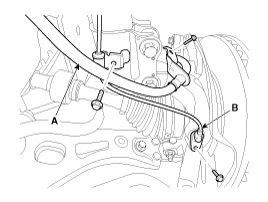
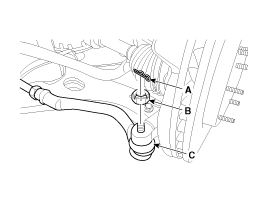
- Disconnect the tie rod end ball joint (C) from the steering knuckle.
- Remove the cotter pin (A).
- Remove the castellated nut (B).
Tightening torque: 34.3 to 44 N·m
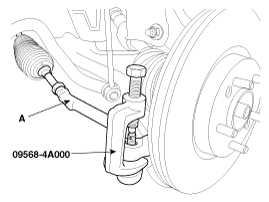
- Disconnect the ball joint (A) from the steering knuckle using the special service tool (09568-4A000).
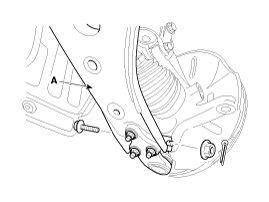
- Remove the mounting bolt and nut of the lower arm (A) from the steering knuckle.
Tightening torque: 98.0 ~ 118 N·m
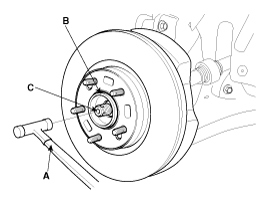
- Using a plastic hammer (A), disconnect the drive shaft (C) from the hub (B).
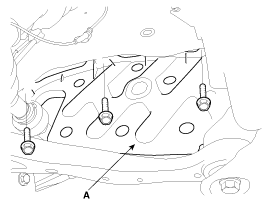
- Remove the right side cover (A).
Tightening torque: 7.8 ~ 11.8 N·m
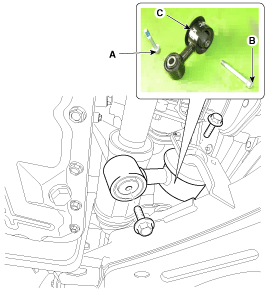
- Remove the mounting bolts (A, B) of the upper arm bracket (C). Tightening torque: (A) 107.9 ~ 126 N·m (B) 49.0 ~ 64 N·m
- Loosen the inner shaft mounting bolts, then disconnect the inner shaft (A).
Tightening torque: 49.0 ~ 69 N·m
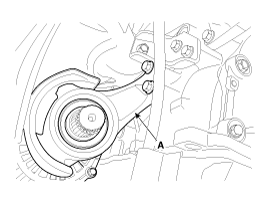
- Insert a pry bar (A) between the transaxle case and the joint housing, and separate the drive shaft (B) from the transaxle case.
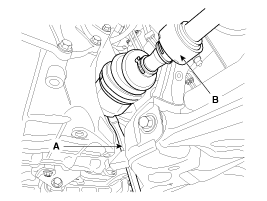
- Install in the reverse order of removal.
Test yourself
A quick Kia Sorento Owner's Manual quiz: every answer comes with an explanation and a link to the manual page.
Was this page helpful?