Kia Sorento XM 2011-2023 Repair Manual
Removal of Steering Column and Shaft
In this manual: Kia Sorento XM 2011-2023 Repair Manual
13steps
~83min
4/5difficulty
1special tools
Done 0 of 13
- Disconnect the negative battery cable from the battery, then wait at least 30 seconds.
- Turn the steering wheel so the front wheels face straight ahead.
- Remove the airbag module. (Refer to Restraint System - Driver Airbag Module (DAB) and Clock Spring)
- Disconnect the connector and the lock nut (A), then remove the steering wheel using the special service tool (09561-11001).
Tightening torque: 39.2 ~ 49 N·m
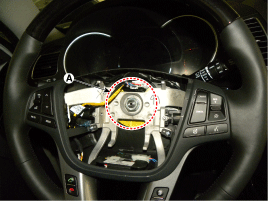
- Remove the steering column shroud. (Refer to Restraint System - Driver Airbag Module (DAB) and Clock Spring.)
- Remove the clock spring. (Refer to Restraint System - "Driver Airbag (DAB) Module and Clock Spring")
- Remove the multifunction switch. (Refer to Body Electrical System - "Multifunction Switch")
- Remove the lower crash pad panel. (Refer to Body (Interior and Exterior) - "Lower Crash Pad Panel")
- Loosen the bolt (A), then disconnect the universal joint assembly from the steering gear shaft.
Tightening torque: 32.4 ~ 37 N·m
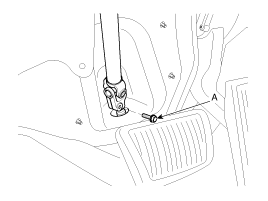
- Disconnect all connectors (A) connected to the steering column.
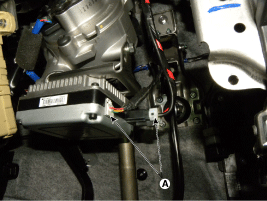
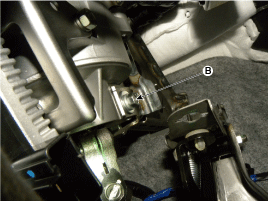
- Remove the steering column (C) by loosening the mounting bolt (B - 1 pc) and nuts (A - 2 pcs). Tightening torque: (A) 2.7 ~ 17.7 N·m (B) 44.1 ~ 49 N·m
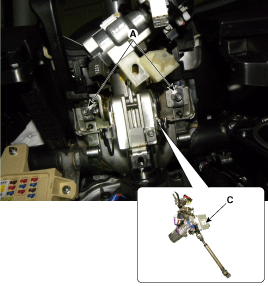
- Install in the reverse order of removal.
- Perform calibration of the steering wheel angle sensor. (Refer to Electric Power Steering - Repair Procedures - ASP Calibration.)
Test yourself
A quick Kia Sorento Owner's Manual quiz: every answer comes with an explanation and a link to the manual page.
Was this page helpful?