Head-Up Display (HUD)
Components and Component Location
Component

Repair Procedures
Removal
Disconnect the negative (-) battery terminal.
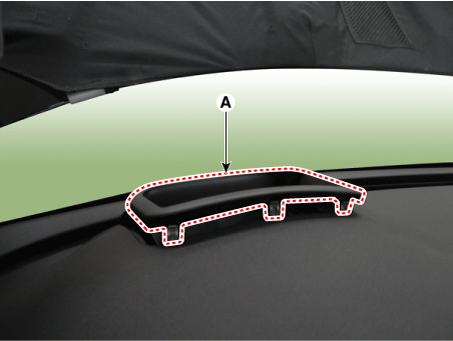
Remove the HUD front cover (A) using a remover.
Remove the instrument cluster.
(Refer to Indicators and Gauges - "Instrument Cluster")
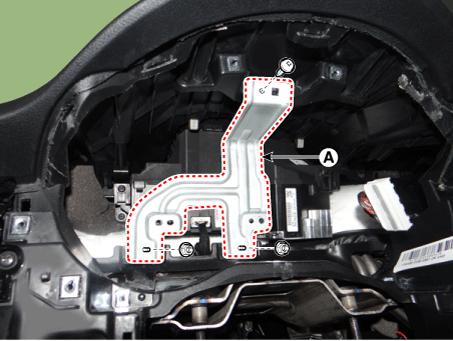
Remove the HUD bracket (A) after loosening the mounting screw and nuts.
Disconnect the HUD connector (A).

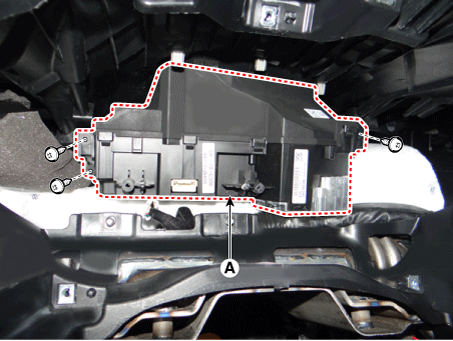
Remove the head-up display (A) after loosening the mounting screws.
Installation
Connect the connector after installing the head-up display.
Install the HUD bracket.
Install the instrument cluster.
Install the head-up display bezel.
Connect the negative (-) battery terminal.
Inspection
If part of the head-up display image is distorted or is not at the driver's eye level, the Global Diagnostic System (KDS) can be used to perform calibration.
Calibration is required:
After replacing the head-up display
When the image is distorted after windshield replacement (built-in film to remove double images in the glass)
When removing/installing or replacing the main cluster panel mounted on the HUD.
When the HUD image installation position is not within the driver's field of view, resulting in an out-of-focus image.
Calibration Items
No Video Calibration Functions Calibration Cases 1 Rotation: Calibrate counterclockwise/clockwise to the center.
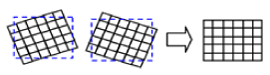
2 Smile: Calibrate vertically to the center.
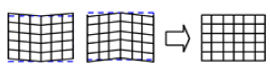
3 Tilt (up/down): Calibrate the vertical tilt.
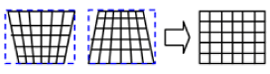
4 Tilt (left/right): Calibrate the horizontal tilt.
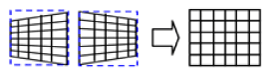
5 Parallel Compensation
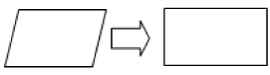
6 Move up/down at the specified position: Calibrate to the user's eye level.

7 Initialization: Return to the previous state before calibration. Calibration Procedure
Park the vehicle on a level surface for accurate adjustment.
Make sure there are no foreign objects on the windshield.
Connect the Global Diagnostic System to the vehicle and select the vehicle type and the HUD optional functions.
In the additional functions, select "HUD Calibration."
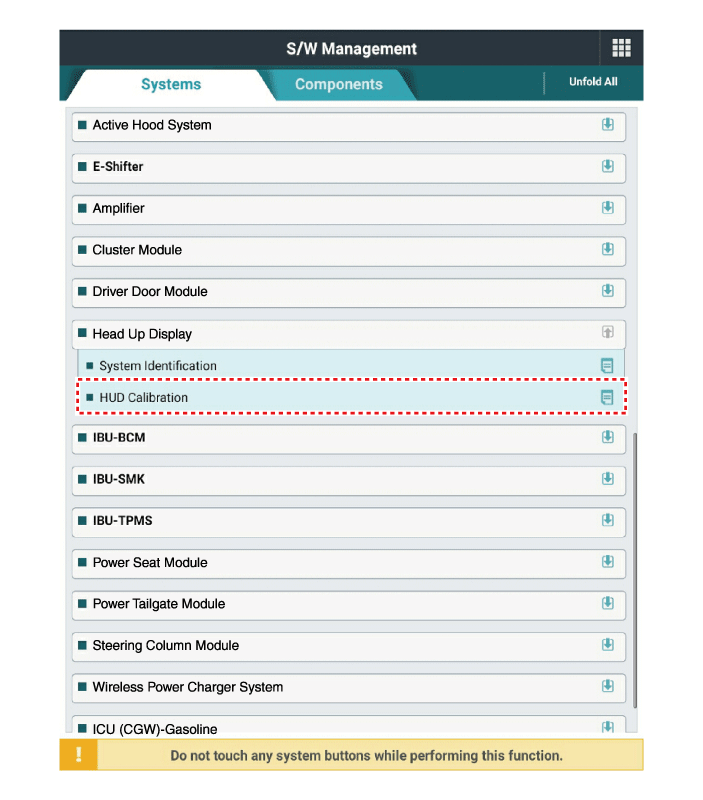
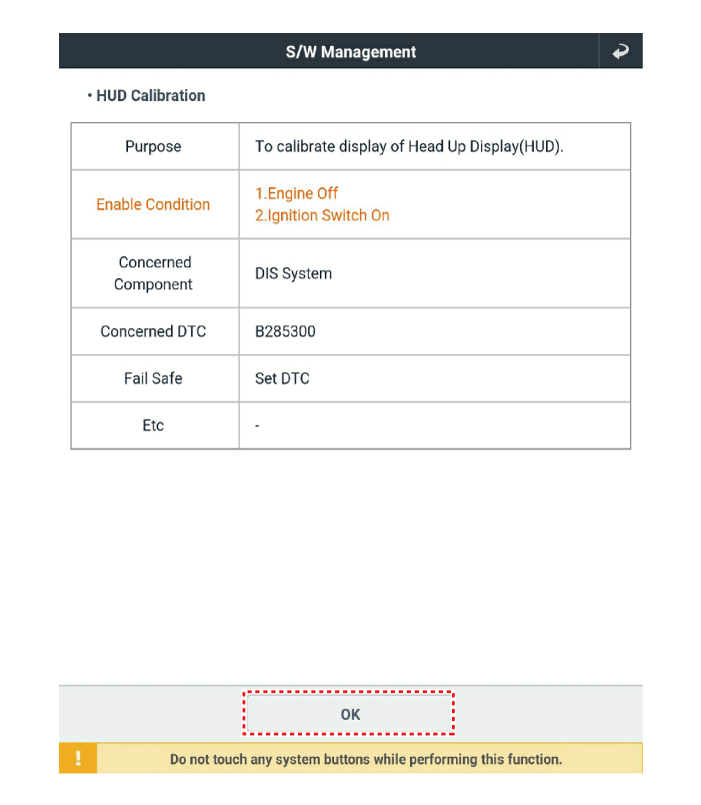
Before "Calibration," perform "HUD Calibration - Initialization."
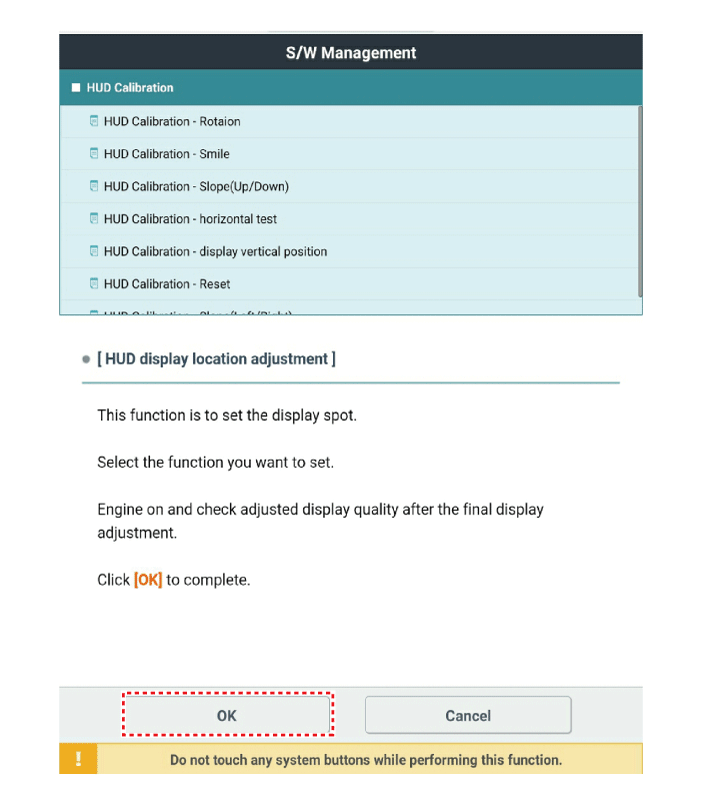
Select the required calibration items and perform "HUD Calibration."
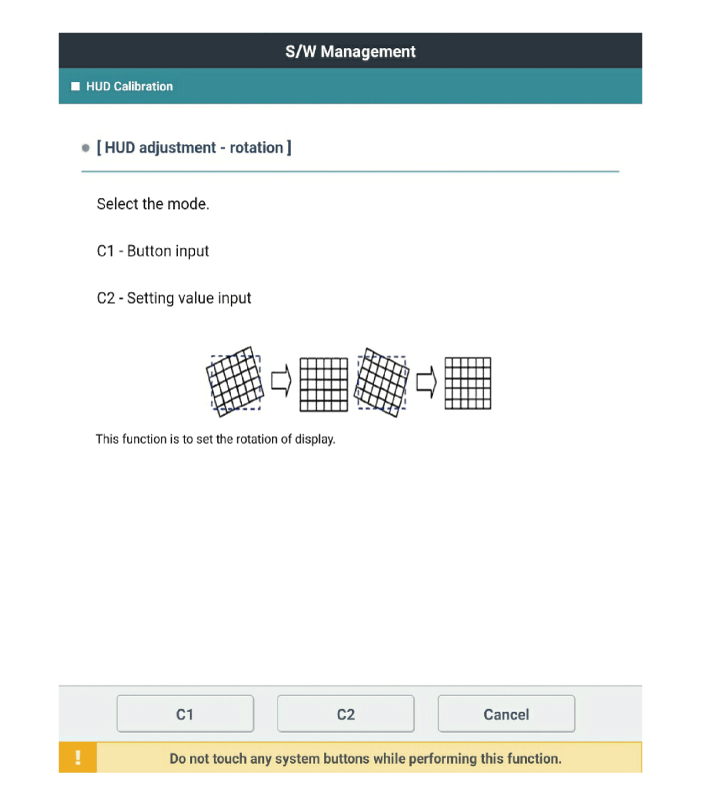
After calibration is completed, start and stop the engine, and make sure the calibration data is saved.
Troubleshooting
Troubleshooting
| Category | Symptom Errors | Inspection Item | Detailed Inspection Item | Related Parts |
| Lighting |
|
|
|
Light sensor CGW Cluster |
| Adjustment Function |
|
|
|
HUD Cluster |
Test yourself
A quick Kia Stinger CK quiz: every answer comes with an explanation and a link to the manual page.