Dual Clutch Transmission (DCT) System
Dual Clutch Transmission (DCT) Repair Procedures
In this manual: Dual Clutch Transmission (DCT) System
31steps
~191min
5/5difficulty
1special tools
Done 0 of 31
Removal
- Remove the engine cover. (Refer to Engine Mechanical System - "Engine Cover")
- Remove the air cleaner assembly and air duct. (Refer to Engine Mechanical System - "Air Cleaner")
- Remove the battery and battery tray. (Refer to Engine Electrical System - "Battery")
- Remove the ECM. (Refer to Fuel System - "Engine Control Module (ECM)").
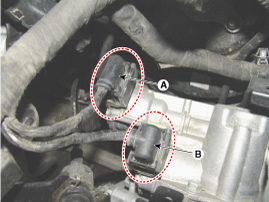
- Disconnect the shift actuator connector (A) and select actuator connector (B). Then remove the wire retainer.
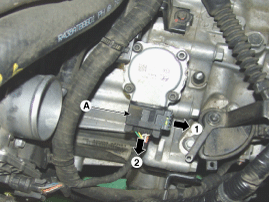
- Disconnect the odd clutch actuator motor connector (A), then remove the wire retaining clip.
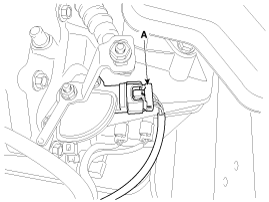
- Disconnect the shift lock switch connector (A).
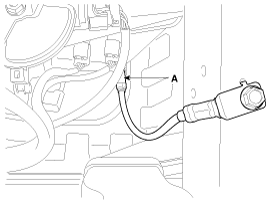
- Remove the bolt (A) and disconnect the ground wire.
- Disconnect the input shaft 2 speed sensor connector (A) and input shaft 1 speed sensor connector (B).
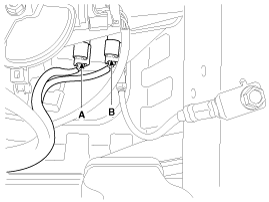
- Remove the nut (A) and bolt (B). Then remove the shift cable (C). Tightening torque: (A) 8.8 ~ 13.7 N·m (B) 19.6 ~ 26 N·m
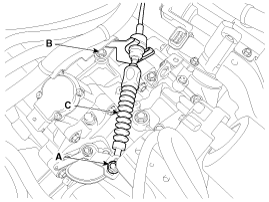
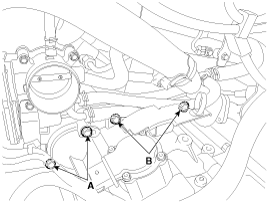
- Remove the upper DCT mounting bolts (A: 2 pcs., B: 2 pcs.).
Tightening torque: (A, B) 42.2 ~ 54 N·m
- Remove the upper hood cover. (Refer to Body - "Upper Cover Panel")
- Assemble the engine mount. (Refer to Special Service Tools - "Engine Mount Bracket Assembly Drawing")
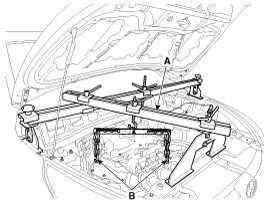
- Install the special service tool (A) for the engine mounting bracket in the engine compartment.
- Hang the ring (B) on the engine hanger and support the engine.
- Remove the mounting cover (A).
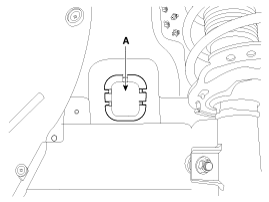
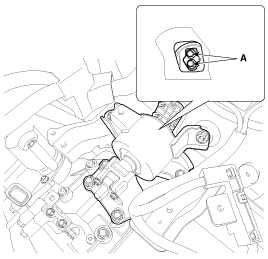
- Support the dual clutch transmission (DCT) from below and remove the DCT support bracket mounting bolt (A).
Tightening torque: 88.3 ~ 108 N·m
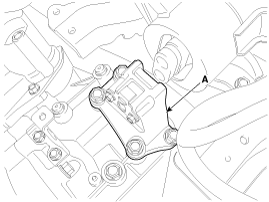
- Loosen the mounting bolt and remove the dual clutch transmission (DCT). Support bracket (A).
Tightening torque: 58.8 ~ 78 N·m
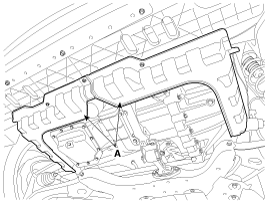
- Remove the lower cover (A). Tightening torque under the cover: 6.9 ~ 10.8 N·m
- Disconnect the even-numbered gear clutch actuator motor connector (A).
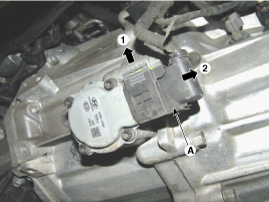
- Remove the drive shaft. (Refer to Drive Shaft and Axle - "Front Propeller Shaft")
- Loosen the mounting bolt and remove the bracket (A).
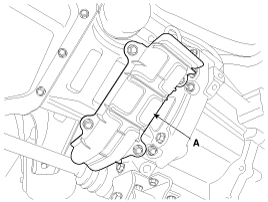
- Remove the drive shaft cover (A).
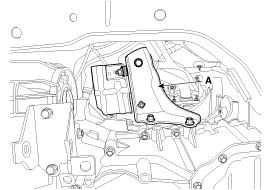
- Remove the mounting bolts (A, B) after supporting the transmission with a jack. Tightening torque: (A) 42.2 ~ 54 N·m (B) 42.2 ~ 48 N·m
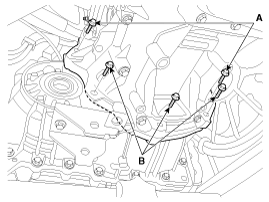
- Remove the transaxle by slowly lowering the jack.
Installation
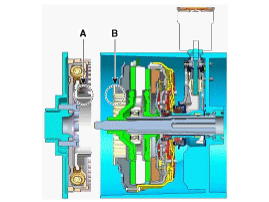
- Align the external spline of the damper (A) on the engine side with the dual spline connection of the clutch (B).
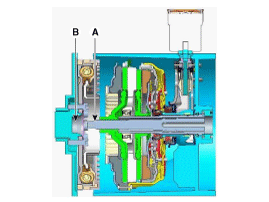
- First insert the input shaft (A) into the engine pilot bearing (B), and then attach the transmission to the engine.
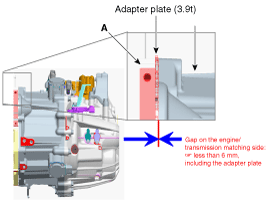
- When assembling, make sure there is no gap on the corresponding side between the engine block (A) and the transmission. Then tighten the bolts (engine-to-transmission mounting bolts).
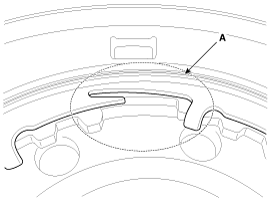
- Fill with dual clutch transmission (DCT) fluid. (Refer to Dual Clutch Transmission Assembly - "Fluid")
- Always use GDS to clear the diagnostic trouble code (DTC) after servicing the dual clutch transmission (DCT) and TCM. The DTC cannot be cleared by disconnecting the battery terminal.
- You must perform TCM learning after replacing the transmission to prevent shift delay and shock during acceleration or when starting to move. (Refer to Dual Clutch Transmission (DCT) System - "Repair Procedures")
Test yourself
A quick Kia Cee'd quiz: every answer comes with an explanation and a link to the manual page.
Was this page helpful?