Battery
Description and Operation
Description
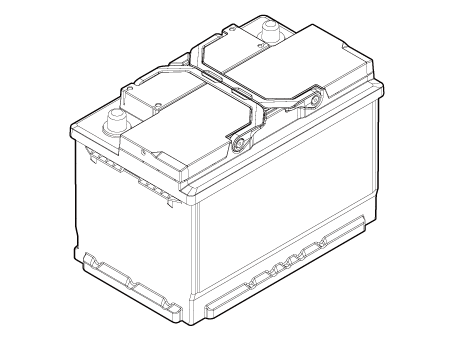
The CMF (Calcium Maintenance Free) battery, as its name suggests, requires no maintenance at all and has no removable battery caps.
The CMF (Calcium Maintenance Free) battery does not require water replenishment and is not serviceable.
The battery is fully sealed, except for small vent holes in the cover.
Specifications
Specification
▶CMF68L-DIN
| Item | Specification |
| Model Type | CMF68L-DIN |
| Capacity [20h/5h] (Ah) | 68/54 |
| Cold Cranking Amps (A) | 600 (SAE / EN) |
| Reserve Capacity (min.) | 113 |
Repair Procedures
Removal
Battery
Turn the ignition off.
Disconnect the negative (-) battery terminal (A).
Tightening torque: 4.0–6 N·m
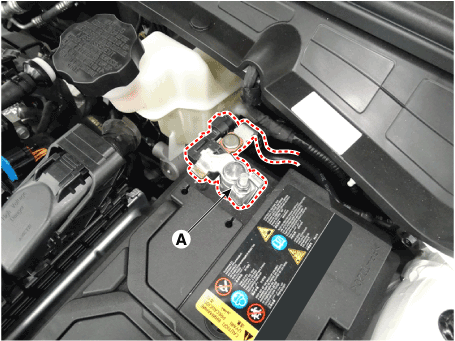
Remove the battery positive (+) terminal clamp (A).
Tightening torque: 7.8–9.8 N·m
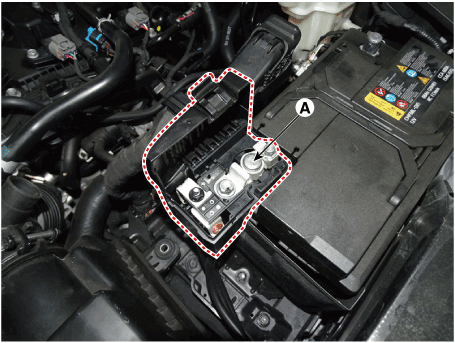
Remove the battery mounting bracket (A).
Remove the battery insulation pad after removing the battery (B).
Tightening torque: 19.6–29 N·m
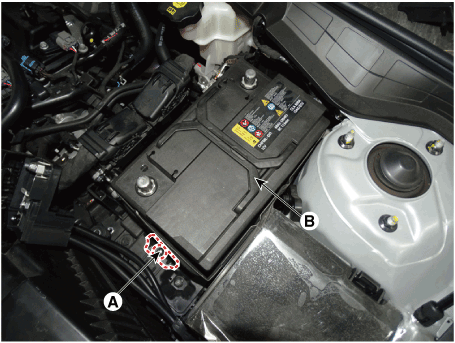
Battery tray
Remove the battery.
(Refer to "Removal")
Remove the air cleaner assembly.
(Refer to Engine Mechanical System - "Air Cleaner")
Remove the ECM.
(Refer to Engine Control System / Fuel System - "Engine Control Module (ECM)").
Remove the battery tray (A) after loosening the nuts.
Tightening torque: 7.8–9.8 N·m
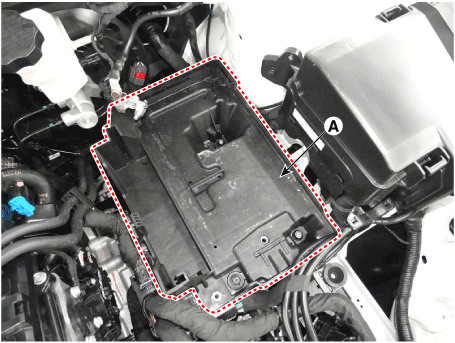
Installation
Install in the reverse order of removal.
Inspection
Battery Voltage and Condition
Check the battery voltage and condition using a battery tester.
Battery Terminal
Move the battery terminals (A) back and forth to check for looseness or corrosion. Clean any corroded terminals.
If the battery positive connection is loose, disconnect the ground (GND) cable before attempting to remove or tighten the positive connection to prevent injury.
If the battery clamp on the positive (+) battery terminal is not securely fastened:
Turn the ignition switch OFF and disconnect the negative (-) battery terminal.
Tighten the battery clamp (A) on the positive (+) battery terminal.
Tightening torque: 7.8–9.8 N·m
If the battery clamp on the negative (-) battery terminal is loose:
Tighten the battery clamp (A) on the negative (-) battery terminal.
Tightening torque: 4.0–6 N·m
Battery Condition
Inspect the battery for damage or deformation. If the battery is severely damaged, deformed, or leaking, replace the battery.
Vehicle Parasitic Current Inspection
[Using an Ammeter]
Turn off all electrical devices, then turn the ignition OFF.
Close all doors except the hood, then lock all doors.
Disconnect the hood switch connector.
Close the liftgate.
Close the doors or remove the door switches.
Wait several minutes until the vehicle's electrical systems enter sleep mode.
Connect the ammeter in series between the negative (-) battery terminal and the ground cable, then slowly disconnect the clamp from the negative (-) battery terminal.
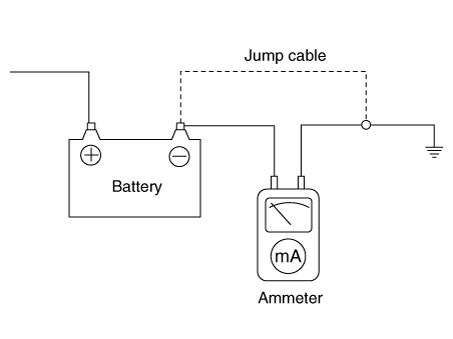
Read the ammeter current value.
If the parasitic current exceeds the limit value, search for the abnormal circuit by removing fuses one at a time and checking the parasitic current.
Reconnect only the fuse of the suspected parasitic current circuit, and locate the suspect unit by removing the components connected to the circuit one at a time until the parasitic draw drops below the specified value.
Limit value (after 10-20 min.): Less than 50 mA
[Using a Clamp-Type Ammeter]
Turn off all electrical devices, then turn the ignition OFF.
Close all doors except the hood, then lock all doors.
Disconnect the hood switch connector.
Close the liftgate.
Close the doors or remove the door switches.
Wait several minutes until the vehicle's electrical systems enter sleep mode.
Install the clamp-type ammeter on the negative (-) battery terminal.
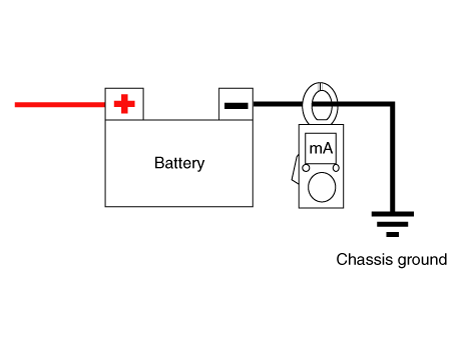
Read the ammeter current value.
If the parasitic current exceeds the limit value, search for the abnormal circuit by removing fuses one at a time and checking the parasitic current.
Reconnect only the fuse of the suspected parasitic current circuit, and locate the suspect unit by removing the components connected to the circuit one at a time until the parasitic draw drops below the specified value.
Limit value (after 10-20 min.): Less than 50 mA
Cleaning
Make sure the ignition switch and all accessories are in the OFF position.
Disconnect the battery cables (negative terminal first).
Remove the battery from the vehicle.

Inspect the battery tray for damage caused by electrolyte leakage. If acid damage is present, clean the area with a solution of clean warm water and baking soda. Scrub the area with a stiff brush and wipe with a cloth dampened with baking soda and water.
Clean the top of the battery with the same solution described above.
Inspect the battery case and cover for cracks. If cracks are present, the battery must be replaced.
Clean the battery terminals with a suitable tool.
Clean the inside surfaces of the battery terminal clamps with a suitable battery terminal cleaning tool. Replace damaged or worn cables and broken terminal clamps.
Install the battery in the vehicle.
Connect the cable terminals to the battery terminal, making sure the upper parts of the terminal are level with the tops of the posts.
Tighten the terminal nuts securely.
After tightening, apply light mineral grease to all connections.
Troubleshooting
Troubleshooting
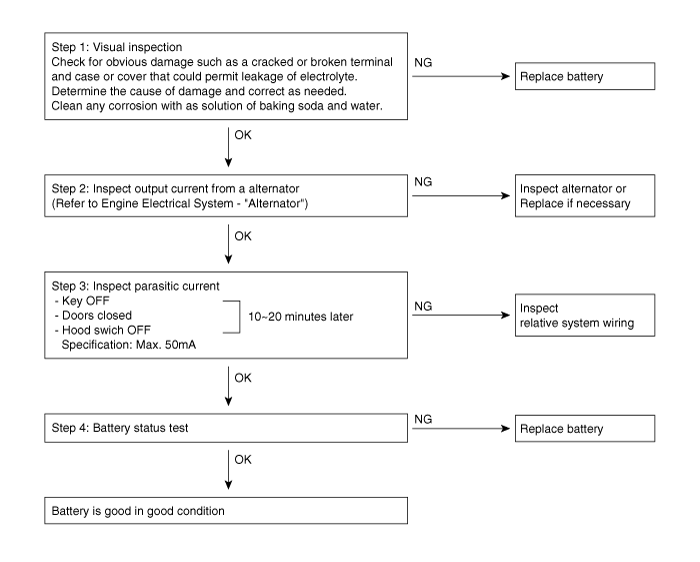
Test yourself
A quick Kia Optima DL3 quiz: every answer comes with an explanation and a link to the manual page.