Timing Chain Guide Assembly
Components and Component Location
Components
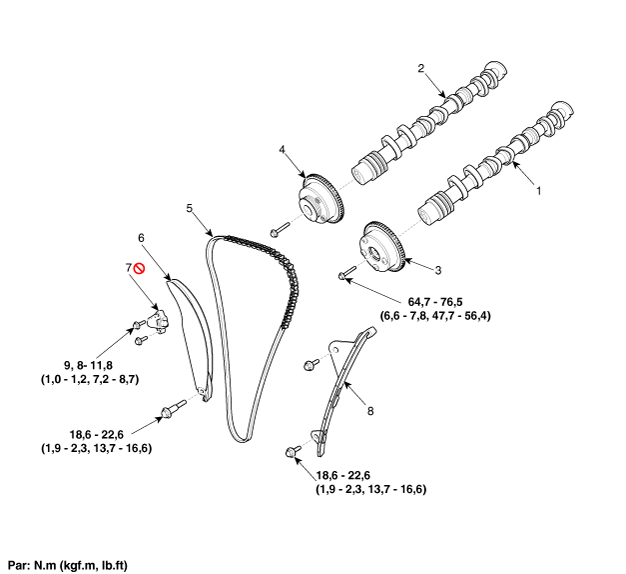
| 1. Intake Camshaft 2. Exhaust Camshaft 3. Intake CVVT Assembly 4. Exhaust CVVT Assembly |
5. Timing Chain 6. Timing Chain Tensioner Arm 7. Timing Chain Tensioner 8. Timing Chain Guide |
Repair Procedures
Removal
Remove the cylinder head cover.
(Refer to Cylinder Head Assembly - "Cylinder Head Cover")
Set the No. 1 cylinder to TDC (top dead center) on the compression stroke.
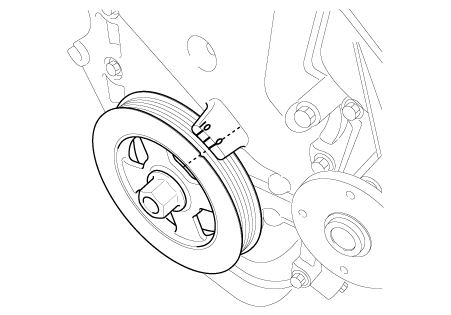
Turn the crankshaft pulley and align its groove with the valve timing mark on the timing chain cover.
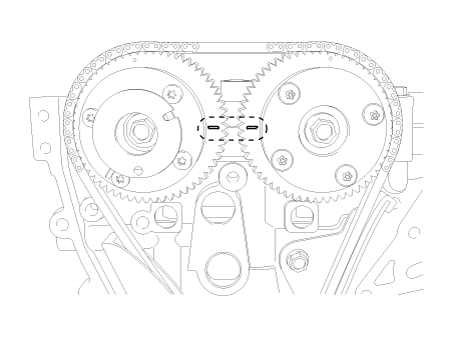
Make sure the TDC marks of the intake and exhaust CVVT sprockets are in a straight line with the cylinder head surface, as shown in the illustration. If not, turn the crankshaft one full revolution (360°) or more.
Remove the timing chain cover.
(See Valve Timing - "Timing Chain Cover")
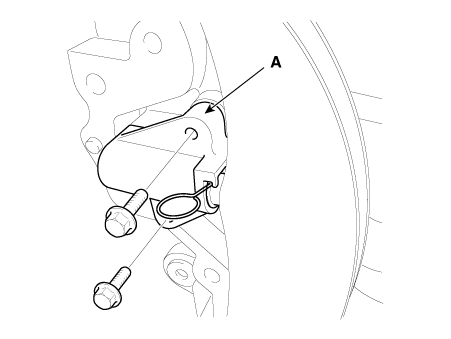
Remove the timing chain tensioner (A).
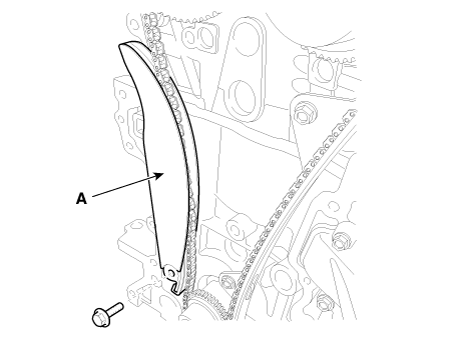
Remove the timing chain tensioner arm (A).
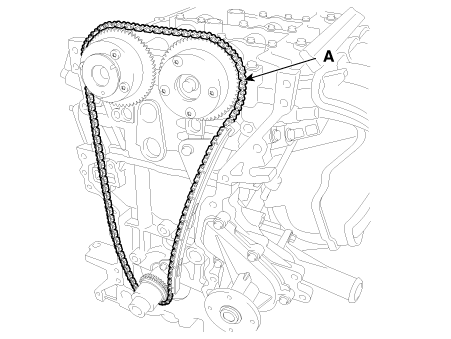
Remove the timing chain (A).
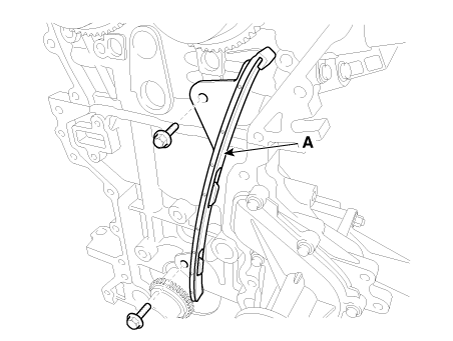
Remove the timing chain guide (A).
Inspection
sprockets, chain tensioner, chain guide, chain tensioner arm
Inspect the CVVT sprocket and crankshaft sprocket for abnormal wear, cracks, or damage. Replace if necessary.
Inspect the tensioner arm and chain guide for excessive wear, cracks, or damage. Replace if necessary.
Installation
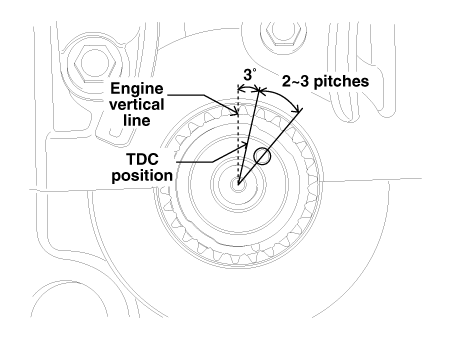
With the timing chain removed, the TDC marks on the intake and exhaust CVVT sprockets are slightly rotated from the TDC position, as shown.
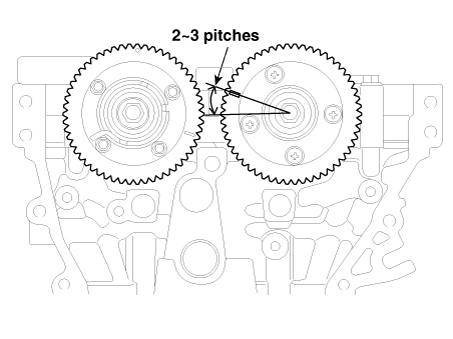
Rotate the crankshaft clockwise (approximately 2-3 teeth) from TDC (the crankshaft alignment pin (A) is at an angle of approximately 3° from the engine vertical), as when rotating the intake CVVT sprocket from TDC.
Install the timing chain guide (A).
Tightening torque: 18.6–22.6 N·m (1.9–2.3 kgf·m, 13.7–16.6 ft-lbf)
Install the timing chain tensioner arm (A).
Tightening torque: 18.6–22.6 N·m (1.9–2.3 kgf·m, 13.7–16.6 ft-lbf)
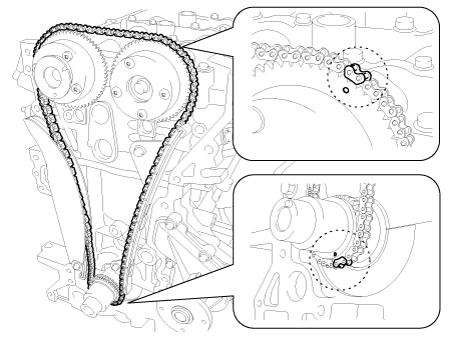
Install the timing chain.
Crankshaft sprocket (A) → Timing chain guide (B) → Intake CVVT sprocket (C) → Exhaust CVVT sprocket (D)
Install the timing chain without slack between the crankshaft sprocket and the intake CVVT sprocket.
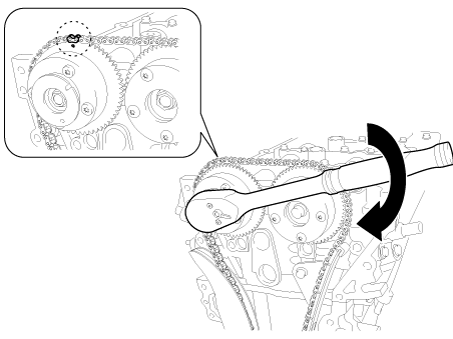
Install the timing chain on the exhaust CVVT sprocket without slack while rotating the CVVT assembly clockwise.
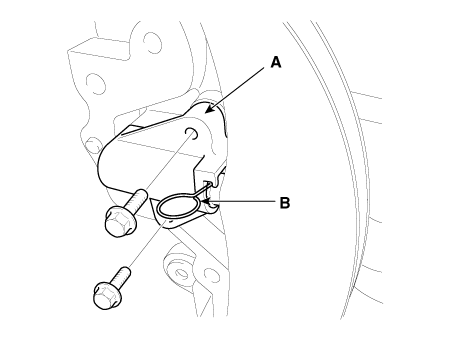
Install the automatic timing chain tensioner (A) and remove the stopper pin (B).
Tightening torque: 9.8–11.8 N·m (1.0–1.2 kgf·m, 7.2–8.7 ft-lbf)
After rotating the crankshaft 2 revolutions in the normal direction (clockwise when viewed from the front), verify that the TDC marks on the intake and exhaust CVVT sprockets align with the upper surface of the cylinder head.
Install the remaining parts in the reverse order of removal.
Test yourself
A quick Kia Optima DL3 quiz: every answer comes with an explanation and a link to the manual page.