Heater & A/C Control Unit (MANUAL)
Components and Component Location
Components
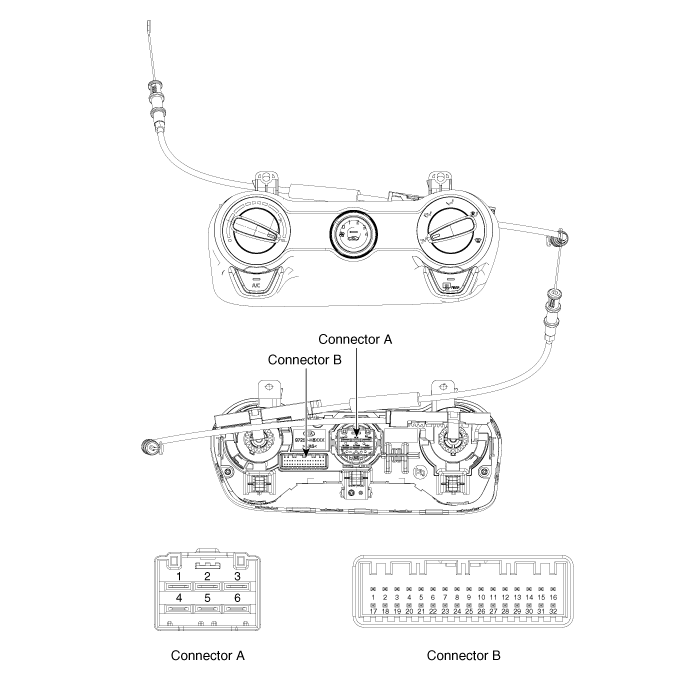
Connector Pin Function
| NO. | Connector A | Connector B |
| 1 | Low | Battery |
| 2 | General | ISG Battery |
| 3 | High | Illumination (+) |
| 4 | Mid_LOW | Sensor (+5V) |
| 5 | Mid_High | ⁻ |
| 6 | High | Intake Actuator Feedback |
| 7 | Evaporator Sensor (+) | |
| 8 | Ambient Sensor (+) | |
| 9 | ⁻ | |
| 10 | ⁻ | |
| 11 | Intake Actuator (FRE) | |
| 12 | Intake Actuator (REC) | |
| 13 | HTD | |
| 14 | Rear Heater Switch | |
| 15 | Blower Signal Common | |
| 16 | Illumination (-) | |
| 17 | IGN2 | |
| 18 | IGN1 | |
| 19 | ⁻ | |
| 20 | Max. Fan Signal | |
| 21 | PTC Relay 3 | |
| 22 | PTC Relay 2 | |
| 23 | PTC Signal | |
| 24 | Latch Out (-) | |
| 25 | ⁻ | |
| 26 | Chassis_CAN (High) | |
| 27 | Chassis_CAN (Low) | |
| 28 | ⁻ | |
| 29 | ECV (+) | |
| 30 | ECV (-) | |
| 31 | Sensor Ground | |
| 32 | Ground |
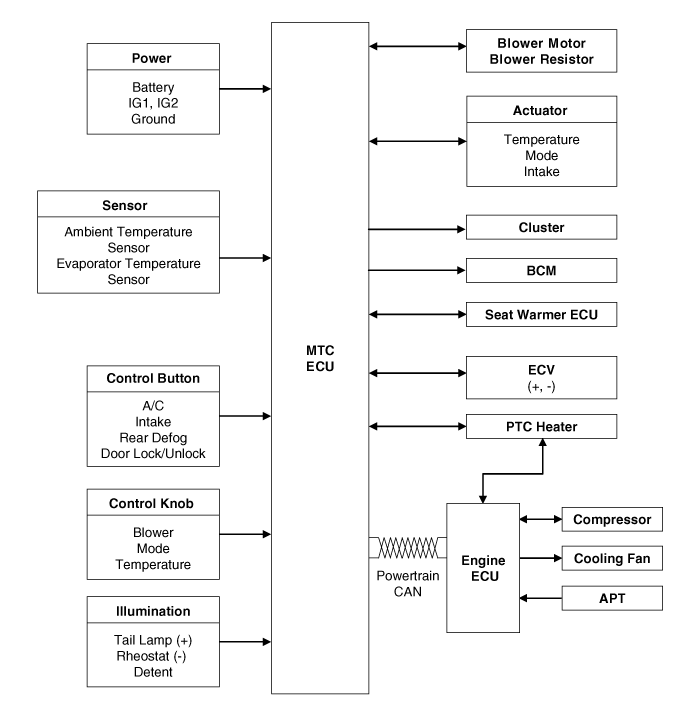
Circuit Diagrams
Schematic Diagram
Repair Procedures
Replacement
Disconnect the negative (-) battery terminal.
Remove the airbag lower panel.
(Refer to Body - "Under Cover Panel")
Remove the audio unit.
(Refer to Body Electrical System - "Audio Unit")
Remove the glove box.
(Refer to Crash Pad - "Glove Box Housing")
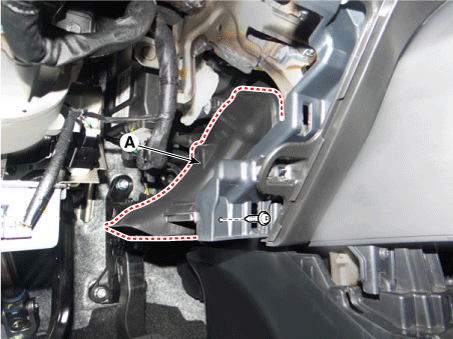
Remove the driver side air vent duct (A) after loosening the screw.
Disconnect the mode control cable (A).
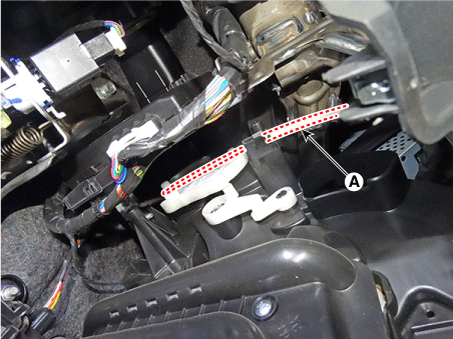
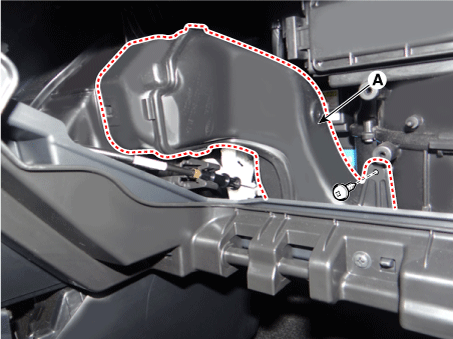
Remove the passenger side air vent duct (A) after loosening the screw.
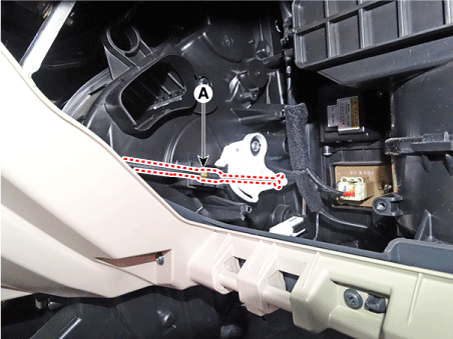
Disconnect the temperature control cable (A).
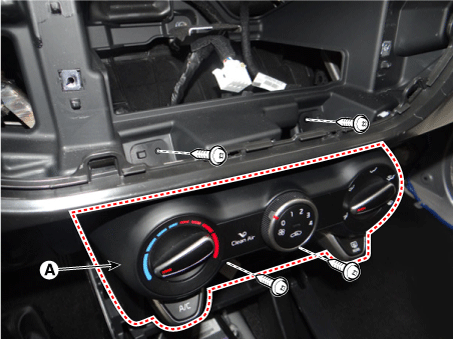
After loosening the mounting screws, remove the heater and air conditioning controller unit (A).
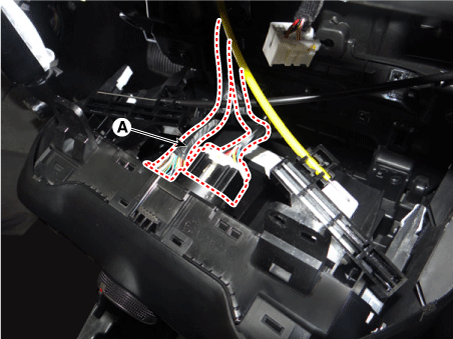
Disconnect the A/C and heater controller connectors (A).
To install, reverse the removal procedure.
Test yourself
A quick Kia Rio YB quiz: every answer comes with an explanation and a link to the manual page.