Body
Rear door operations
In this manual: Body
14steps
~84min
3/5difficulty
Done 0 of 14
REAR DOOR
REMOVAL AND REFITTING
- Open the front door.
- Lower the window fully.
- Unclip the boot (1) at the centre pillar and disconnect the connector (Fig.48).
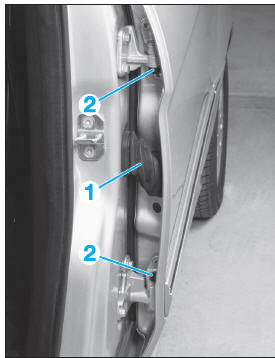
Fig. 48
- Remove the caps (2), then the screws behind them.
- Lift the door off the hinges.
To refit, reverse the procedure and respect the door gap settings.
REAR DOOR TRIM
REMOVAL AND REFITTING
- Lower the door window.
- On vehicles without rear electric windows, remove the crank handle.
- Unclip the cover (1) (Fig.49).
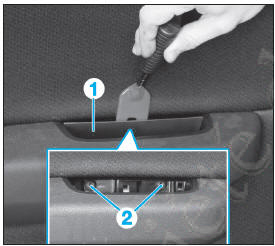
Fig. 49
- Remove the screws (2).
- Unclip the door trim (3) using a trim removal tool (Fig.50).
- Remove the door trim (3) by lifting it to clear the window frame.
- If equipped, disconnect the lower door light connector and the electric window switch connector.
- Unhook the cable from the interior door release control.
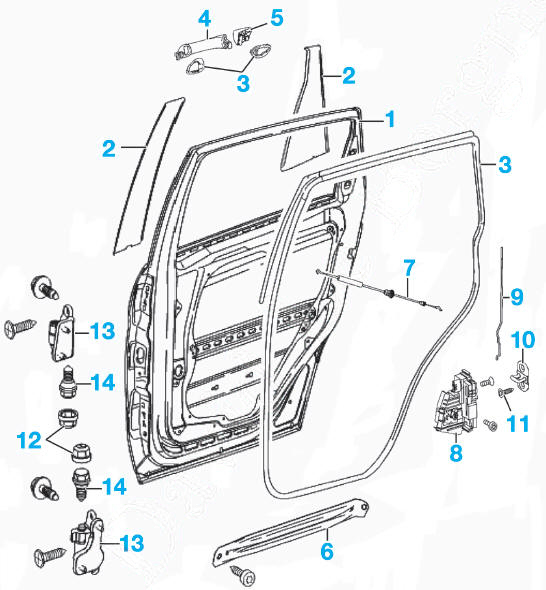
Rear door (hinges and lock)
- Rear door
- Decals
- Sealing gaskets
- Outside handle
- Cover
- Reinforcement
- Interior release cable
- Lock
- Link rod
- Striker
- Bolts: 1 daN.m
- Caps
- Hinges
- Bolt: 3.2 daN.m
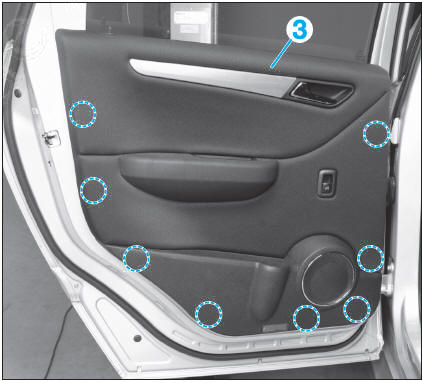
Fig. 50
On refitting, reverse the removal procedure and replace any damaged door trim retaining clips.
REAR DOOR WINDOW REGULATOR MECHANISM
REMOVAL AND REFITTING
- Remove the door trim (see corresponding operation).
- Remove the plug (1) (Fig.51).
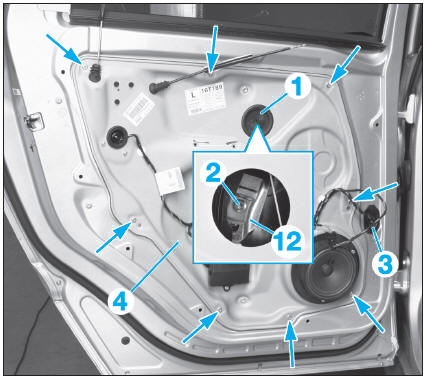
Fig. 51
- Refit the window regulator switch and raise the window until screw (2) is accessible through the hole.
- Remove the screw (2).
- Refit the window regulator switch, raise the window fully until it stops, and hold it to the door frame with adhesive tape.
- Unclip the boot at the centre pillar and disconnect the connector.
- Unclip the plug (3) and remove the wiring harness from the mounting plate (4).
- Remove the cover (5) of the outer door handle; to do so (Fig.52):
- remove the plug (6),
- Loosen the screw behind the cap (6) as far as it will go,
- pull the door handle (7) and remove the trim panel (5) from the door.
 the screw behind plug (6) remains on cover (5).
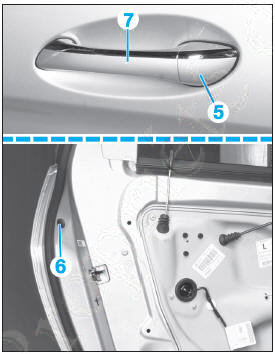
Fig. 52
- Remove the outer door handle (7) by pulling it.
- Remove the screws (8) (Fig.53).
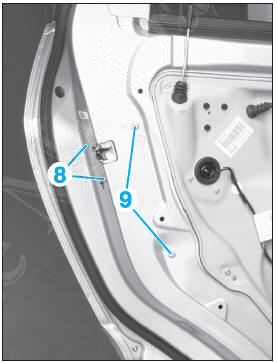
Fig. 53
- Remove the screws (9).
- Remove the seal (10) from the door handle (Fig.54).
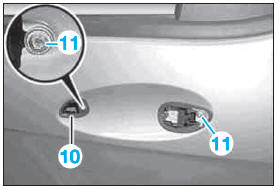
Fig. 54
- Remove the screws (11).
- Mill off the rivets (arrows) (Fig.51).
- Remove the support plate (4) with the window regulator mechanism.
To refit, reverse the removal procedure, observing the following points:
- position the door handle correctly,
- Before tightening the screw (2), push the glass forward as far as it will go into the window seal. The glass must sit fully in the holder (12) of the window regulator (Fig.51).
REAR DOOR GLASS
REMOVAL AND REFITTING
- Remove the door trim (see corresponding operation).
- Remove the support plate with the window regulator mechanism (see corresponding operation).
- Remove the inner window seal.
- Lower the glass to the bottom of the door shell.
Take care not to scrape the window when lowering it.- Turn the glass by 90° (left glass clockwise and right glass anticlockwise) and remove it from the door shell through the top.
To refit, carry out the removal procedure in reverse order.
Test yourself
A quick Mercedes-Benz B-Class quiz: every answer comes with an explanation and a link to the manual page.
Was this page helpful?