Emblem
With Tail Lamp
Exploded View
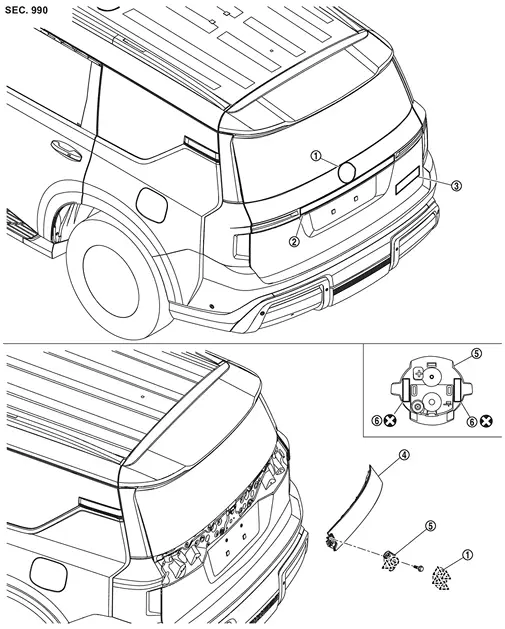
 |
Rear emblem |  |
Emblem A |  |
Emblem B |
 |
Tail lamp RH |  |
Rear emblem bracket |  |
Double-sided tape [t: 1.2 mm (0.047 in)] |
 |
: Clip | ||||
 |
: Pawl | ||||
 |
: Always replace after every disassembly. | ||||
Removal and Installation
REMOVAL
Apply protective tape (A) on the part to protect it from damage.
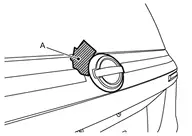
Disengage fixing pawls using remover tool (A), and then remove emblem A.
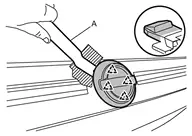
|
: Pawl |
Remove emblem bracket mounting bolt.
Apply protective tapes (A) on the part to protect it from damage.
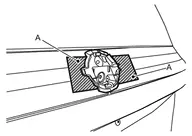
Cut double-sided tapes using remover tool (A) and cutter (B).
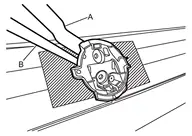
Disengage fixing pawl and clip using a remover tool (A), and then remove rear emblem bracket.
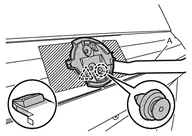
|
: Clip |
|
: Pawl |
Remove emblem A from back door finisher while warming using an industrial dryer.
Remove emblem B from the panel while warming using an industrial dryer.
INSTALLATION
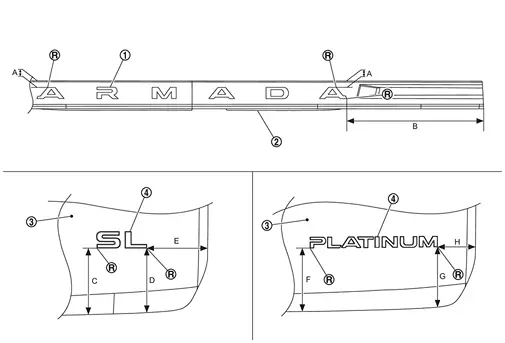
Note the following items, and then install in the reverse order of removal.
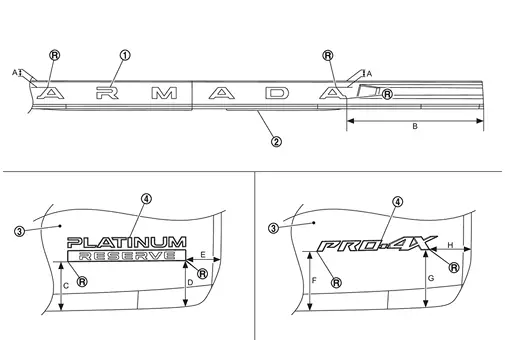
|
Emblem A | |
Back door finisher | |
Back door panel |
|
Emblem B | ||||
 |
: R end | ||||
| A | : 13.0 mm (0.512 in) | B | : 365.4 mm (14.386 in) | C | : 101.5 mm (3.996 in) |
| D | : 95.8 mm (3.772 in) | E | : 78.1 mm (3.075 in) | F | : 122.8 mm (4.835 in) |
| G | : 144.9 mm (5.705 in) | H | : 77.6 mm (3.055 in) |
Without Tail Lamp
Exploded View
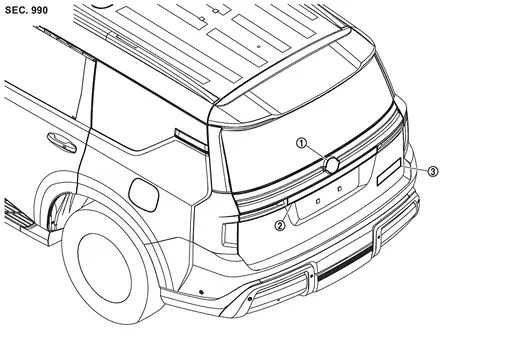
|
Emblem A | |
Emblem B | |
Emblem C |
Removal and Installation
REMOVAL
Remove emblem from the panel while warming using an industrial dryer.
INSTALLATION
Note the following items, and then install in the reverse order of removal.
|
Emblem B | |
Back door finisher | |
Back door panel |
|
Emblem C | ||||
|
: R end | ||||
| A | : 13.0 mm (0.512 in) | B | : 365.4 mm (14.386 in) | C | : 122.1 mm (4.807 in) |
| D | : 119.1 mm (4.689 in) | E | : 120.1 mm (4.728 in) | F | : 121.9 mm (4.799 in) |
| G | : 116.1 mm (4.571 in) | H | : 79.7 mm (3.138 in) |